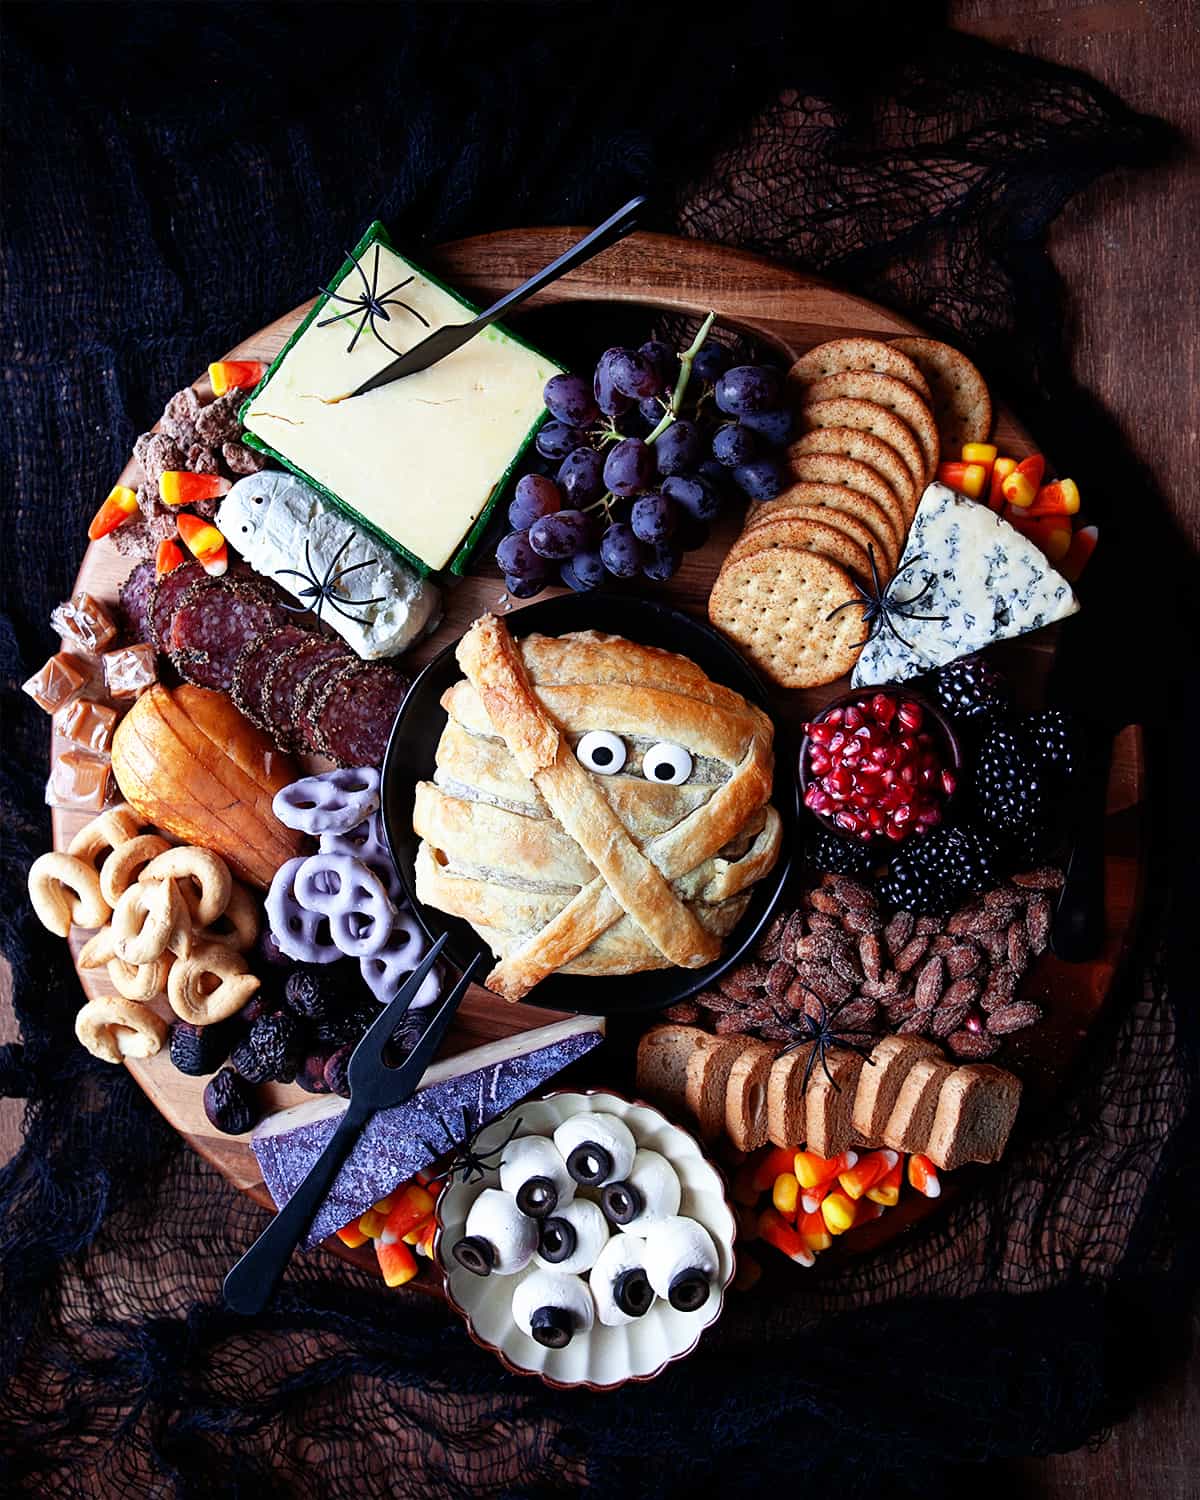
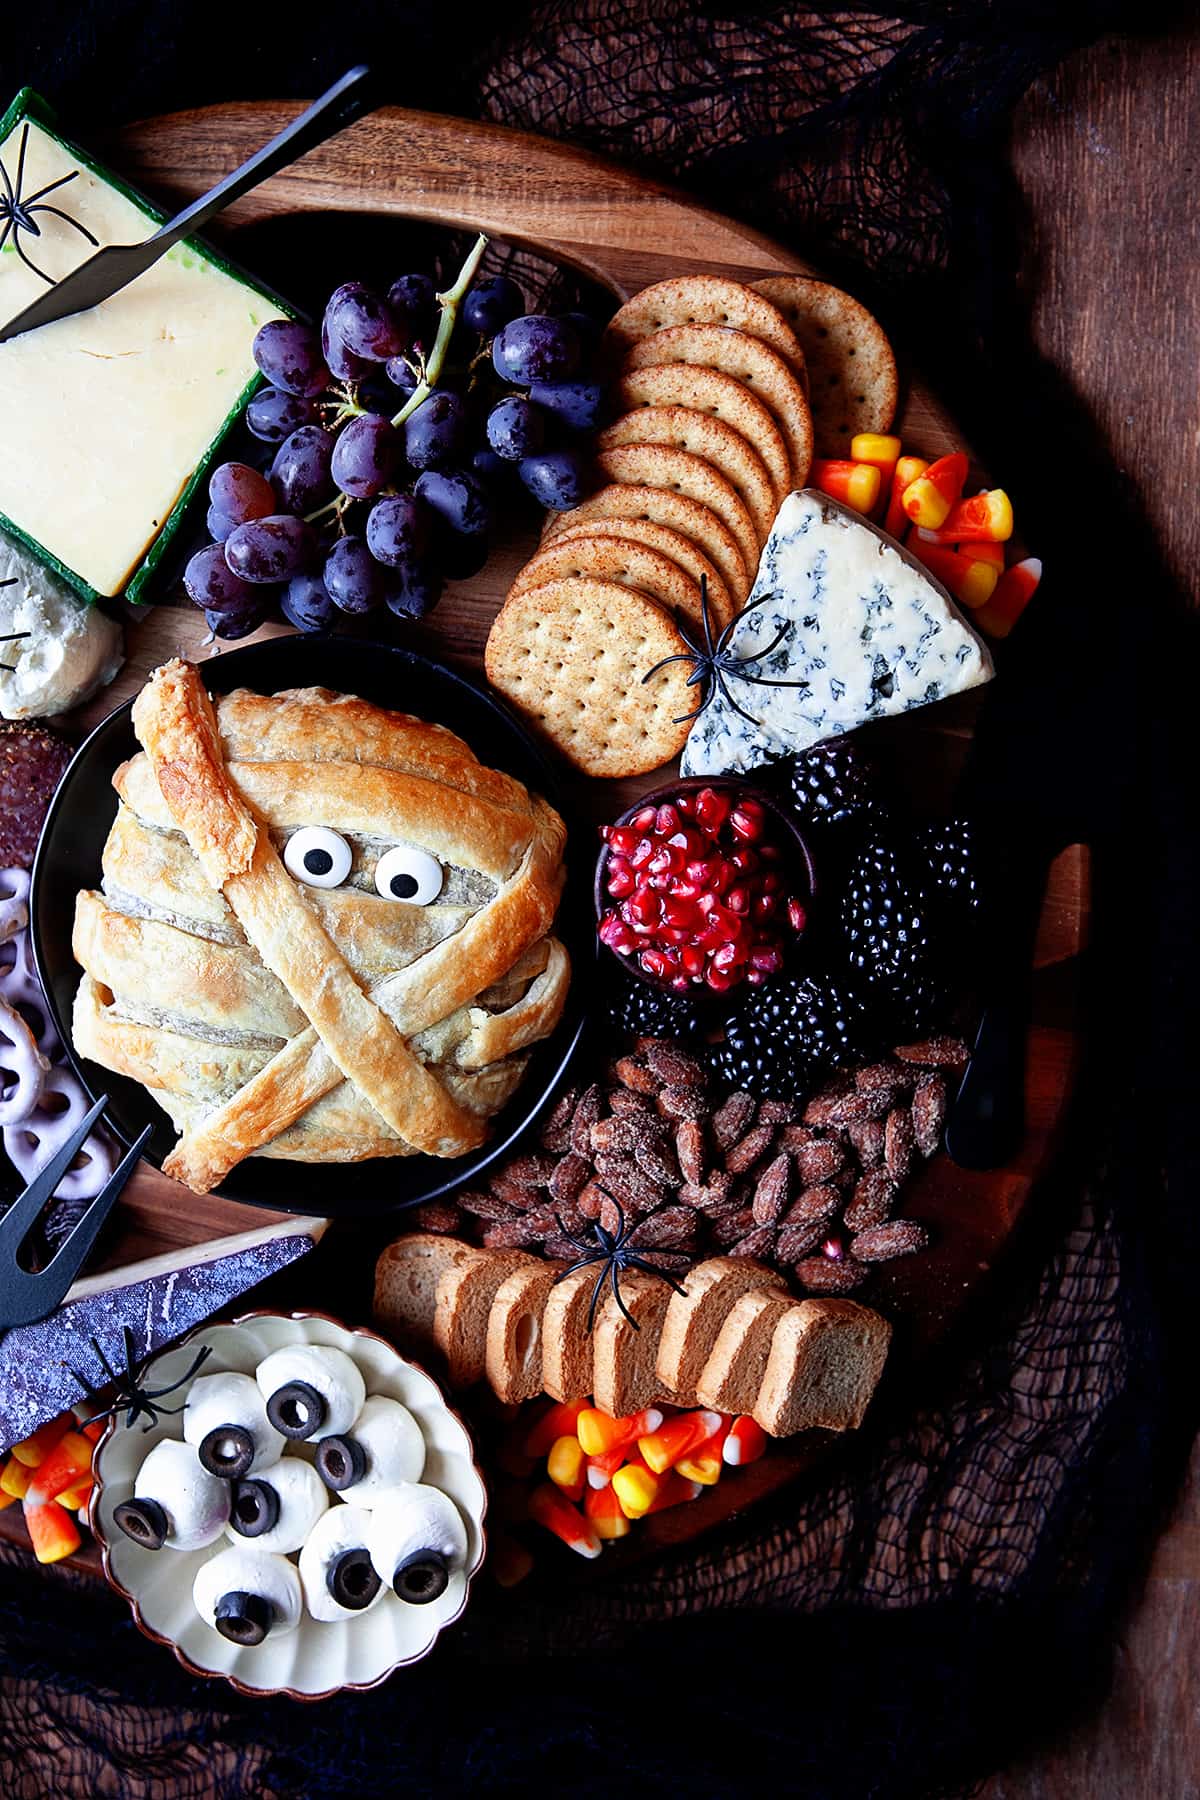
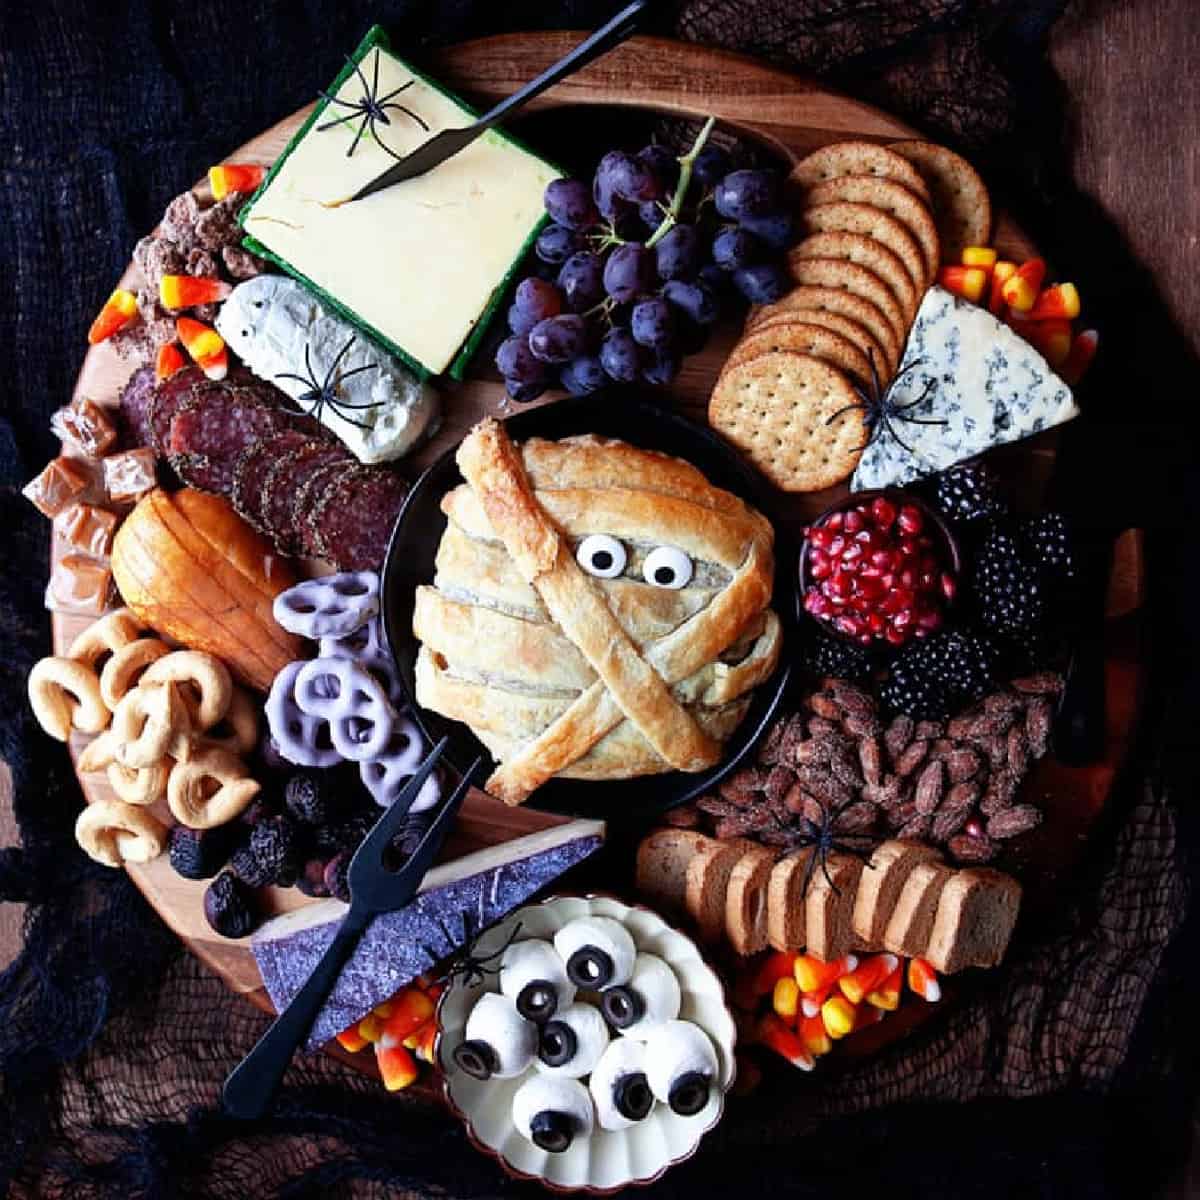
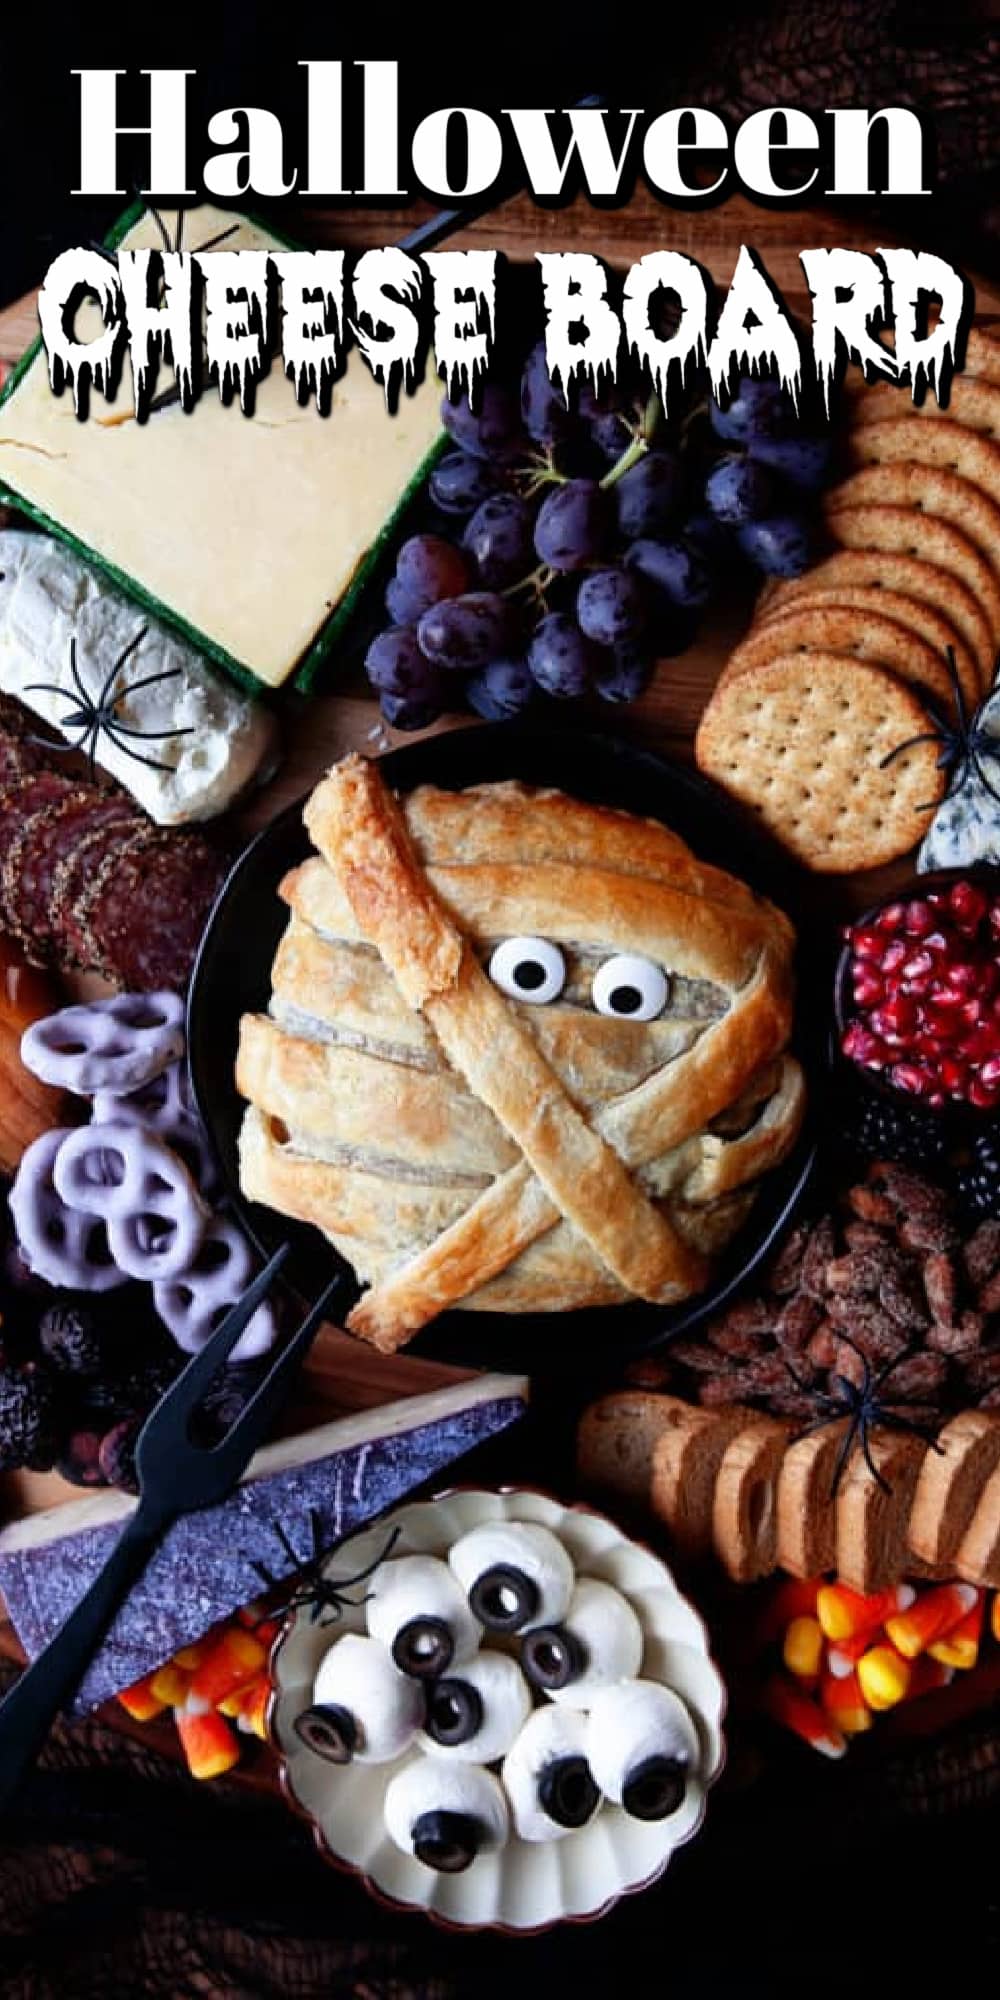
This spooky and delicious Halloween Cheese Board is so much fun! It’s a perfect Halloween Charcuterie Board for entertaining in October, but it’s also easy enough to make that you could whip one up for a family movie night too.
With Mummy Baked Brie, Mozzarella Eyeballs, and an assortment of tasty cheeses, nuts, fruits, and crackers, this Halloween-themed snack board will be a guaranteed hit for food lovers of all ages at your next Halloween party.
For more fun Halloween Appetizers and Treats, also check out our Halloween Platter Ideas, Halloween Spider Web Dip, and this adorable Halloween Pizza.
HELPFUL ITEMS FOR THIS RECIPE
This post contains affiliate links. As an Amazon Associate, I earn a small portion from qualifying purchases at no extra charge for you.
What Goes On a Halloween Cheese Board
What makes a meat and cheese board so fun to put together is that there isn’t just one right way to do it. I often like to go to the grocery store and see what’s available in the deli and produce section just to get ideas. I do, however, have a few general guidelines in mind as I decide what to put on a cheeseboard.
First, when picking cheese, keep in mind that you want to include cheese from several different families, so you have a variety of flavors and textures. For example:
- Aged Cheese: Aged Cheddar, Gouda, Gruyere, Emmentaler
- Soft Cheese: Brie, Goat Cheese, Camembert
- Blue Cheese: Gorgonzola, Stilton, Roquefort
- Hard Cheese: Manchego, Edam, Parmesan
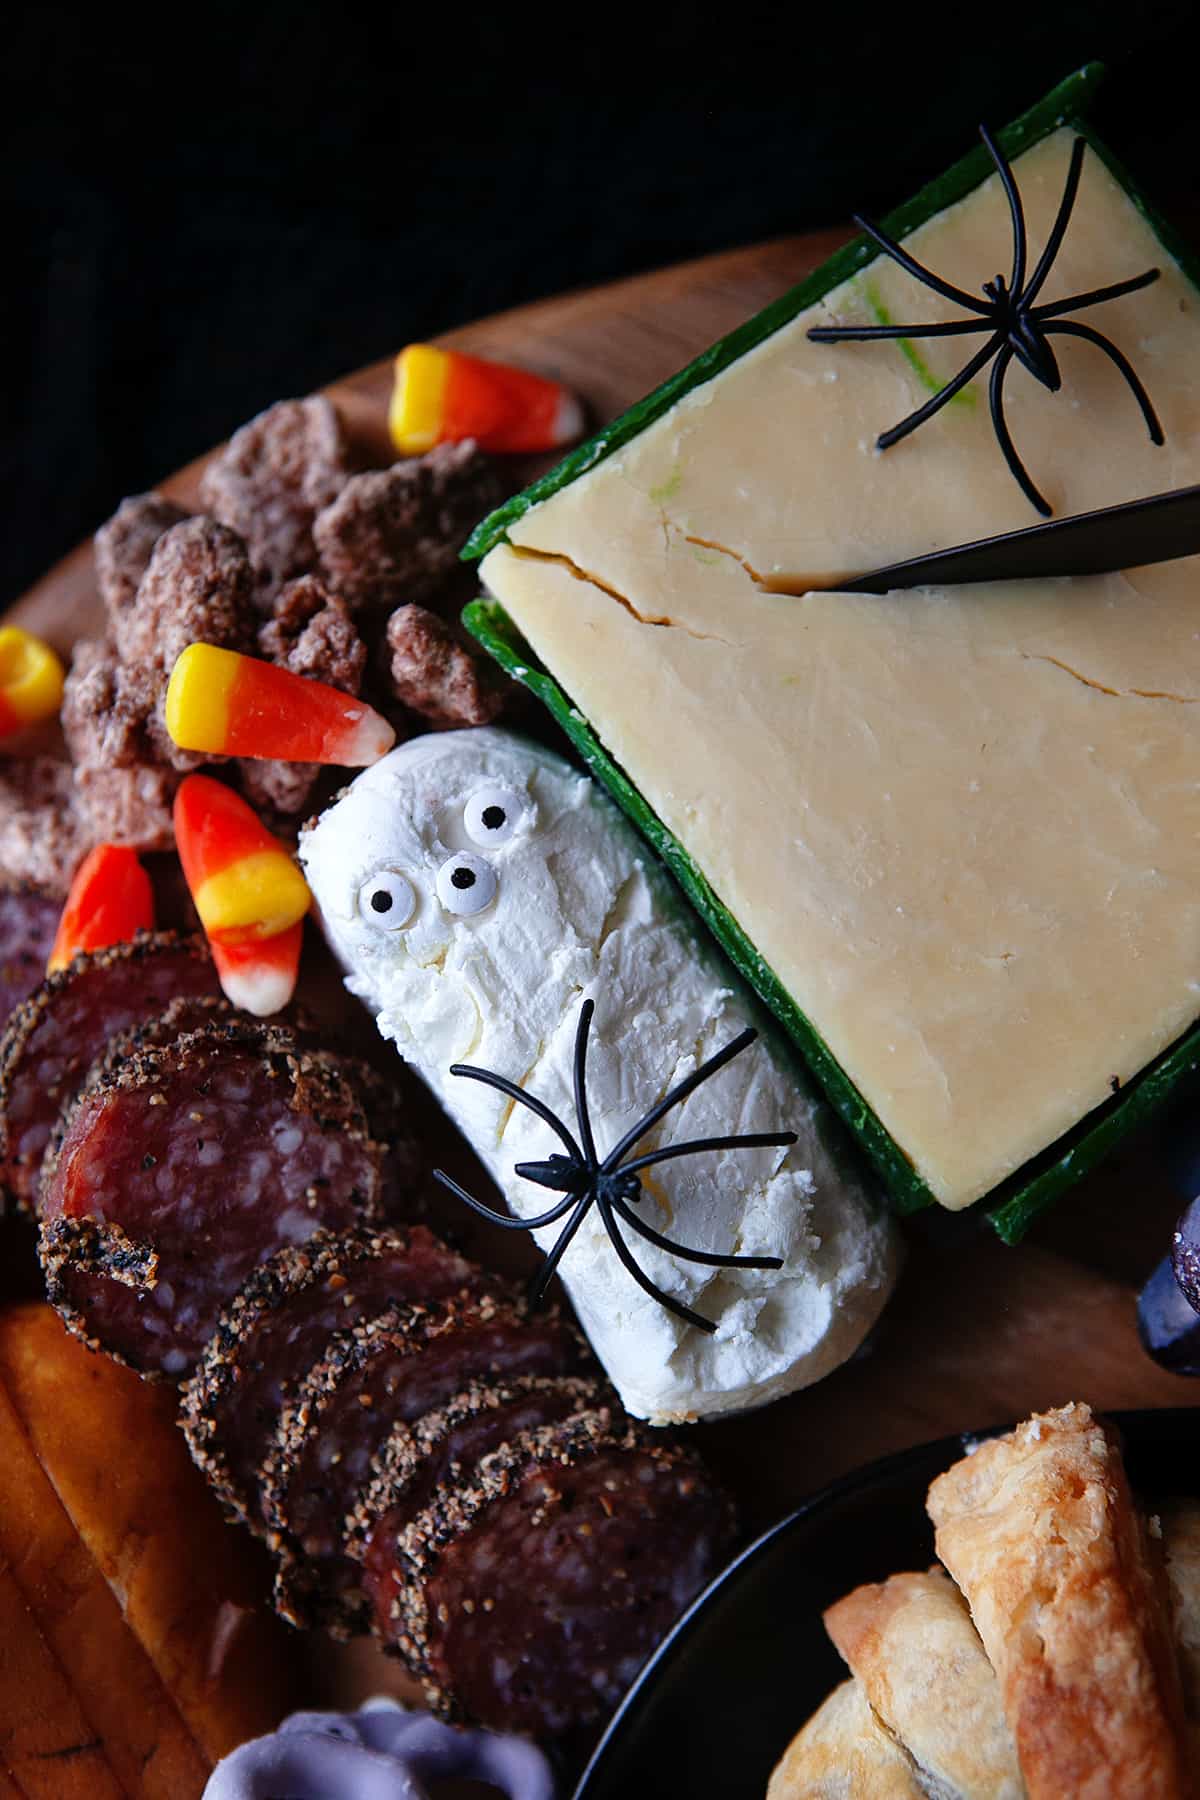
For this Halloween Cheese Board, I specifically looked for a couple of cheeses that had a Halloween vibe, like the purple and green rinds. I ended up with a Sharp Irish Cheddar (green rind), Merlot Bellavitano (Purple Rind), a small log of goat cheese, a small wedge of Blue Cheese, and a wheel of Brie for the centerpiece.
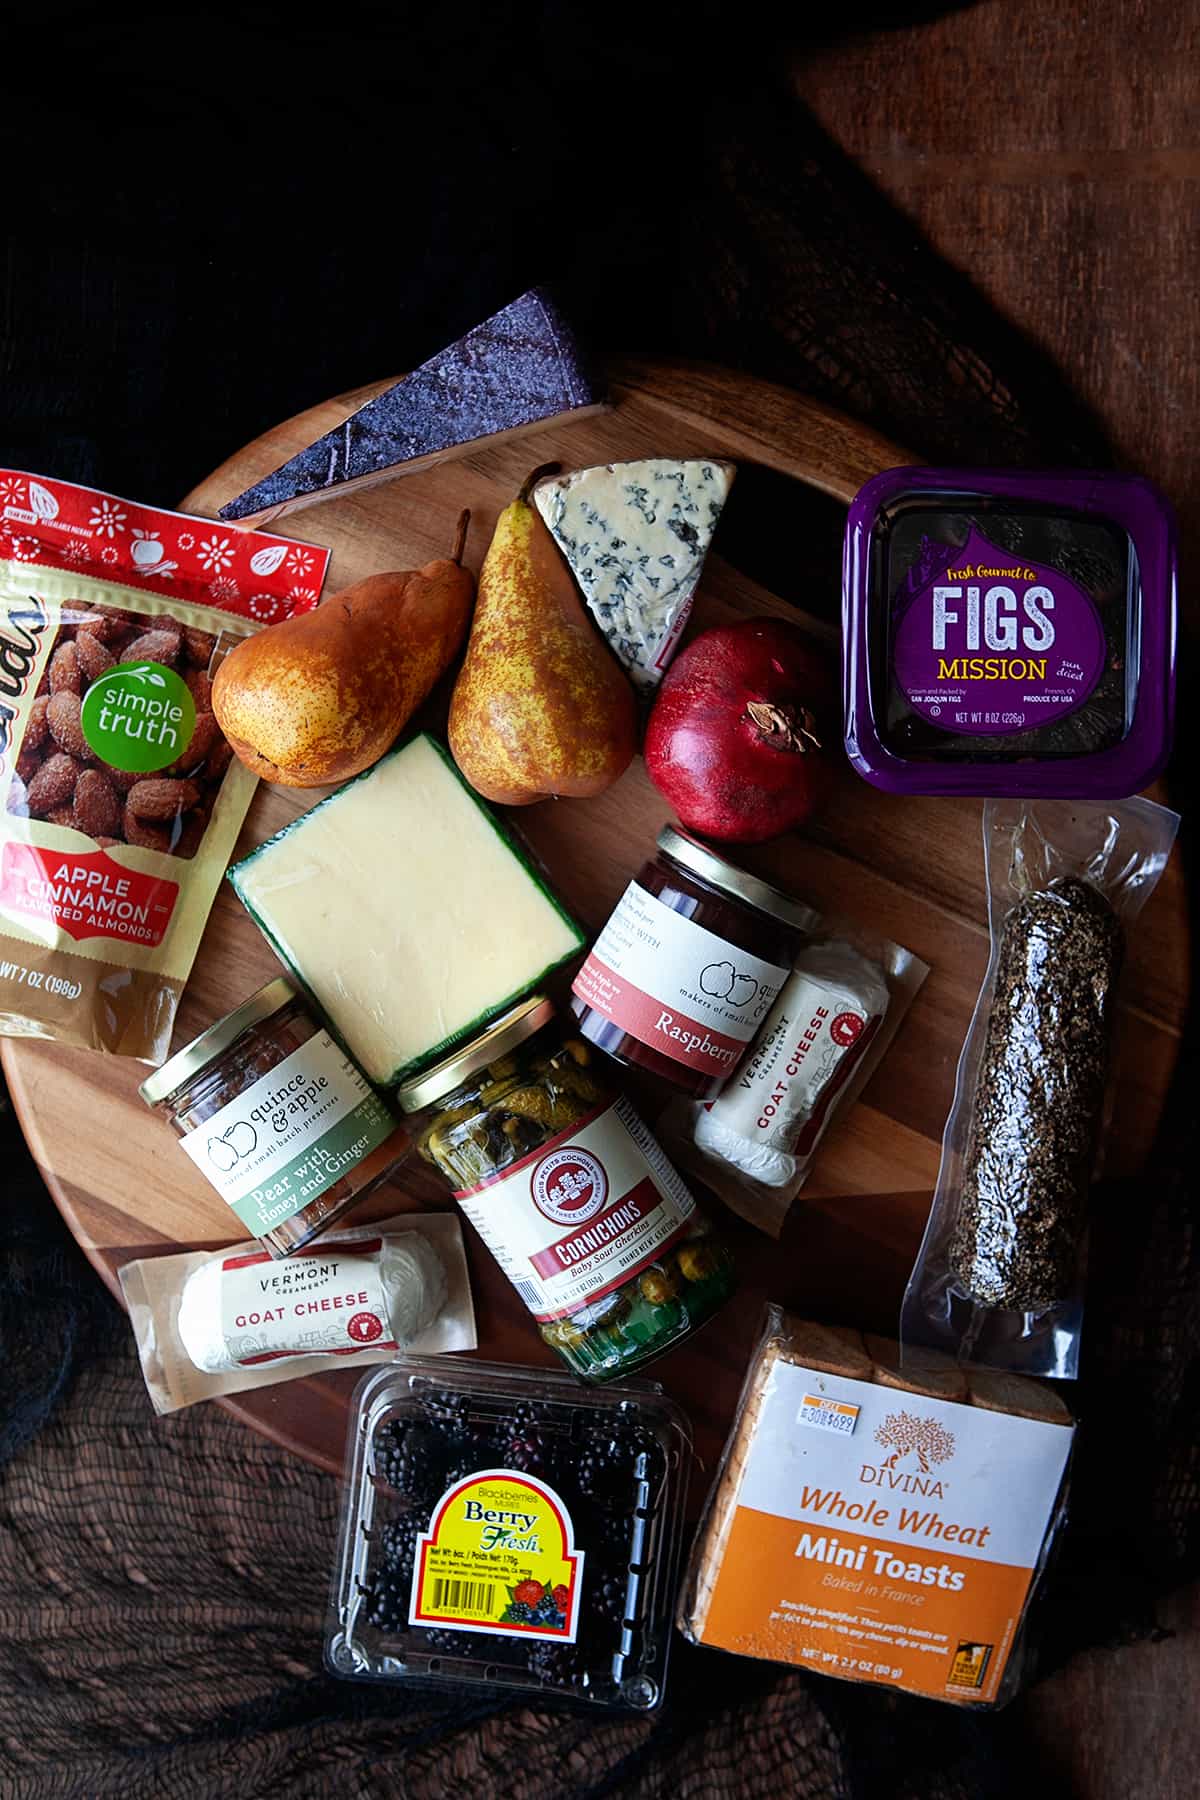
In addition to the cheeses, you’ll also want some meat, crackers, fruit, and spreads. Good cured meats, like prosciutto or a spicy salami, work wonderfully, a variety of pieces of bread or crackers to pair with the cheeses, a few spreads like jam or honey, as well as some fruit (fresh and dried) and nuts (sweet and salty).
Because it’s fall, I tried to stick with Autumn fruits and flavors like pears, pomegranates, cinnamon apple-flavored nuts, etc. You could also add in some dried fruits like dried apricots, cherries, cranberries, etc.
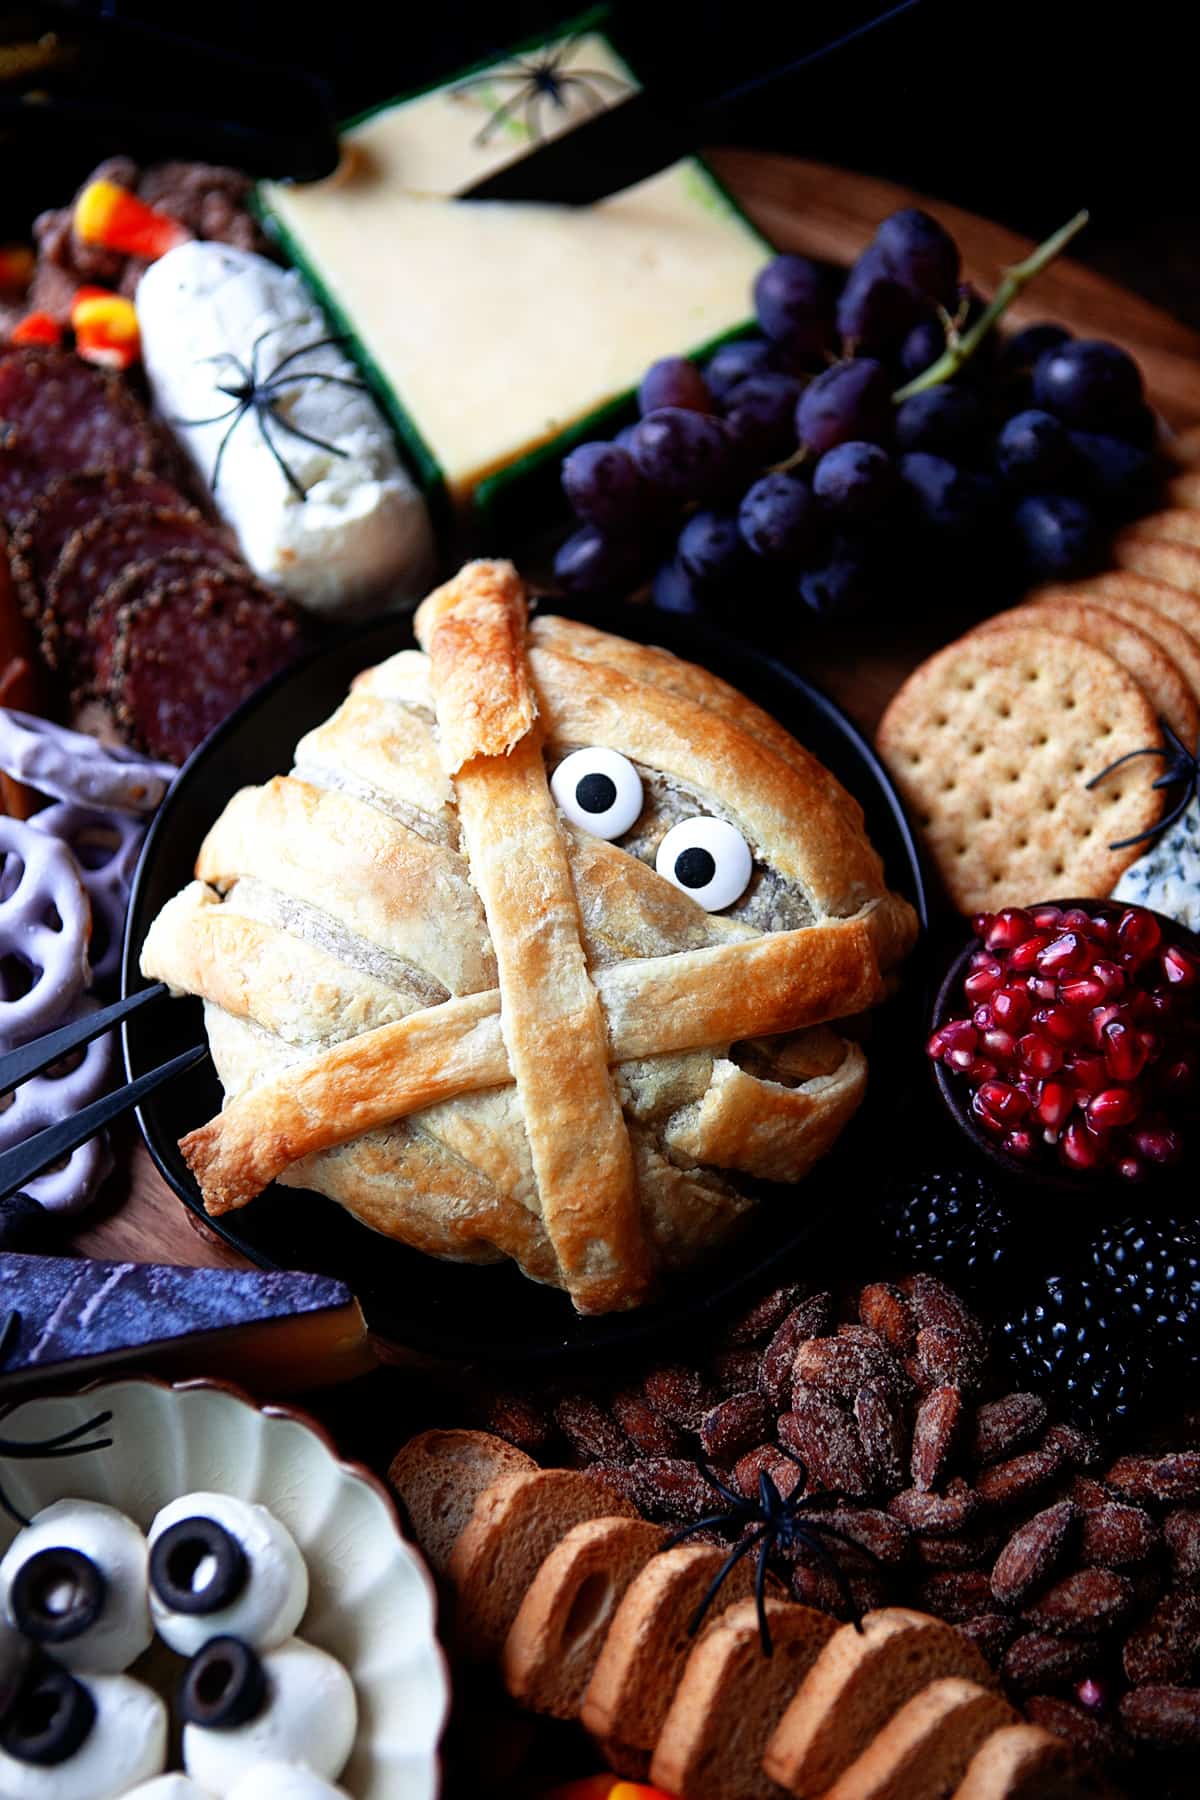
And to really make this cheese board perfect for Halloween, I made the Mummy Baked Brie for the board’s centerpiece!
How to Make Mummy Baked Brie
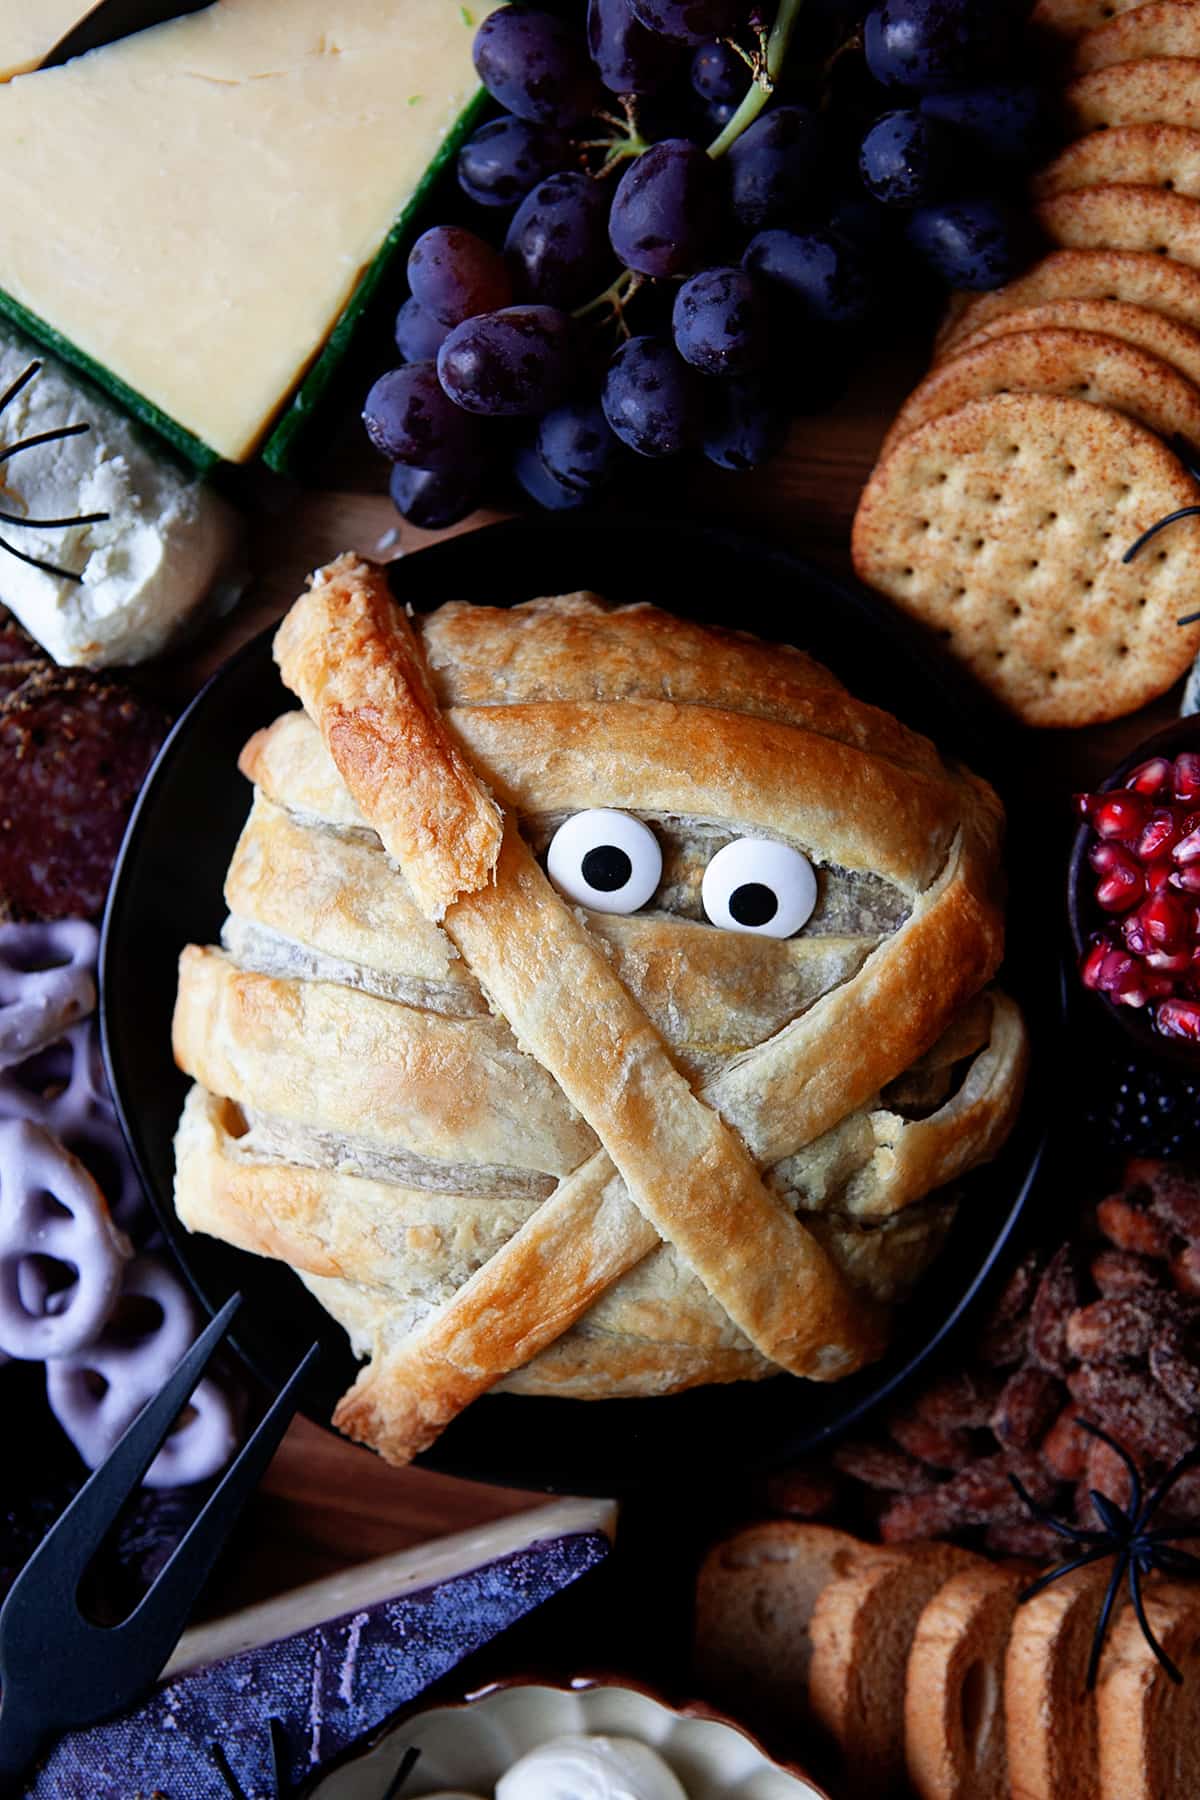
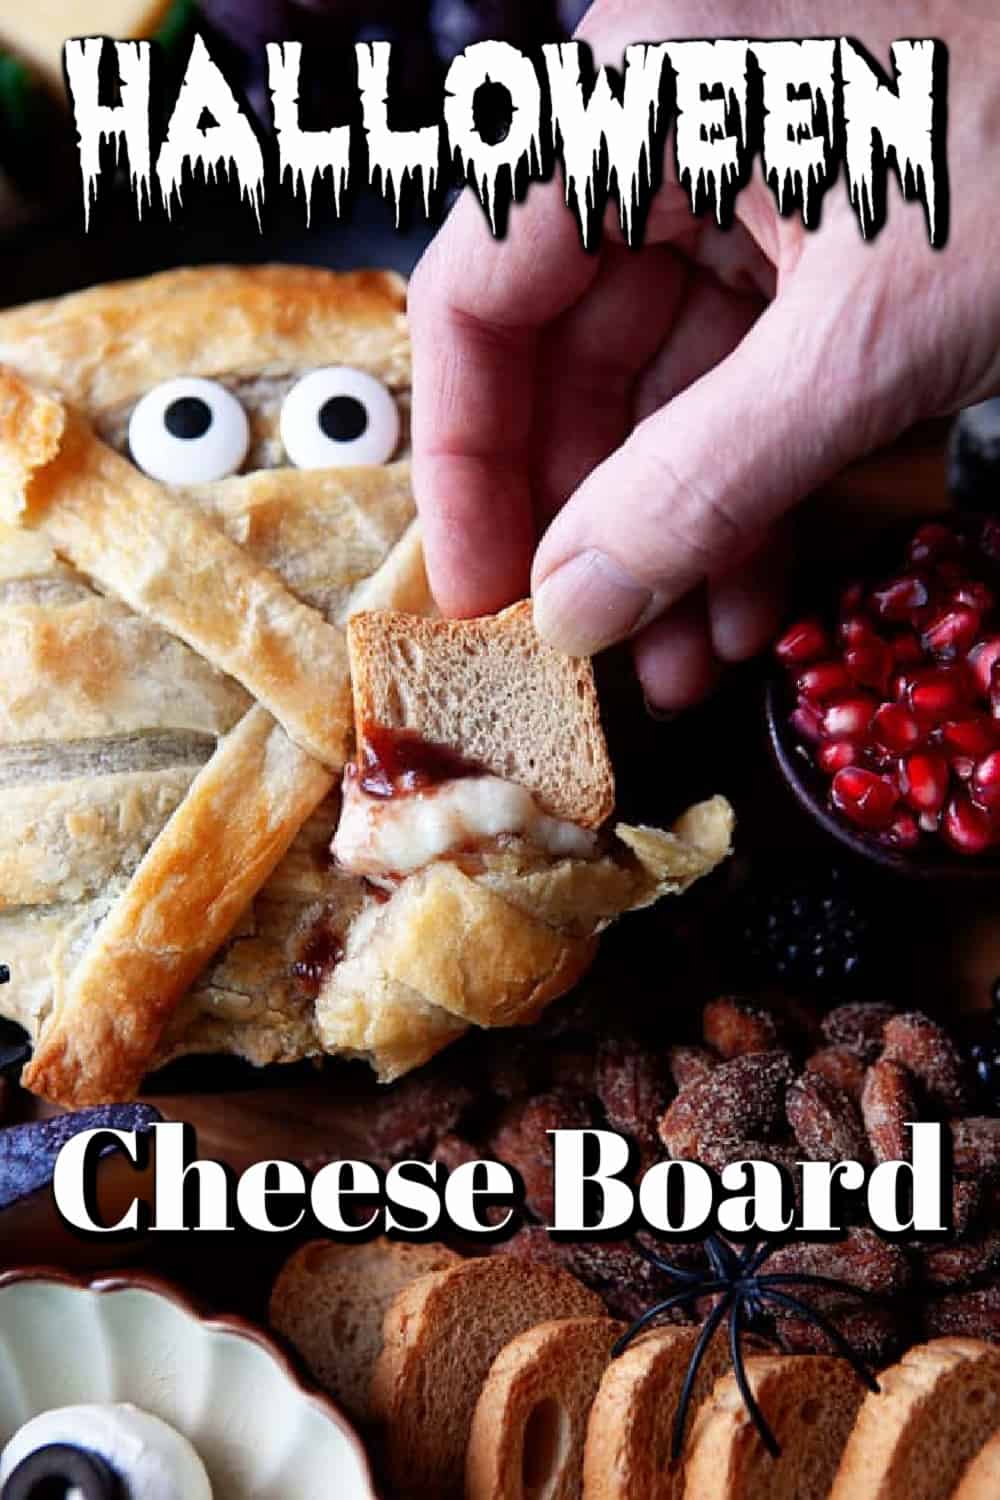
This Halloween Themed Cheese is the perfect centerpiece for a party snack board. Not only is it fun and a little spooky, but it’s also really delicious!
To make the Mummy Baked Brie for the Halloween Cheese Board, you’ll need an 8 oz wheel of Brie, a couple of tablespoons of jam or fruit preserves (I used raspberry), and a sheet of thawed puff pastry.
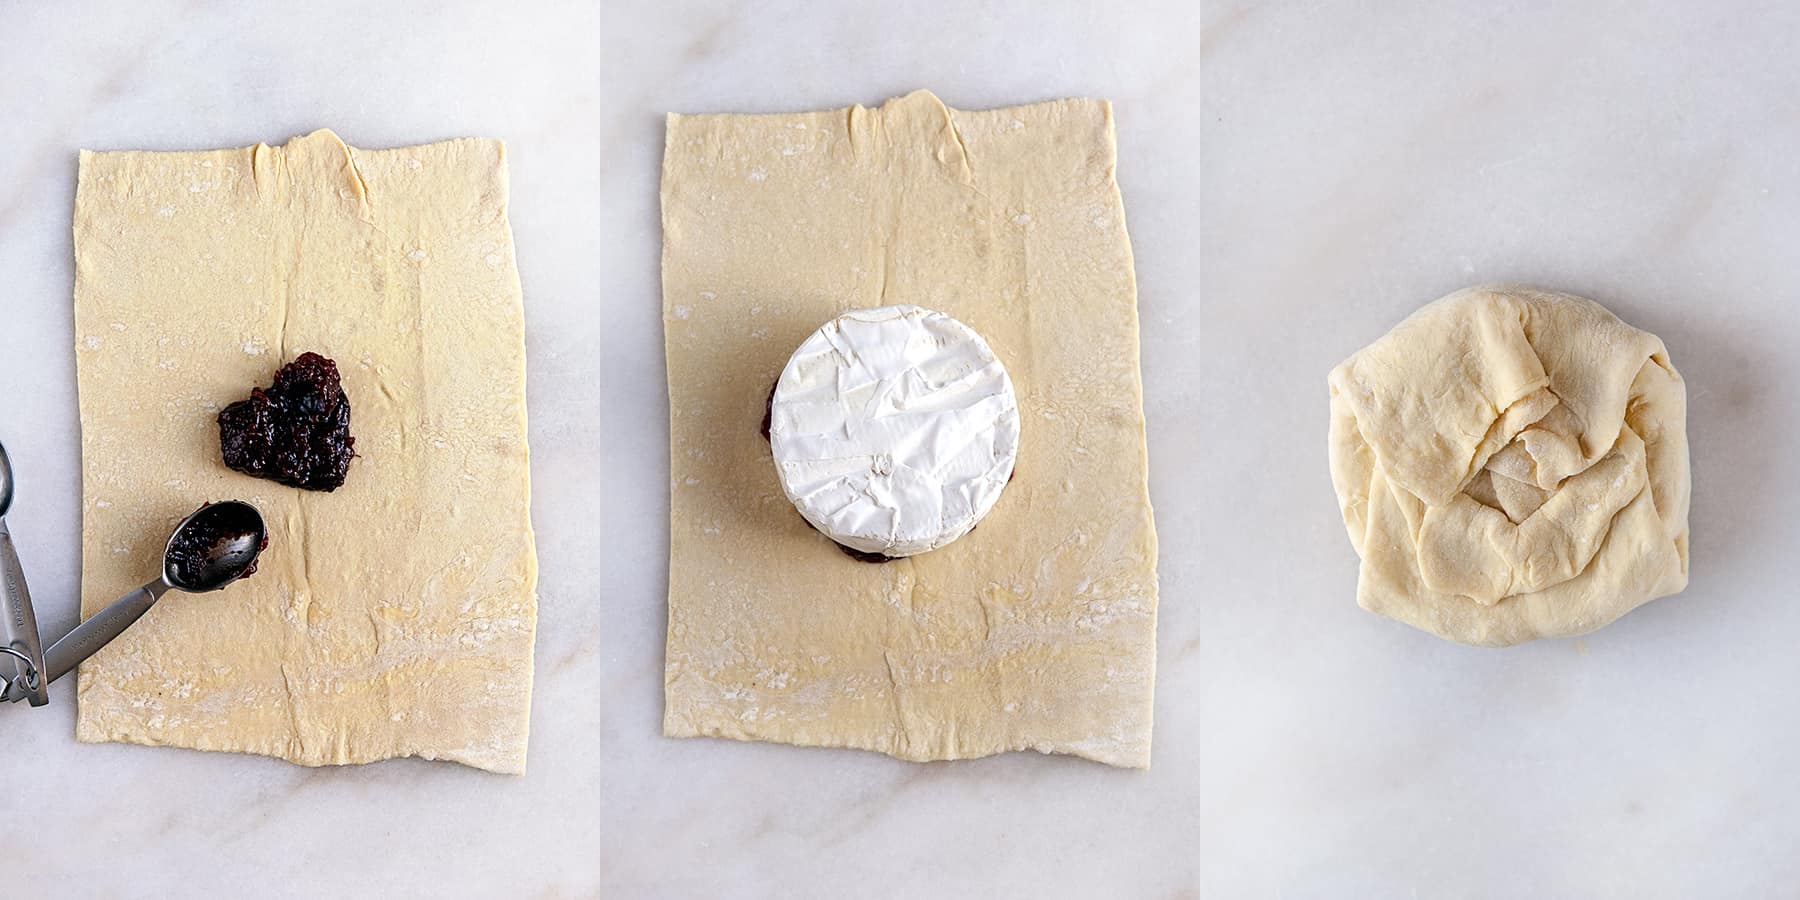
While the oven is pre-heating to 400 degrees Fahrenheit, roll out one sheet of thawed puff pastry on a lightly floured surface until you have a rectangle that is about 13 inches by 11 inches. Cut off one end of the rectangle (about 1/3) and set it aside.
Spread the jam in the center of the larger piece of puff pastry in a circle the same size as the brie. Place the brie in the center on the jam circle and then fold the edges of the pastry up around the brie. Flip it over, with the folded side on the bottom, and place it on a parchment-lined baking sheet.
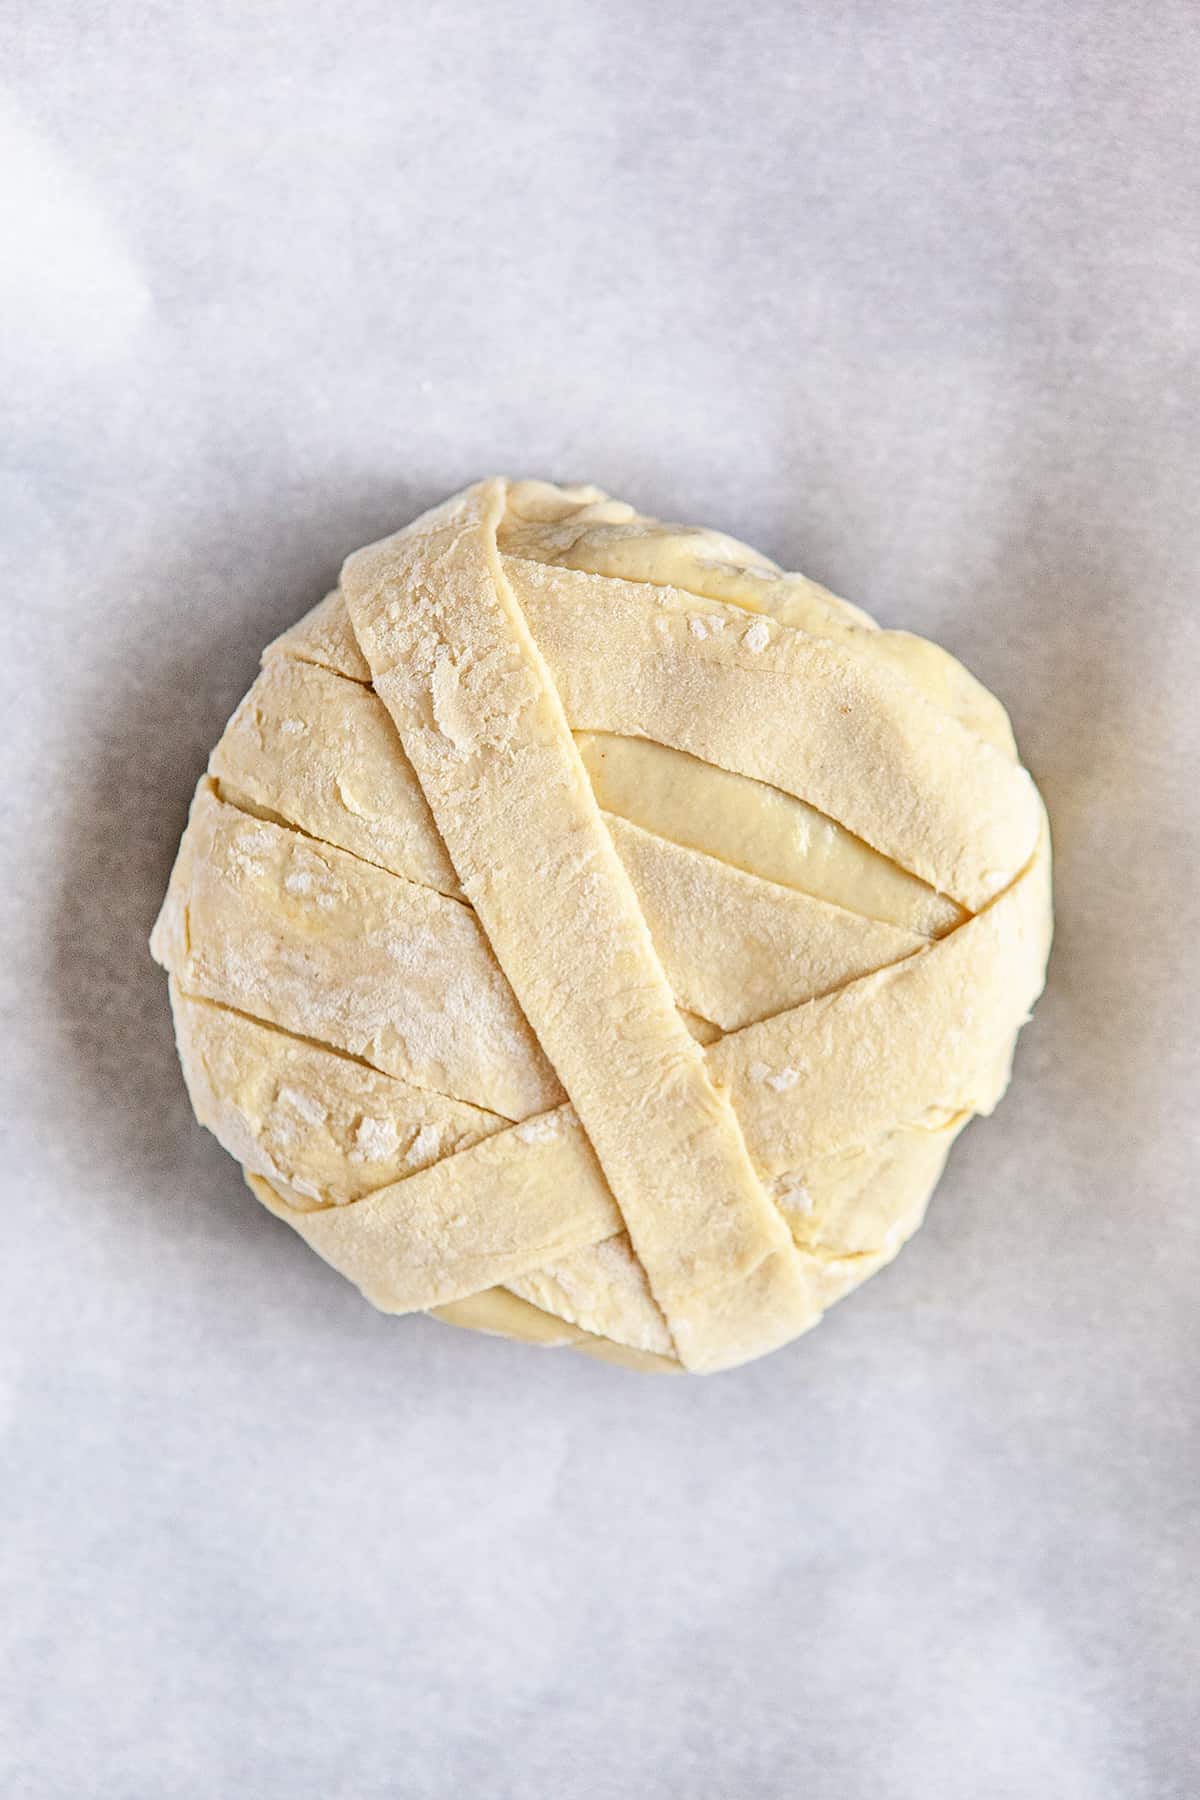
Next, use the smaller piece of puff pastry and cut it into 1/2 inch strips. Brush the wrapped wheel of brie with an egg wash, then place the strips around the wheel of brie.
Bake it for 10 minutes, then remove it from the oven to brush it one more time with an egg wash. Return it to the oven and bake for an additional 10 to 12 more minutes, or until it is puffy, golden brown, and the brie inside is melty.
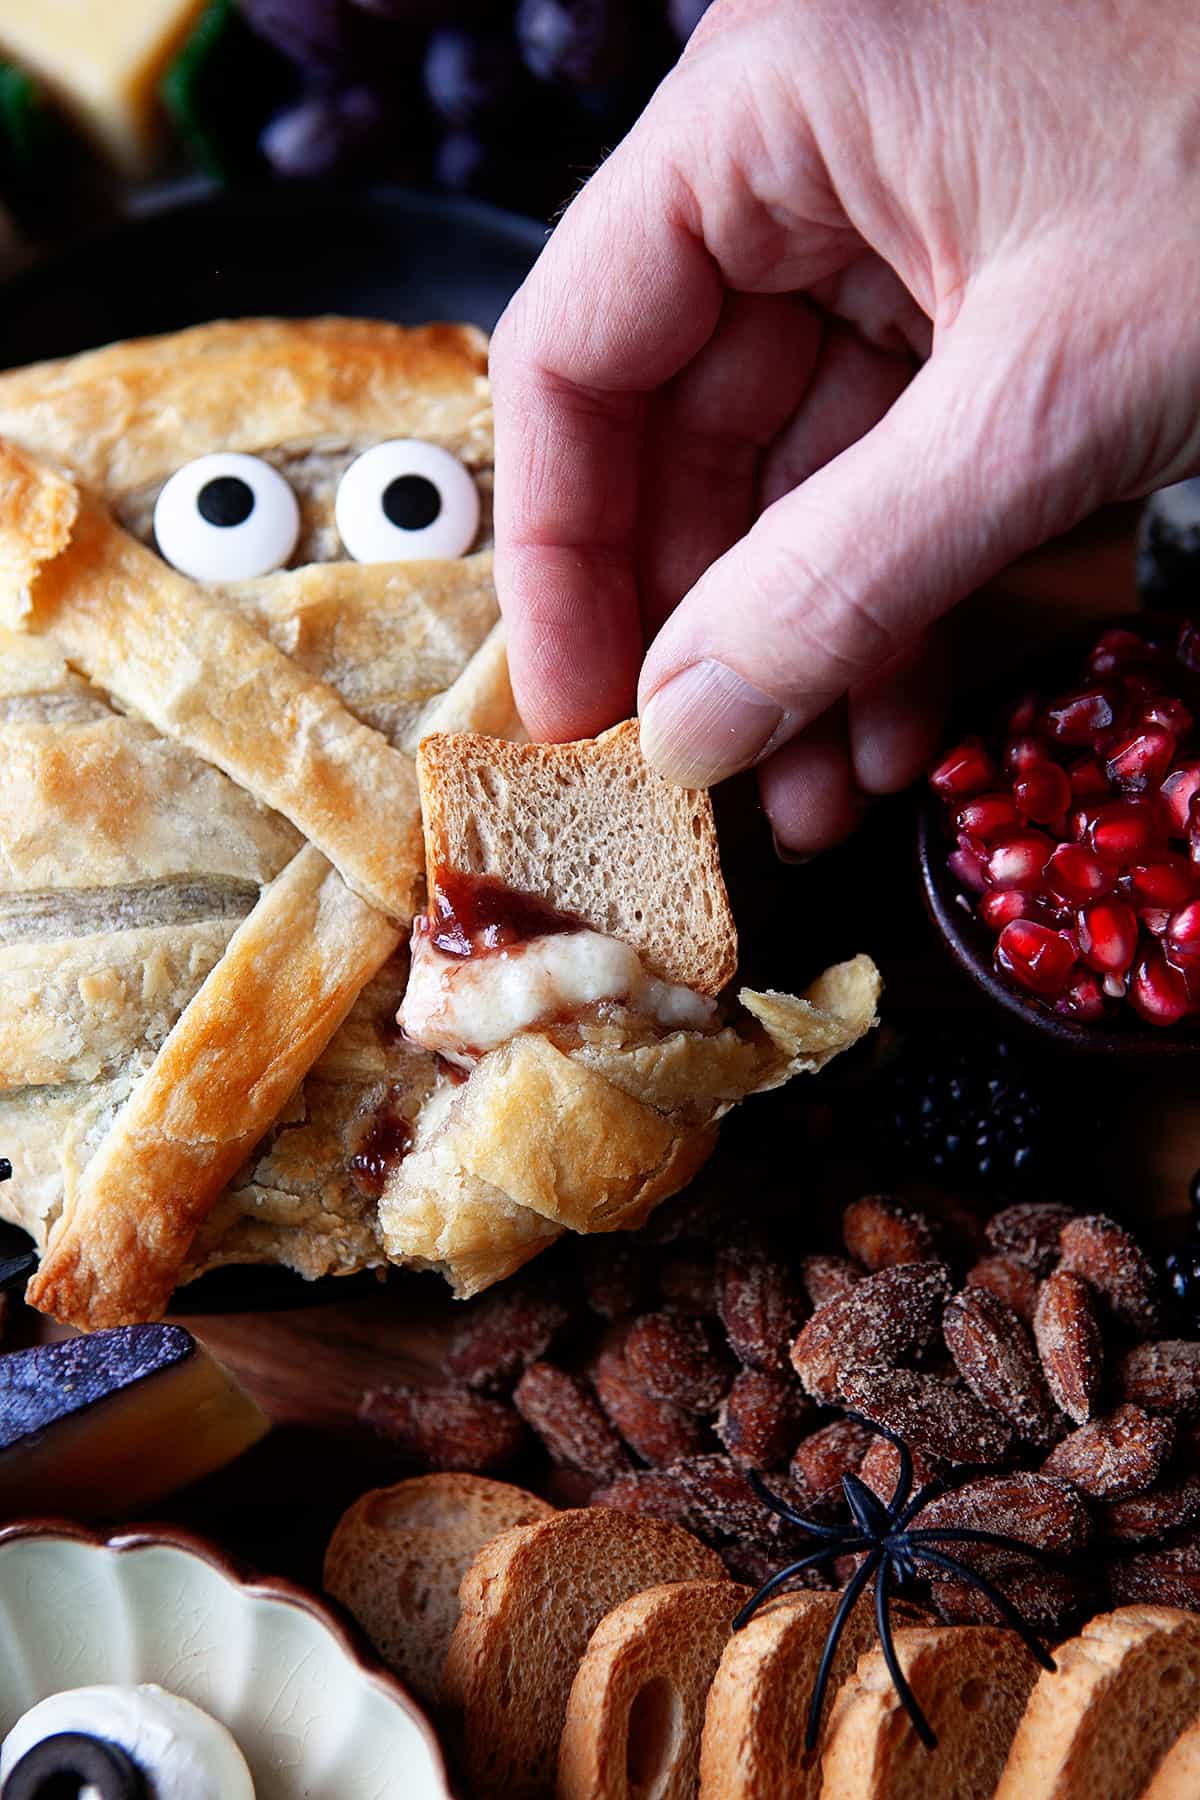
After it’s done baking, you can add two candy eyeballs to the mummy’s face to complete it.
Transfer it carefully to your cheese board and dig in! It may look a little spooky, but it tastes fantastic!
How to Make a Halloween Cheese Board
Once you’ve gathered all of the ingredients for your cheese board, you’re ready for the fun part! Making a Halloween Cheese Board is almost as enjoyable as eating it.
To begin, you’ll want to find a large cutting board or serving board. I always start by placing the cheeses around the board first.
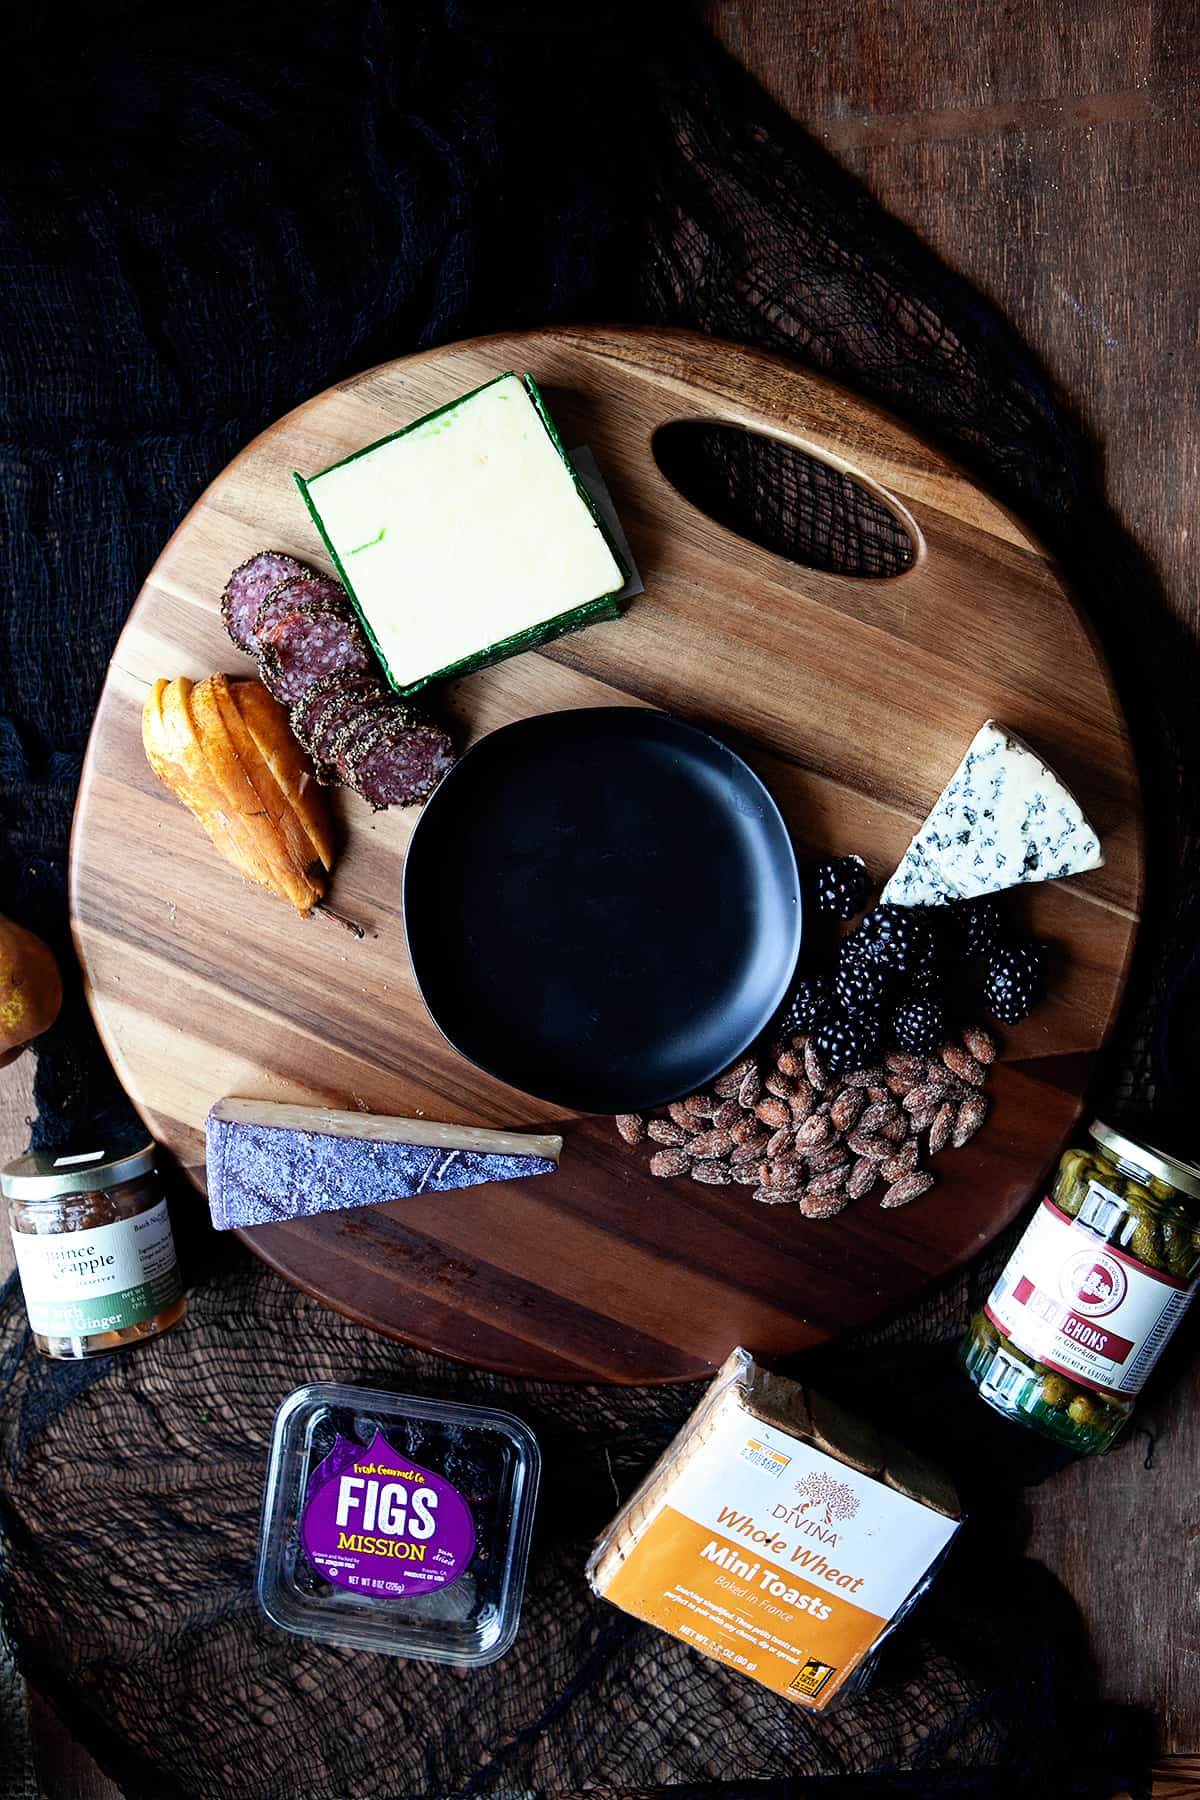
Once you’ve placed the cheeses, start arranging everything else around them. Fan out the crackers, meats, and thinly sliced fruit slices. Then, fill in the gaps with handfuls of nuts, dried fruits, and berries. Add small bowls to hold the jams or small ingredients like pomegranate arils. Plus, don’t forget a cheese knife or two.
You’ll be surprised how easy it is to make it look like a magazine spread!
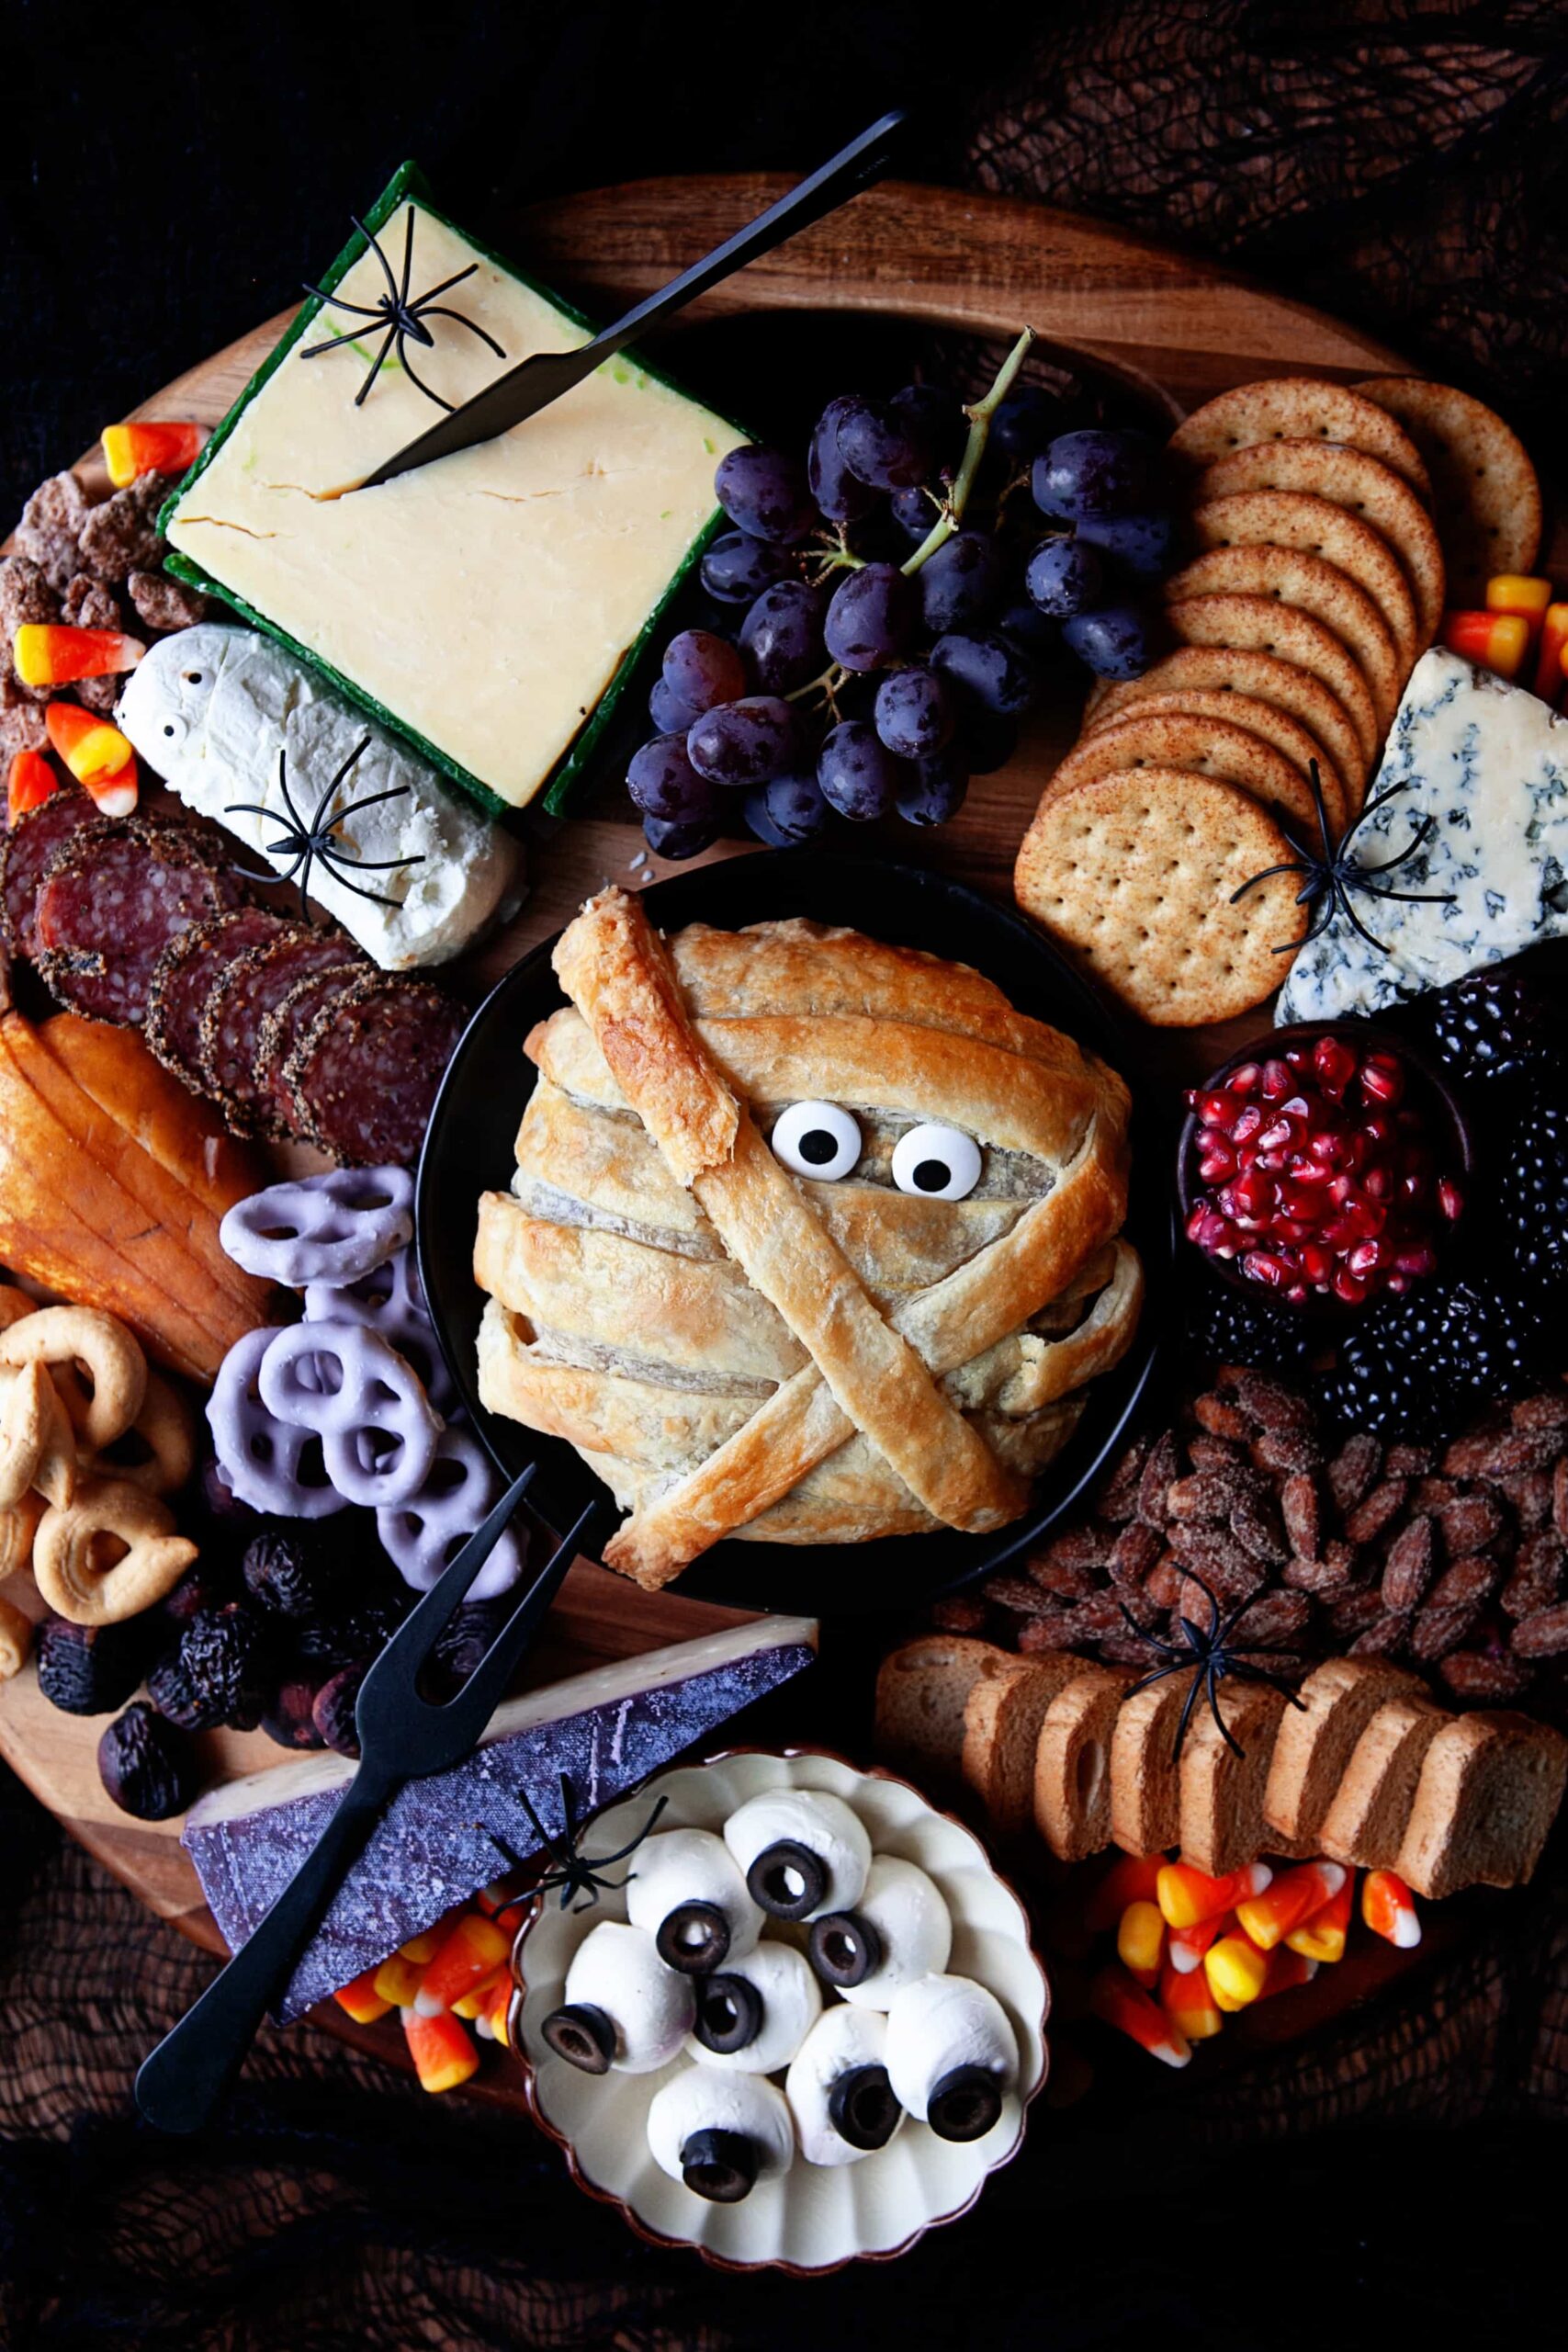
When you’re making a themed charcuterie board for Halloween, you can also add a few fun elements specific to the holiday to really make the board stand out. Here are a few ideas:
- Mozzarella Eyeballs (just a sliced olive stuck onto a fresh mozzarella ball)
- Candy eyeballs (I added them to the brie mummy and the log of goat cheese)
- Candy Corn (a quintessential Halloween candy)
- Plastic Spiders
- Black Cheese Cloth underneath the cheese board for display
- Baked Brie Mummy as the centerpiece
Pin it HERE!!
Pin it HERE!!
Halloween Cheese Board & Brie Mummy
Ingredients
For the Cheese Board
- 1/2 pound block Irish Cheddar
- 1/2 pound wedge Merlot Bellavitano Cheese
- 1/4 pound wedge Blue D’Avergne Cheese
- 1 40z log goat cheese
- 1 8 oz log peppered salami
- 1 package 2.8 oz Divina Whole Wheat Mini Toasts
- 1 sleeve of round whole wheat Entertainment Crackers
- 1 package Taralli Classic Italian Crackers
- 1 small jar Petits Cochon Cornichons
- 1 small jar Pear jam
- 1 small can sliced ripe black olives drained
- 8 oz fresh mozzarella balls drained
- 1 pomegranate
- 1 ripe Bosc pear
- Blackberries
- Praline Pecans
- Apple Cinnamon Flavored Almonds
- Dried Figs
- Red Seedless Grapes
- Blueberry Yogurt Pretzels
- Individually wrapped caramels
- Candy Corn
For the Mummy Wrapped Brie
- 1 sheet of Pepperidge Farm Puff Pastry completely thawed
- 2 tablespoons raspberry jam
- 8 oz wheel of brie
- 1 egg
- 1 tablespoon water
- 2 candy eyeballs
Instructions
- Before assembling the cheese board, keep in mind that you'll want your cheeses to be at room temperature. It only takes a few minutes to put together the cheese board, so set out your cheese ahead of time and then put together the cheese board 15 minutes or so before you're ready to serve it.
- To assemble the cheese board, first place your cheeses around the board, leaving space in the center for the Mummy Brie. Then, arrange your meats, fruits, and crackers around the cheeses. Fill in the holes with handfuls of nuts, berries, and candy. Use small bowls for the jam and pomegranate arils. (See photos above)
- To assemble the mozzarella eyeballs, just press a sliced olive into each mozzarella ball.
- Add eyeballs, spiders, or other Halloween decorations just before serving.
For the Mummy Brie- Preheat the oven to 400 degrees Fahrenheit.
- While the oven is pre-heating to 400 degrees Fahrenheit, roll out one sheet of thawed puff pastry on a lightly floured surface until you have a rectangle that is about 13 inches by 11 inches. Cut off one end of the rectangle (about 1/3) and set it aside.
- Spread the jam in the center of the larger piece of puff pastry in a circle the same size as the brie. Place the brie in the center on the jam circle and then fold the edges of the pastry up around the brie. Flip it over, with the folded side on the bottom, and place it on a parchment-lined baking sheet.
- Beat together the egg and water in a small bowl to create an egg wash.
- Use the smaller piece of puff pastry and cut it into 1/2 inch strips. Brush the wrapped wheel of brie with an egg wash, then place the strips around the wheel of brie.
- Bake for 10 minutes, then remove it from the oven to brush it one more time with an egg wash. Return it to the oven and bake for an additional 10 to 12 more minutes, or until it is puffy, golden brown, and the brie inside is melty.
- Add the candy eyeballs, place carefully in the center of the cheeseboard, and serve immediately.



Let us know what you think!
We’d love to know what you and your family think! Make sure to leave a review below and follow us on your favorite social network!