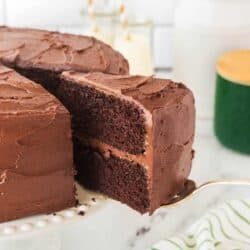
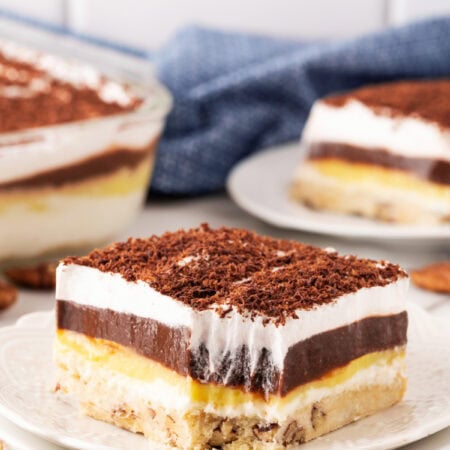
Need a great recipe for a simply delicious cake? Our Best Chocolate Layer Cake is just that. Our recipe will give you a moist chocolate cake every time and an amazing chocolate buttercream frosting also. This chocolate cake recipe is perfect for any occasion and will satisfy the chocolate lover.
Want more cake recipes? First off check out How and Why to Crumb Coat a Cake and then try our gorgeous Best Vanilla Cake Recipe, Best Carrot Cake Recipe, Zebra Cake, or Best Angel Food Cake Recipe adorned gorgeously with fresh fruit and mint.

If you prefer a different icing to a buttercream like we have shown you can use a Chocolate Ganache Frosting. Just as delicious!
Helpful Items For This Recipe
This post contains affiliate links. As an Amazon Associate, I earn a small portion from qualifying purchases at no extra charge to you.

What Goes Into a Chocolate Layer Cake?

Pretty basic ingredients go into this chocolate cake. The coffee is added to bring out the chocolate flavor even more. The buttermilk gives a little back note of tang and moistness to the cake.
The chocolate frosting is delicious, and I have added in even more than what you see in the pictures, so you can make a mistake and easily cover it or be more elaborate with the decorations.
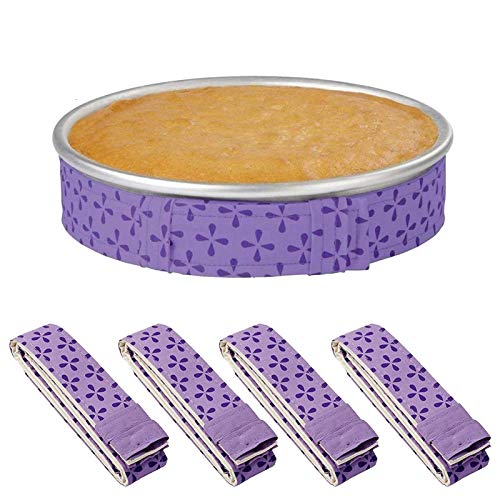
Bake even strips give you a perfectly even bake to your cakes and keeps them flat, so they won’t rise in the middle, making them impossible to frost in layers.
Ingredients
Cake
All-purpose flour
Granulated sugar
Unsweetened cocoa powder
Baking soda
Baking powder
Salt
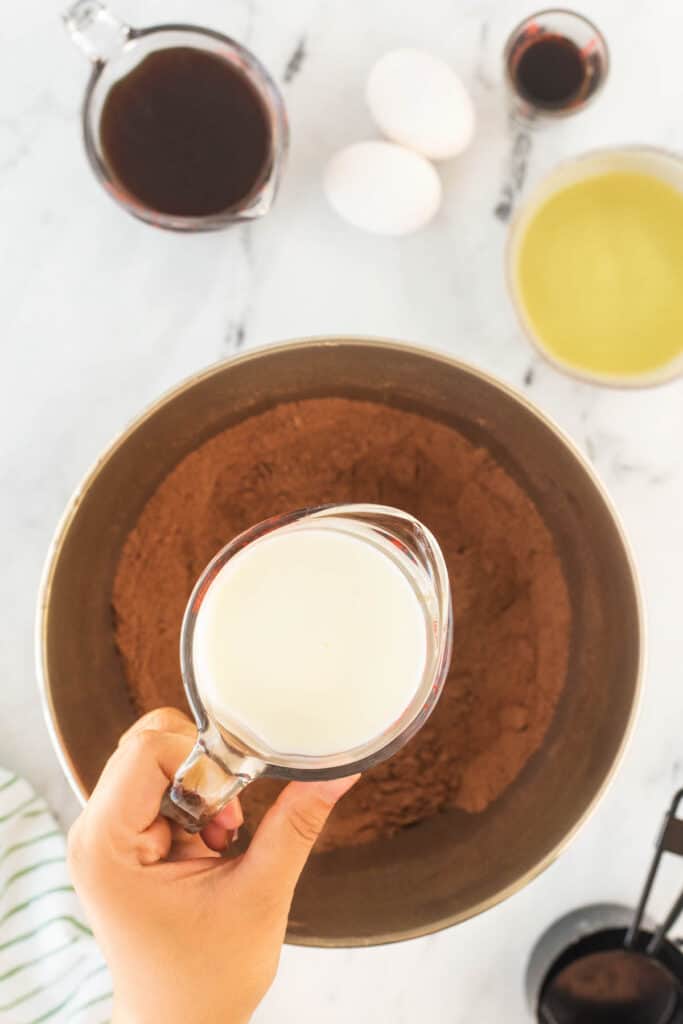
Buttermilk
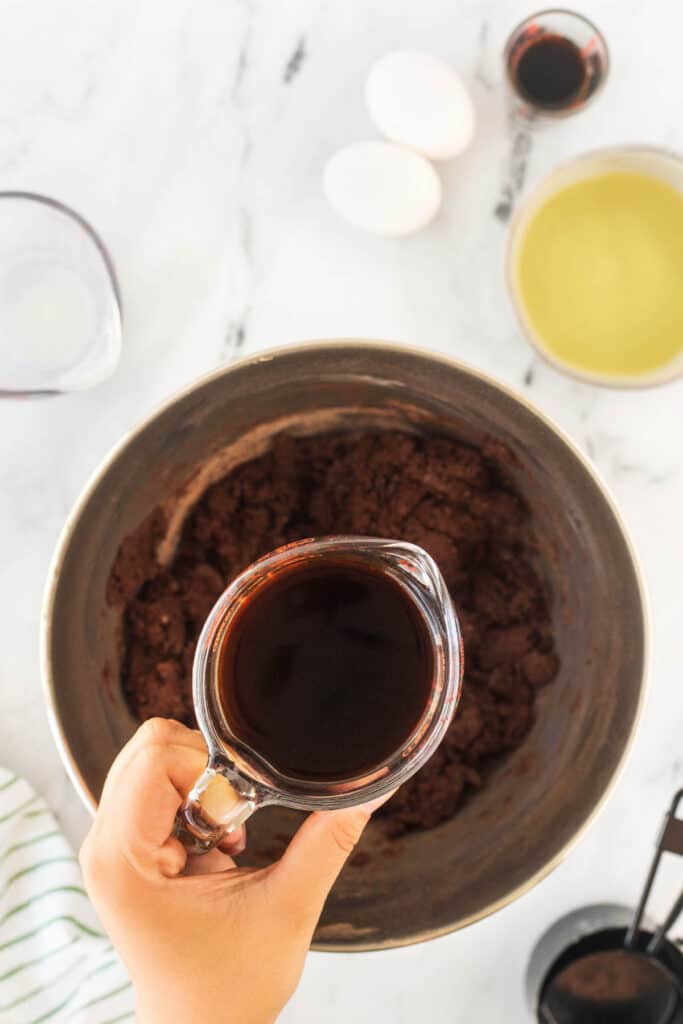
Strong hot coffee
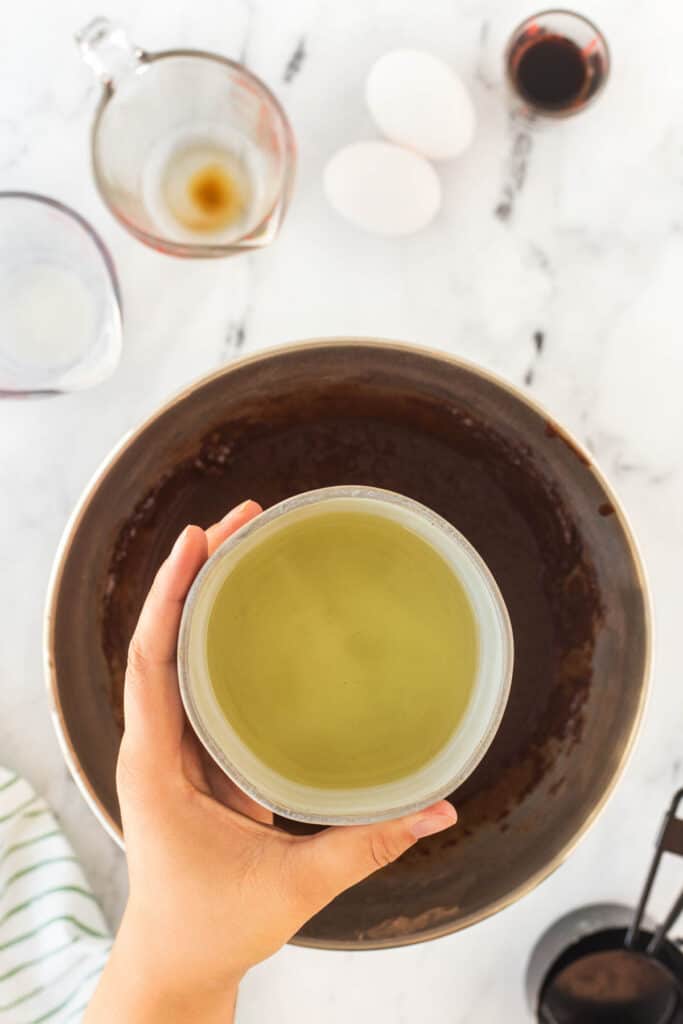
Canola oil
Vanilla
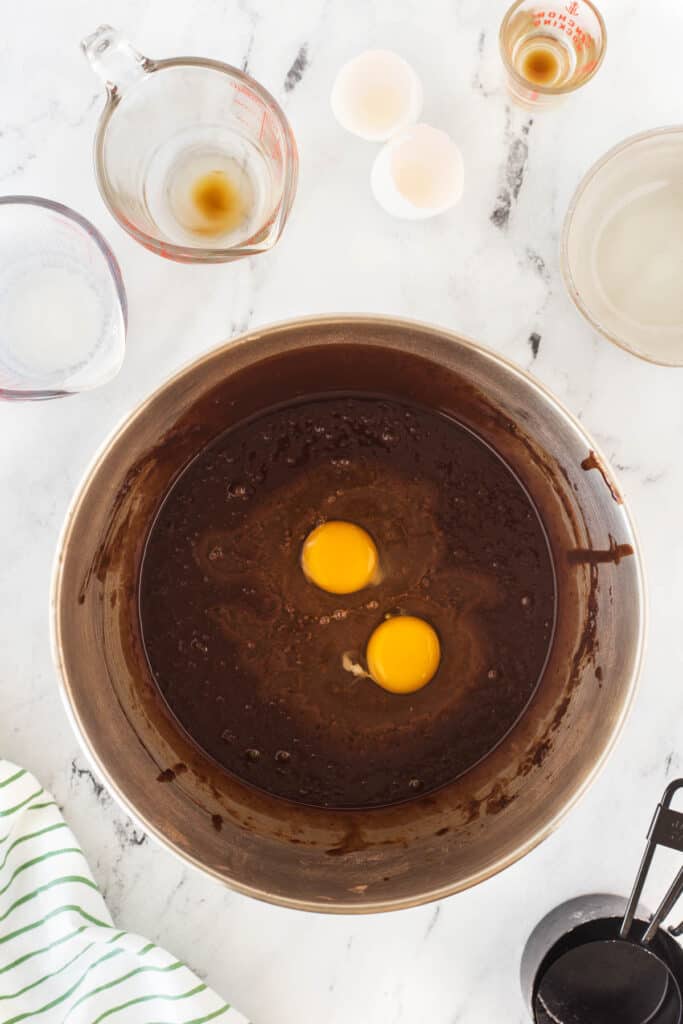
Large eggs
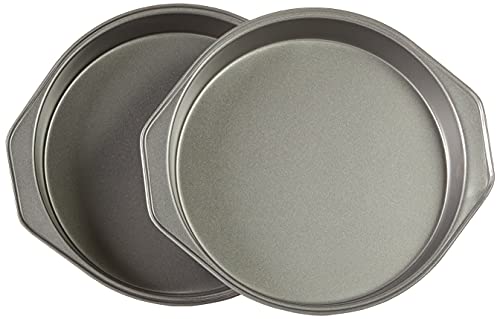
Parchment paper and non-stick cooking spray
Bake even strips

I have given you some extra frosting to do as you wish with, for decorations or to make it extra thick.
Frosting
Salted butter, softened
Icing sugar
Unsweetened cocoa powder
Whipping cream, or more as needed
Vanilla
How to Make a Chocolate Layer Cake

Preheat your oven to 350 degrees F. Prepare pans with “Bake Even Strips”. These will help keep your cakes flat while baking, therefore, making icing your cake so much easier.
Preparing The Pans
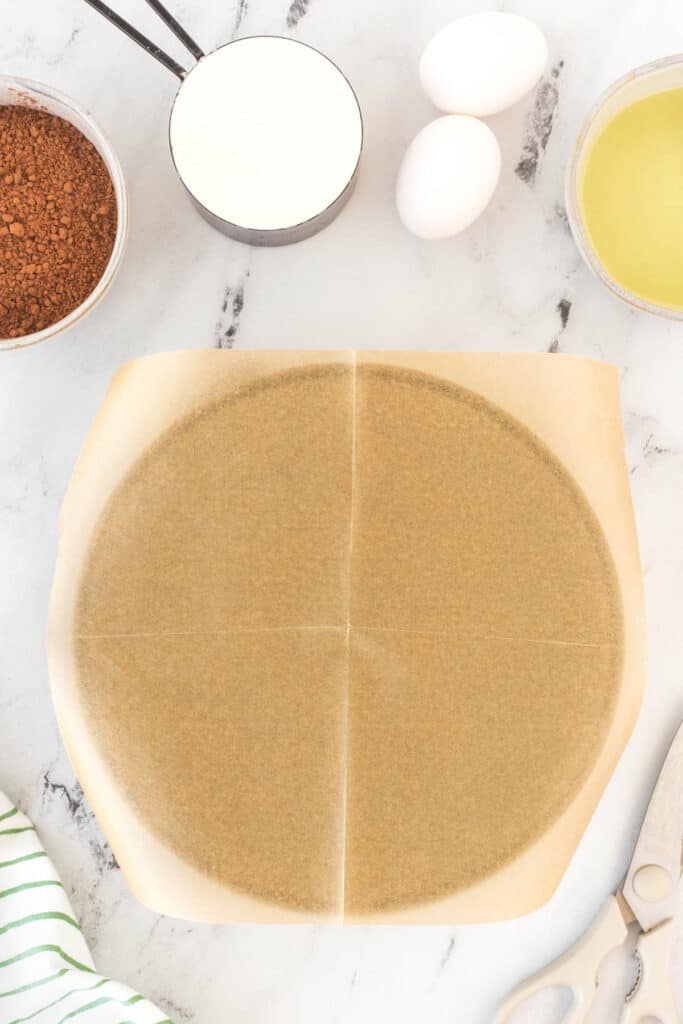
Cut 2 rounds of parchment paper that fit the bottom of a 9-inch round cake baking pan.
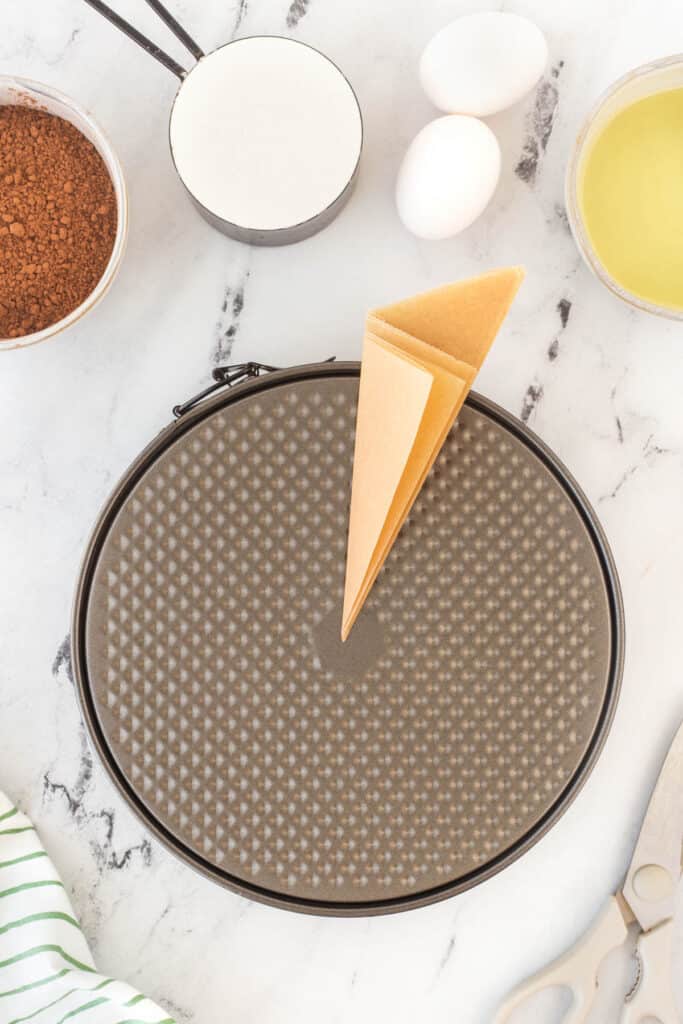
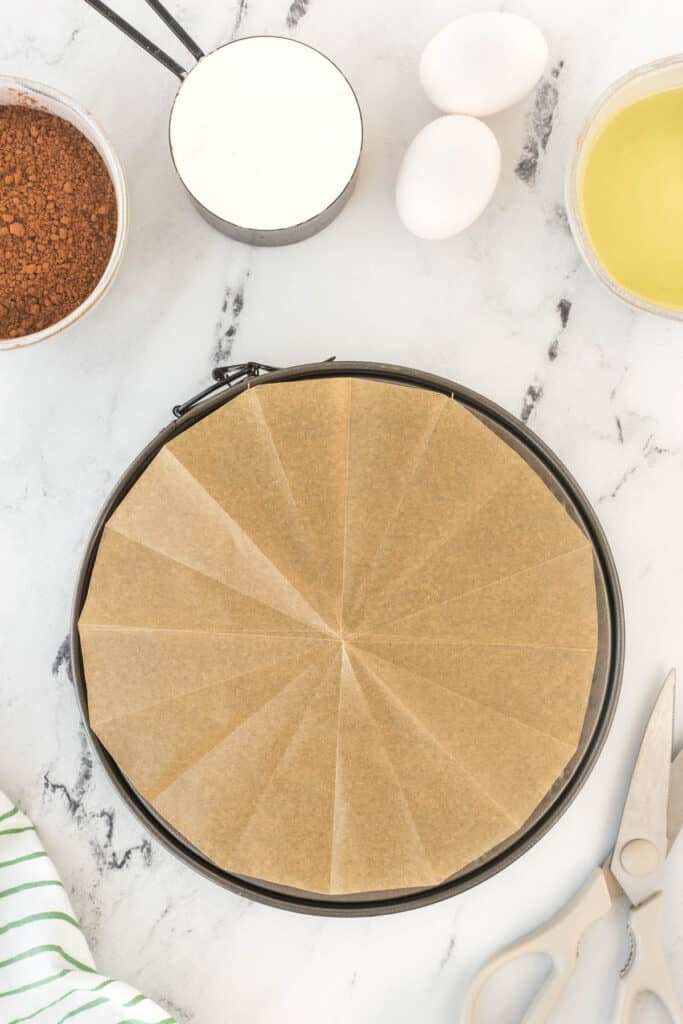
To make these rounds, tear off a piece big enough to cover the bottom. Then fold in half and half again. After those two folds, fold in half once again, making a triangle shape. Sometimes I will fold a fourth time, but you could stop here. (The more folds, the more likely you will cut a nicer circle, and a fourth fold would be all you need).
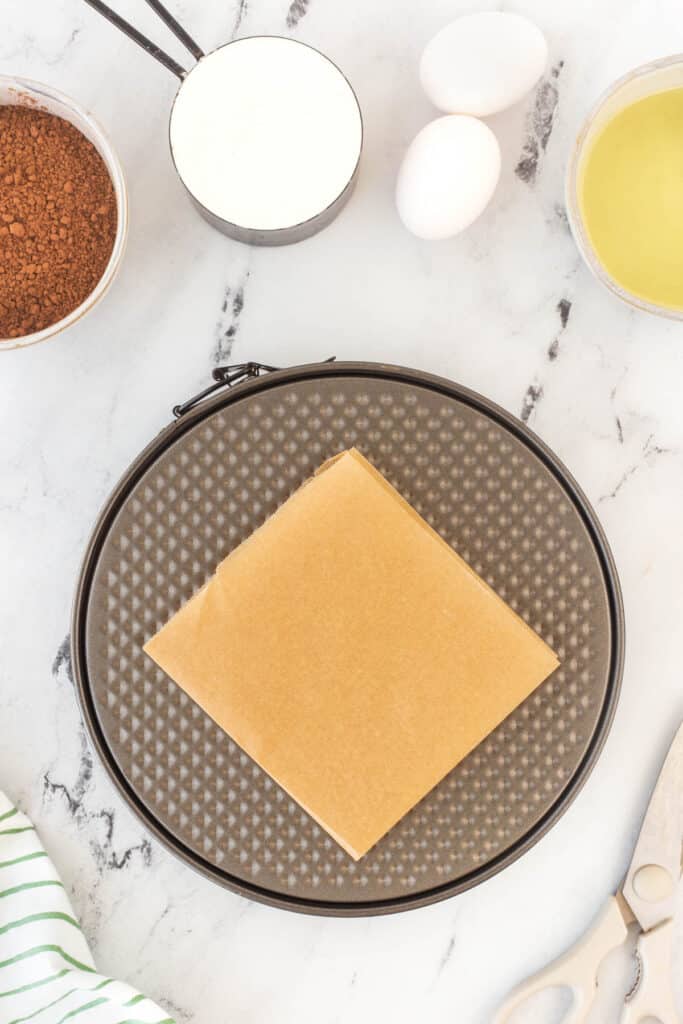
Next, you will measure where you want to cut. Place the pointy end of the triangle in the center of the pan (I will flip my cake pan upside down as it’s easier to trim), and then at the edge, trim off any excess paper hanging over. I tend to trim just a little extra, about a 1/8” to account for the width of the sides of the pan, so your circle fits nicely inside your pan.
Spray two 9 – inch round cake pans with non-stick cooking spray and place one parchment round in the bottom of each pan, and set aside.
Making The Cake
In the bowl of a stand mixer, using the paddle attachment, start with the dry ingredients and combine the flour, sugar, cocoa powder, baking soda, baking powder, and salt.
Mix on low speed until well combined.
With the electric mixer running on low speed, slowly add the buttermilk, hot coffee, canola oil, vanilla, and eggs. Adding one after the other.

Mix until well combined, and the mixture has air bubbles (about 1 minute).
Divide the batter into the 2 prepared cake pans and bake in the preheated oven for about 30 – 35 minutes. Remove from the oven when a cake tester inserted into the middle of the cake comes out clean.
Let cool for 10 minutes in the cake pans, then run a sharp thin knife around the edge of each pan.
Invert the cakes onto a wire cooling rack and allow them to cool for 30 minutes.
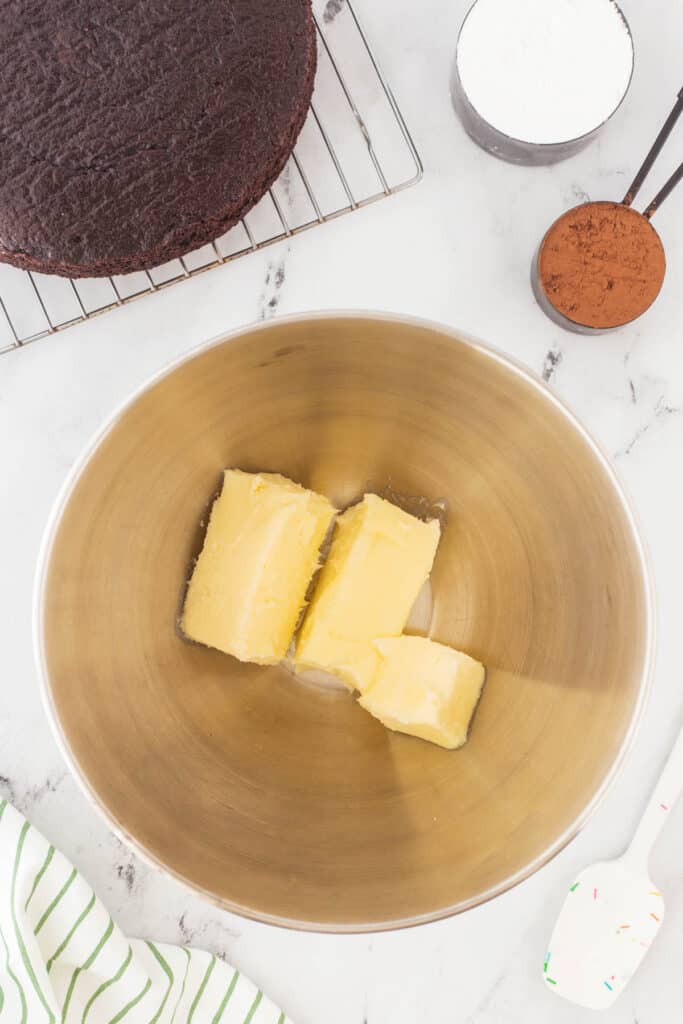
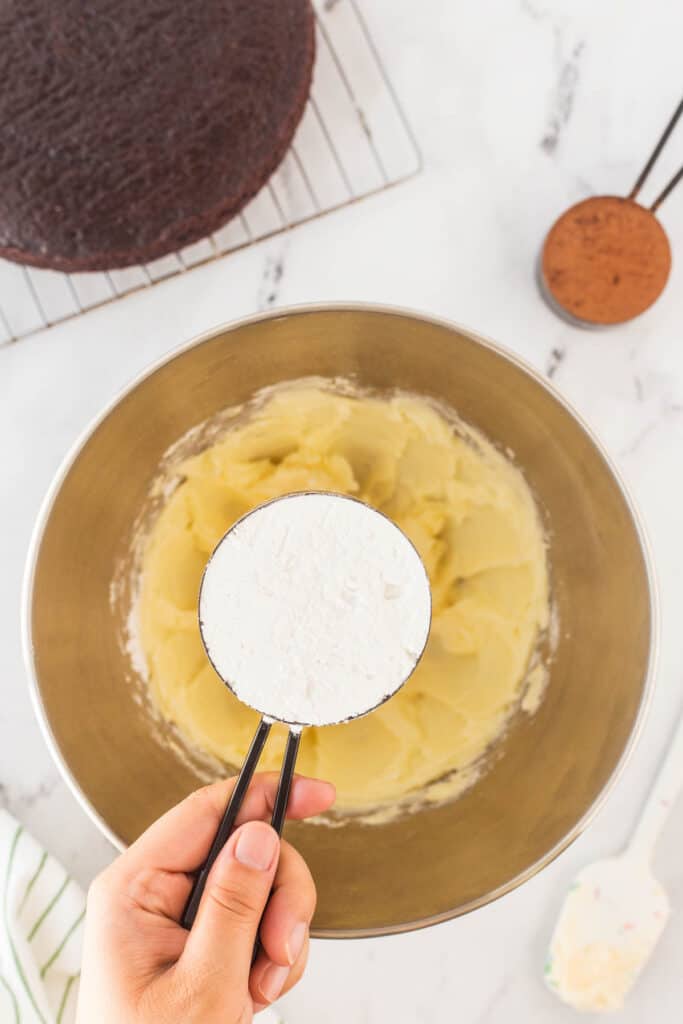

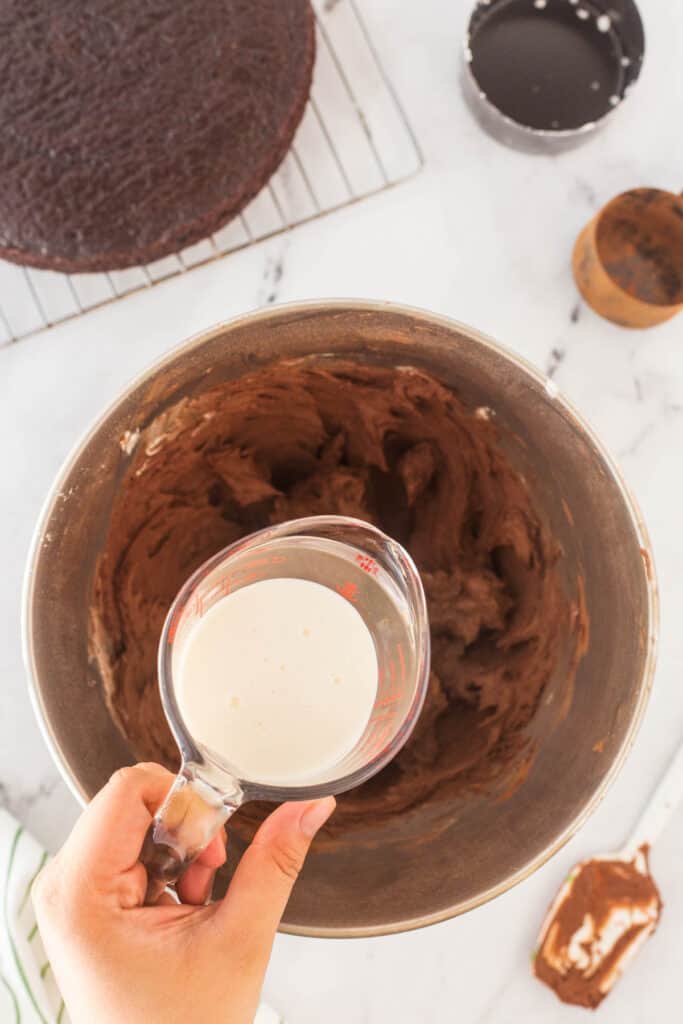
Making the Buttercream Frosting
While the cakes cool, make the buttercream frosting.
Cream the butter in the bowl of your stand mixer using a paddle attachment. Slowly add the icing sugar and cocoa, and mix until combined. Add the vanilla and the whipping cream until the desired consistency is reached. Set aside.
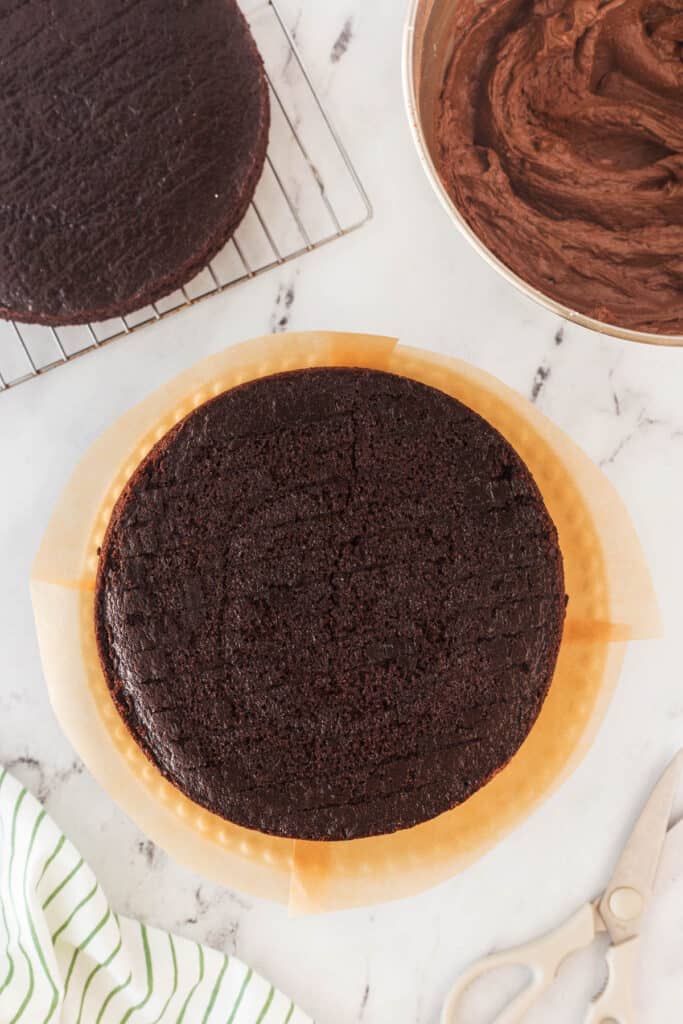
If you didn’t use the bake even strips, then trim your cakes flat.
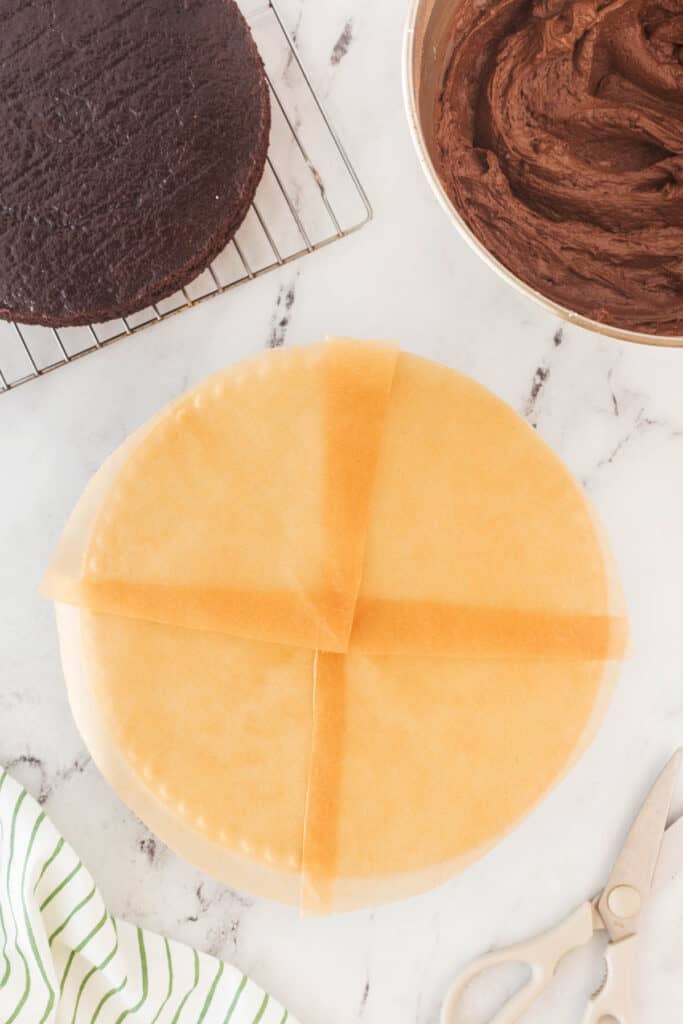
Take a piece of wax paper large enough to completely cover your cake stand with a 2-3 inches overhang on each side.
Cut the wax paper in half and cut each half in half again.
Place the 4 pieces of wax paper on the cake stand so they overlap; they should cover the top surface of the stand (this will help keep the cake stand clean, you remove the wax paper after your cake is iced).
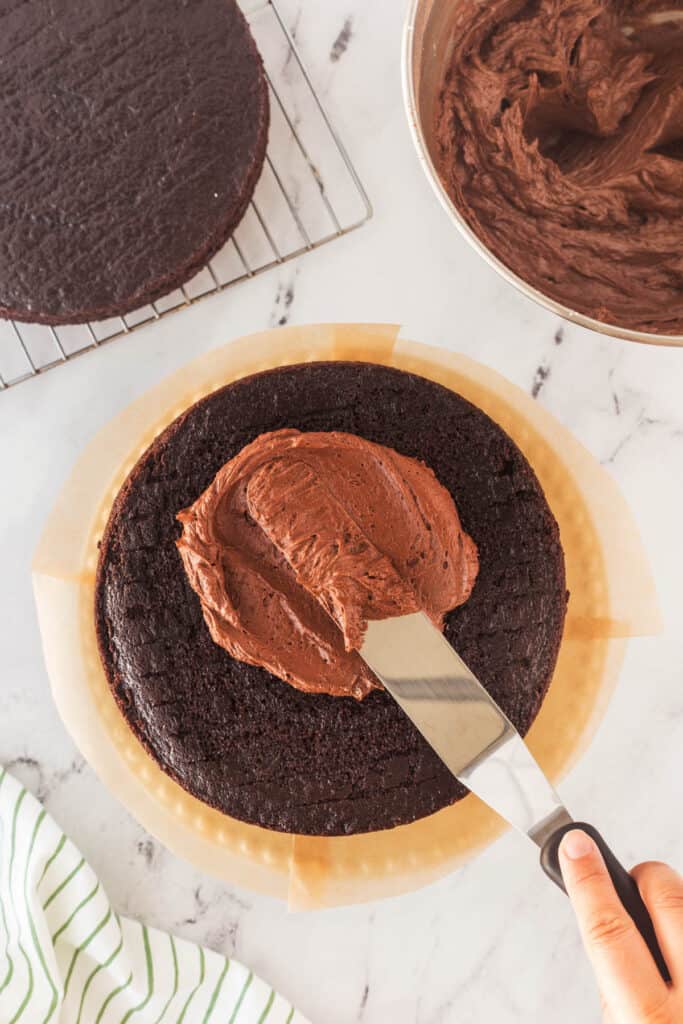
Spread a good amount of frosting on the top of the first cake. Spread to the edge.

Place the second cake upside down on top of the first cake, so the tops of the cakes are together.
Next, take about ¾ of a cup of the remaining frost and place it in a smaller bowl. Add 2-3 tbsps of whipping cream and mix to combine. This thinner icing is to ice the crumble layer on the outside of the cake. It is also easier to spin the stand, so you don’t apply pressure to the cake while applying the crumb coat.
Once you have iced the crumble layer around the outside of the cake, place it in the refrigerator for 30 minutes.

Remove from the refrigerator and finish icing the cake with the remainder of the frosting.
Place back in the refrigerator until the icing is set.

Carefully remove the wax paper from the bottom of the cake.
Serve with a scoop of ice cream if you like!
Why is it Called a Layer Cake?

Layer cakes started to become vogue in Europe in the mid-19th century. They were initially known as sandwich cakes but soon after took the name of layer cakes, and the rest is history, as they say.
How to Store a Layer Cake

If you want to store your layer cake prior to icing, you can do so but carefully. Let the cakes cool completely to room temperature. Then wrap the cakes well in plastic wrap; I do a little extra effort and wrap them twice. This holds them together better also. They can then be placed in a freezer bag and frozen for 3 months.
Iced cakes can be stored at room temperature or refrigeration. Before covering them in the fridge, they should be placed in the fridge for the icing to set. I try to avoid plastic wraps and toothpicks as the end results aren’t as nearly as nice as storing a cake in a proper container; see below.
How do you keep chocolate cake layers moist?
Keeping your cake moist after it is made can be more challenging. Don’t wait to frost it but do so right after it has cooled. Placing it in an air-tight container is the best for storage while it is whole or cut into.
Cake Container Options
Whether it be a box, plastic storage from the grocery store, or a store-bought cake container, your cake should be covered if you will be storing it to keep odors away and moistness in.

Enjoy your chocolate cake with family and friends; I know it will be a hit.
Pin it HERE!!

Pin it HERE!!

Best Chocolate Layer Cake
Ingredients
CAKE:
- 2 cups all-purpose flour
- 2 cups granulated sugar
- 3/4 cup unsweetened cocoa powder
- 2 tsp baking soda
- 1 tsp baking powder
- 1 tsp salt
- 1 cup buttermilk
- 1 cup strong hot coffee
- ½ cup canola oil
- 1 tbsp vanilla
- 2 large eggs
- Parchment paper and non-stick cooking spray
- Bake even strips
FROSTING:
- 1 3/4 cups salted butter softened
- 5 cups icing sugar
- 1 cup unsweetened cocoa powder
- 12 tbsp whipping cream or more or less as needed, plus more to thin our crumb coat
- 2 tsp vanilla
Instructions
- Preheat your oven to 350 degrees F. Prepare pans with “Bake Even Strips”. These will help keep your cakes flat while baking, therefore, making icing your cake so much easier.
- Cut 2 rounds of parchment paper that fit the bottom of a 9-inch round cake baking pan.
- To make these rounds, tear off a piece big enough to cover the bottom. Then fold in half and half again. After those two folds, fold in half once again, making a triangle shape. Sometimes I will fold a fourth time, but you could stop here. (The more folds, the more likely you will cut a nicer circle, and a fourth fold would be all you need).
- Next, you will measure where you want to cut. Place the pointy end of the triangle in the center of the pan (I will flip my cake pan upside down as it’s easier to trim), and then at the edge, trim off any excess paper hanging over. I tend to trim just a little extra, about a 1/8” to account for the width of the sides of the pan, so your circle fits nicely inside your pan.
- Spray two 9 – inch round cake pans with non-stick cooking spray and place one parchment round in the bottom of each pan, and set aside.
- In the bowl of a stand mixer, using the paddle attachment, start with the dry ingredients and combine the flour, sugar, cocoa powder, baking soda, baking powder, and salt.
- Mix on low speed until well combined.
- With the electric mixer running on low speed, slowly add the buttermilk, hot coffee, canola oil, vanilla, and eggs. Adding one after the other.
- Mix until well combined, and the mixture has air bubbles (about 1 minute).
- Divide the batter into the 2 prepared cake pans and bake in the preheated oven for about 30 – 35 minutes. Remove from the oven when a cake tester inserted into the middle of the cake comes out clean.
- Let cool for 10 minutes in the cake pans, then run a sharp thin knife around the edge of each pan.
- Invert the cakes onto a wire cooling rack and allow them to cool for 30 minutes.
- Cream the butter in the bowl of your stand mixer using a paddle attachment. Slowly add the icing sugar and cocoa, and mix until combined. Add the vanilla and the whipping cream until the desired consistency is reached. Set aside.
- If you didn’t use the bake even strips, then trim your cakes flat.
- Take a piece of wax paper large enough to completely cover your cake stand with a 2-3 inches overhang on each side.
- Cut the wax paper in half and cut each half in half again.
- Place the 4 pieces of wax paper on the cake stand so they overlap; they should cover the top surface of the stand, (this will help keep the cake stand clean, you remove the wax paper after your cake is iced.
- Place the second cake upside down on top of the first cake, so the tops of the cakes are together.
- Next, take about ¾ of a cup of the remaining frost and place it in a smaller bowl. Add 2-3 tbsps of whipping cream and mix to combine. This thinner icing is to ice the crumble layer on the outside of the cake. It is also easier to spin the stand, so you don’t apply pressure to the cake while applying the crumb coat.
- Once you have iced the crumble layer around the outside of the cake, place it in the refrigerator for 30 minutes.
- Remove from the refrigerator and finish icing the cake with the remainder of the frosting.
- Place back in the refrigerator until the icing is set.
- Carefully remove the wax paper from the bottom of the cake.
- Serve with a scoop of ice cream if you like!


Comments & Reviews
Kathy says
Right now everyone is doing what they have to save.
Money is tight with everything going up in price.
I discovered taking 1 empty sweetened condensed milk can fill it with 3/4 full with water you won’t need baking strips and your cake turns out just as moist and level no dome shaped cakes.
Tara Noland says
This is a great idea Kathy and thanks for sharing. I have not tried that. I have a set of bake even strips that I have used for 30+ years and love them so I was wanting to share that with everyone.
Gena says
Are there adjustments to this recipe for high altitudes?
Tara Noland says
Hi Gena, this recipe has been tested at sea level and at 3,200 feet without issue. Any higher than that I am not sure.