I like to cook food, eat food and also craft with food! That is where these Non-Edible “Gingerbread” Cinnamon Ornaments come into play. These smell amazing and also look gorgeous hanging on the Christmas tree.
We have done some edible crafts over the years like our very popular Polar Bear Cookies. These feel more like a craft to me than baking as you don’t mix, bake or cook anything.
These applesauce and cinnamon ornaments are easy for the whole family to make. They are a simple craft that can then adorn your Christmas tree beautifully, be given as a gift or decorate the outside of a gift perfectly. A very adorable teacher’s gift too!

Aren’t these cute? I love using my cookie cutters for various crafts or recipes. This makes purchasing them and having a big collection so worth while.
I have used a gingerbread cookie cutter for my Headless Gingerbread Men for Halloween. Also, I have flipped it around for cute Reindeer Cookies.
A candy corn cookie cutter I have used for Halloween Tombstone Cookies, so reuse your cookie cutters for many, many uses.
The house smells so good with making these but also while they are hung. I love to do a food craft like this over the holidays and have made spiced orange pomander balls, that are so wonderful too.
How to Make Cinnamon Scented Ornaments
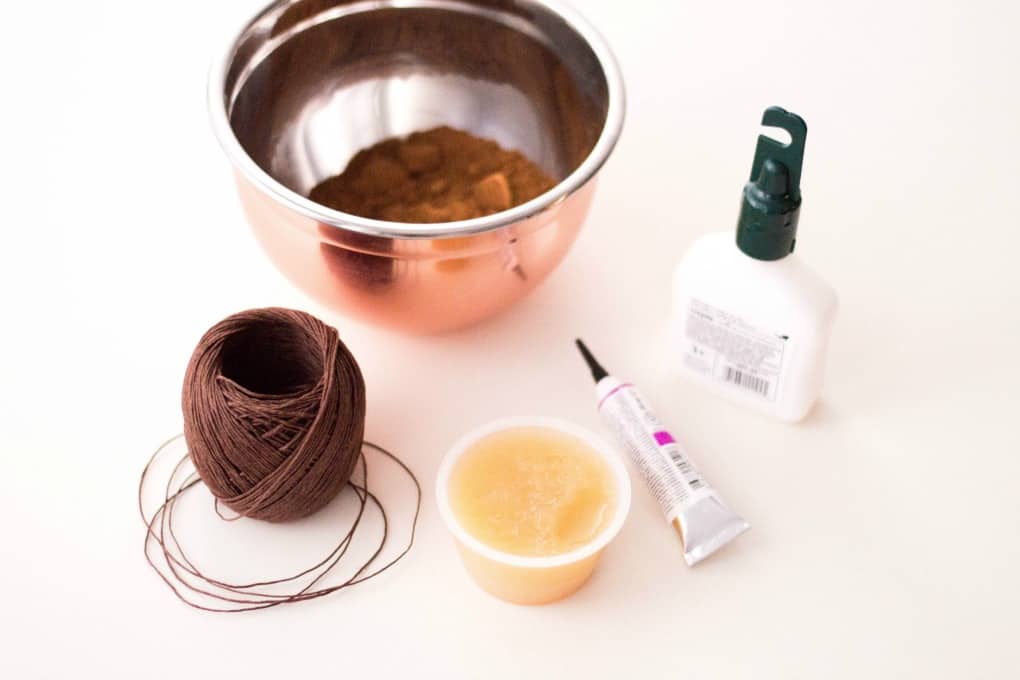
The dough not only has applesauce and ground cinnamon but a bit of glue which makes them stay together and also be then considered non-edible of course.
The ingredients are simple and you may have most of them at home already. I like the brown twine as it blends in with the ornaments perfectly and gives them a rustic look too.
I like that the ornaments turn out nice and thick and substantial. They will really stand out on your tree! An ornament like this will be cherished for years and years to come.
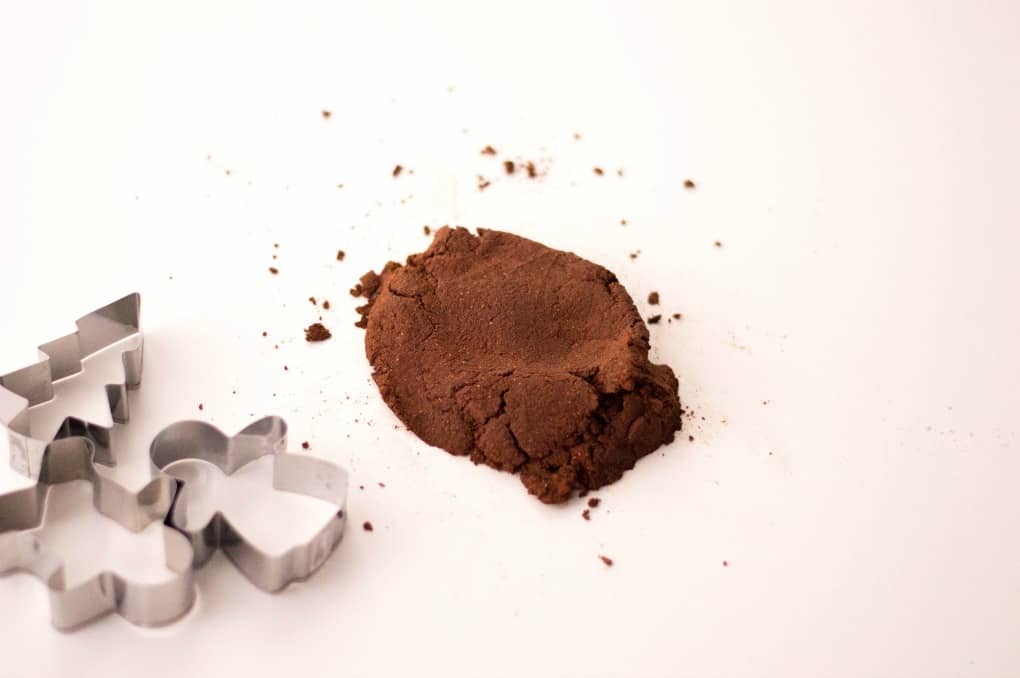
When you roll out the dough it is a bit crumbly before baking, so one thing you should note is to actually use a spatula to get them from your working surface to your cooking sheet.
The dough sure is the perfect brown color for gingerbread!!
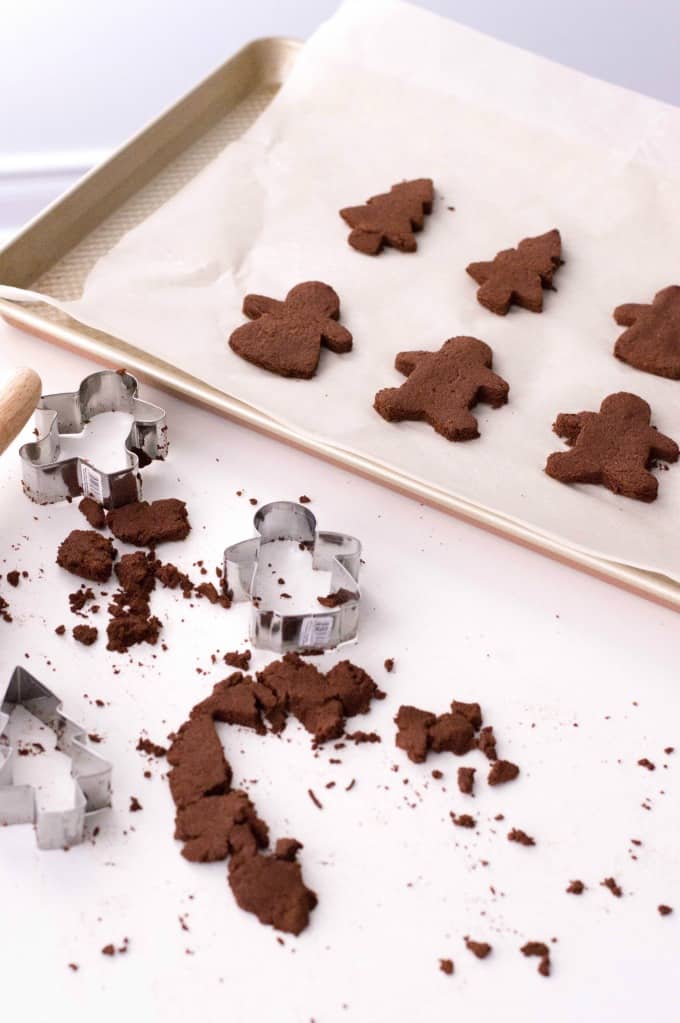
Baking them in the oven as opposed to letting them air dry at room temperature really ensures that they will harden well! They won’t be crumbly once baked.
Bake them on parchment paper for the best results.
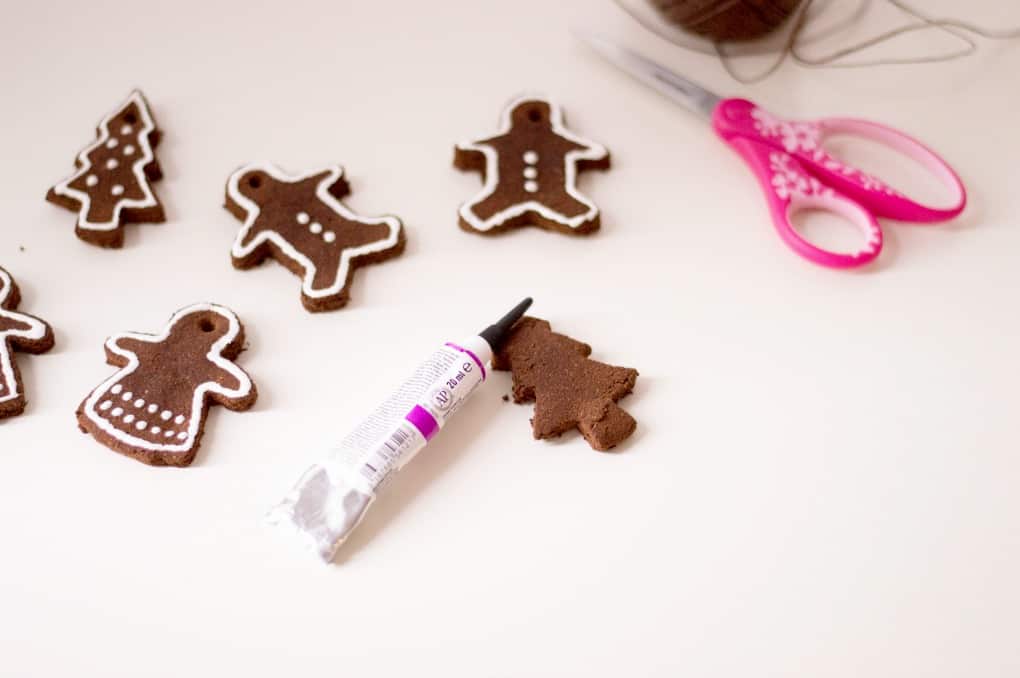
Also, using dotting paint is not as intimidating as it seems. It’s super easy to work with and really just needs to dry overnight.
You could use a glitter glue also for this fun project. I personally like the dotting paint on these ornaments.
How do you bake ornaments?

How do you bake these Non-Edible “Gingerbread” Cinnamon Ornaments? Just simply line a baking sheet with parchment paper and preheat your oven to 200F degrees.
Bake for 2 hours and allow to cool completely before decorating.
This homemade diy project is a great idea and can be done again and again as you hand these out for gifts.

I love my artificial Christmas tree to smell as good as it looks and these Non-Edible “Gingerbread” Cinnamon Ornaments will be perfect. Any Christmas scents will work.
I have used Scentsicles for years already on my tree and change them up every few weeks. They sort of disappear into the tree but these ornaments will serve two purposes as in being beautiful and smelling great!

I have two Christmas trees in our home for the holidays. One that is limited to white, clear and blue ornaments and then one downstairs that have ornaments from around the world and handmade by Amber over the years.
These new ornaments would fit into the downstairs tree perfectly. We have a cute train that also goes around the bottom of the tree.

If you want all gingerbread men, sure do that! I like the little Christmas trees too though. Have other cookie cutters of say reindeer, santa or snowman etc. Use whatever you like!
If you would like to change the scents up you can do that too. Add some cloves, nutmeg, ginger or even a pumpkin pie spice would be great here too. Just mix in what you like with the cinnamon.
How to Make the Hole in the Cinnamon Ornament

This is easily accomplished with the use of a #8 Wilton frosting tip or simply using a straw!
Just be careful with little ones that they aren’t nibbling on the dough. Although it smells great it is still not edible. Maybe a better craft for a slightly older child.
Choose a nice cold afternoon and get into your favorite pj’s, dive into this craft and it will be an awesome adventure that everyone will remember for years to come.
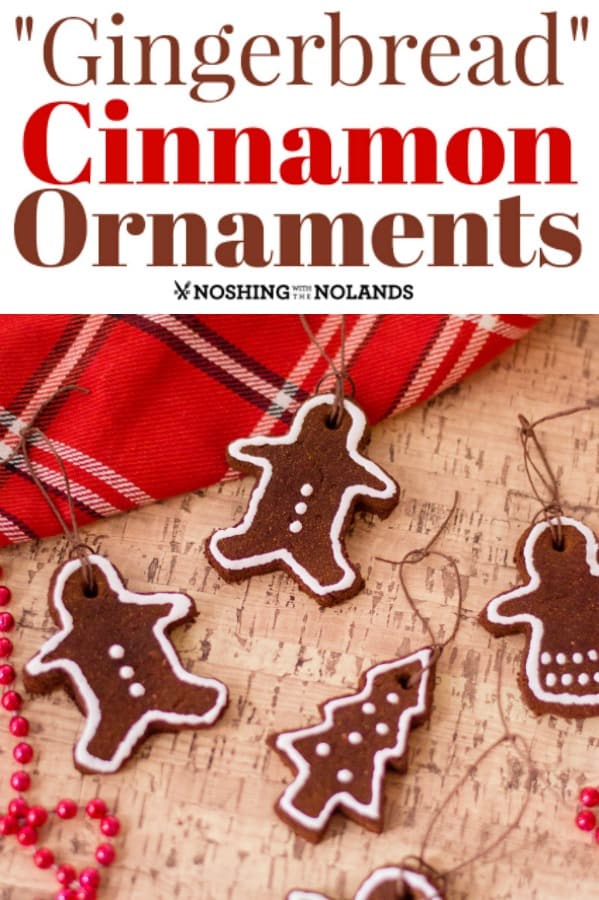
Non-Edible “Gingerbread” Ornaments
Equipment
- Tools needed:
- Christmas cookie cutters (about 2-3 inches in length)
- Wilton frosting tip #8
- White dotting paint
- Waxed string/twine
Materials
- Ingredients
- ½ cup applesauce
- ¾ cup cinnamon
- 1 tbsp white glue
Instructions
- Line a baking sheet with parchment paper and preheat your oven to 200F degrees.
- In a large bowl, mix together applesauce, cinnamon, and white glue.
- Remove the mixture from bowl and sprinkle some extra cinnamon on a clean working surface. Knead until mixture becomes a thick ball of dough.
- Flatten out the dough to be about ½ of an inch thick. Using your cookie cutters, cut out Christmas shapes and with a spatula place gently on a parchment lined baking sheet.
- Using your Wilton frosting tip, cut out one small hole at the top of each cut-out.
- Bake for 2 hours. Allow to cool completely before decorating.
- Use your white dotting paint to decorate each ornament. Follow directions of paint but for most brands, you’ll need it to dry overnight.
- Using the loop-knot method, tie a piece of twine through the hole on each ornament so that it is ready for hanging on the tree. Have fun and happy holidays!





Comments & Reviews
krystal says
I have never made ornaments before and these look so good! I mean, we wouldn’t eat them… lol but they are so cute!
Reesa Lewandowski says
The kids and I make these every year. The best part? The smell!
Toni | Boulder Locavore says
These are really adorable! I will definitely try this!
Brianne Manz says
These are so cute. Such a fun idea to do with the kids to decorate the tree. We have made these before but not as ornaments, so I might just have to try that.
Jeni Hawkins says
I’m SO making these this year! I need something fun for the tops of my presents and to put in gift baskets, and these are perfect!
Amy says
I cannot believe Christmas is already coming soon!!! These are really cute for my kid’s tree!
Melissa Chapman says
I am not quite ready for tree trimming but these are so great for a house and tree around the holidays. They do look great but i love to eat gingerbread.
Stacie says
Those look great! I love how festive they are. This is the kind of thing I love to do with my kids for the holidays.