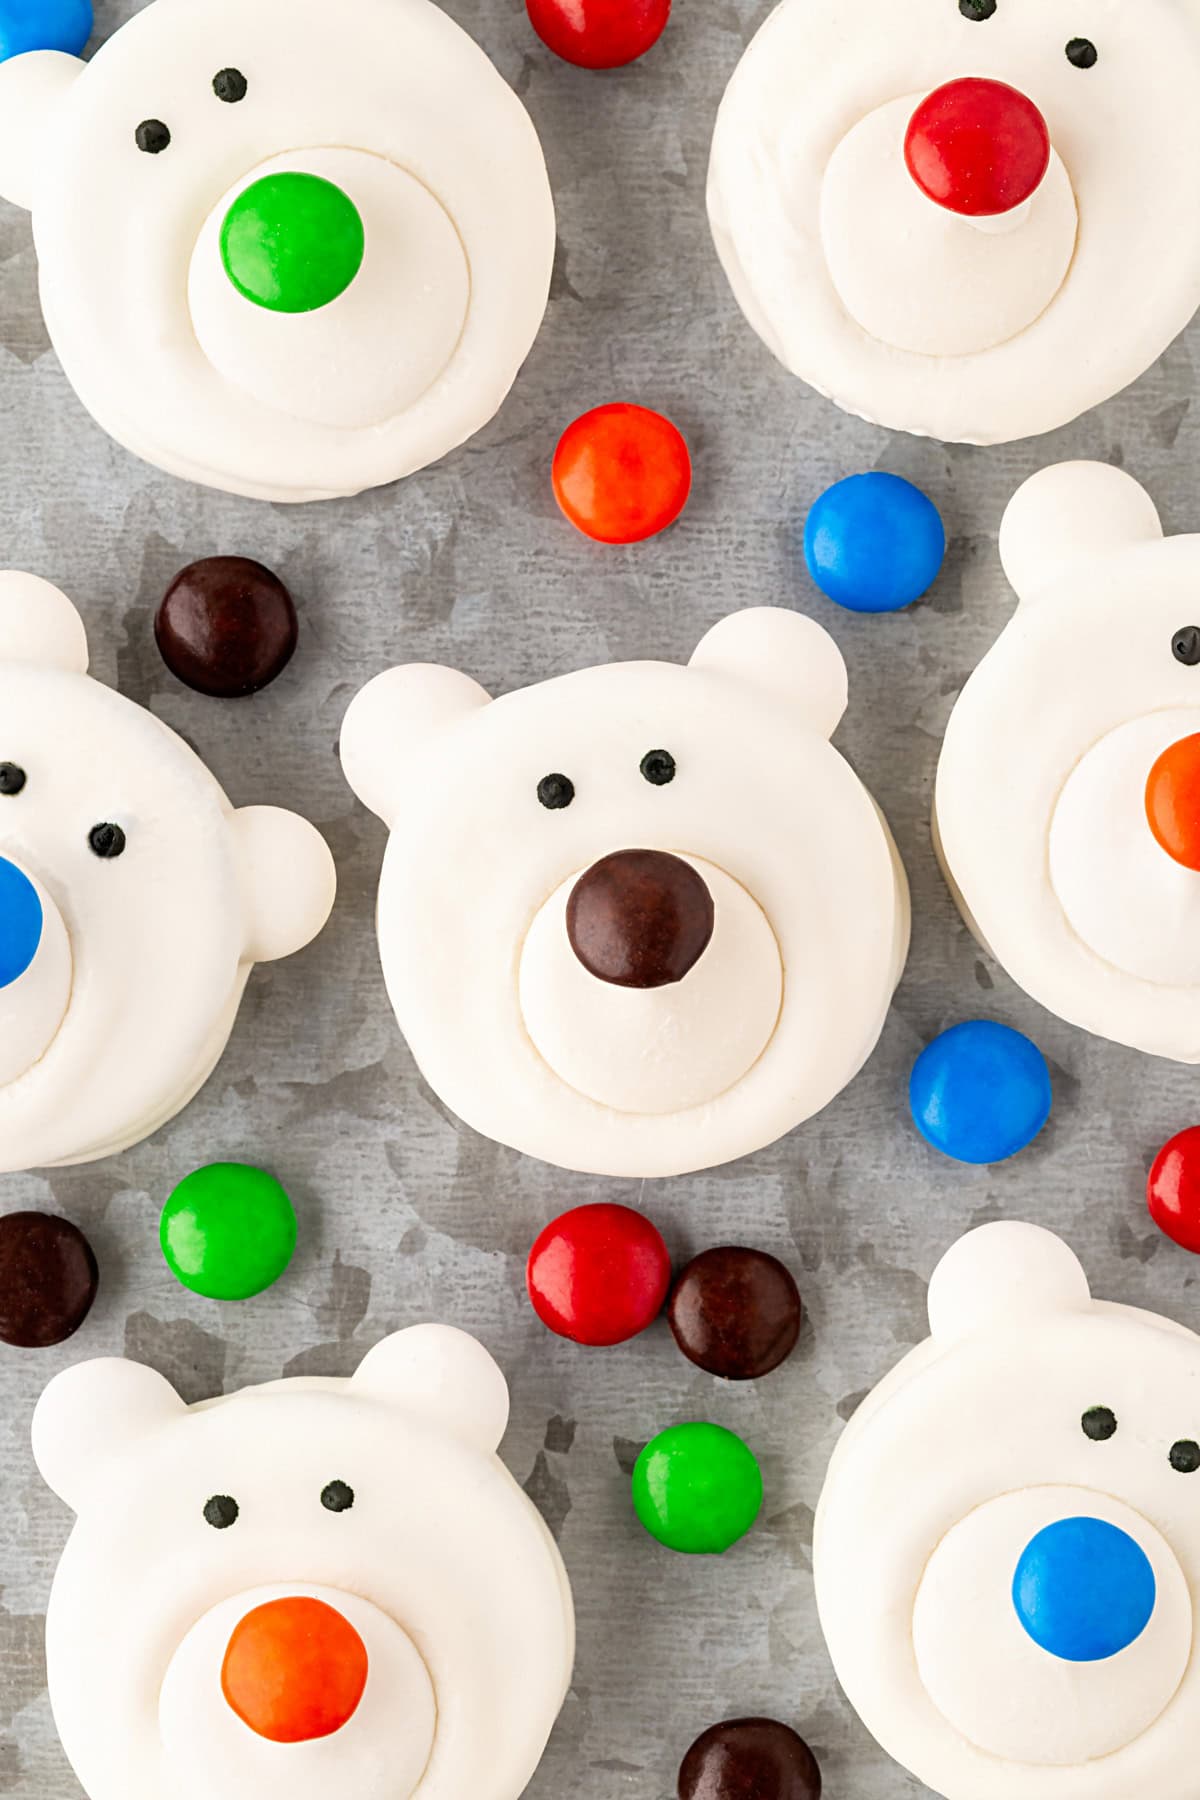
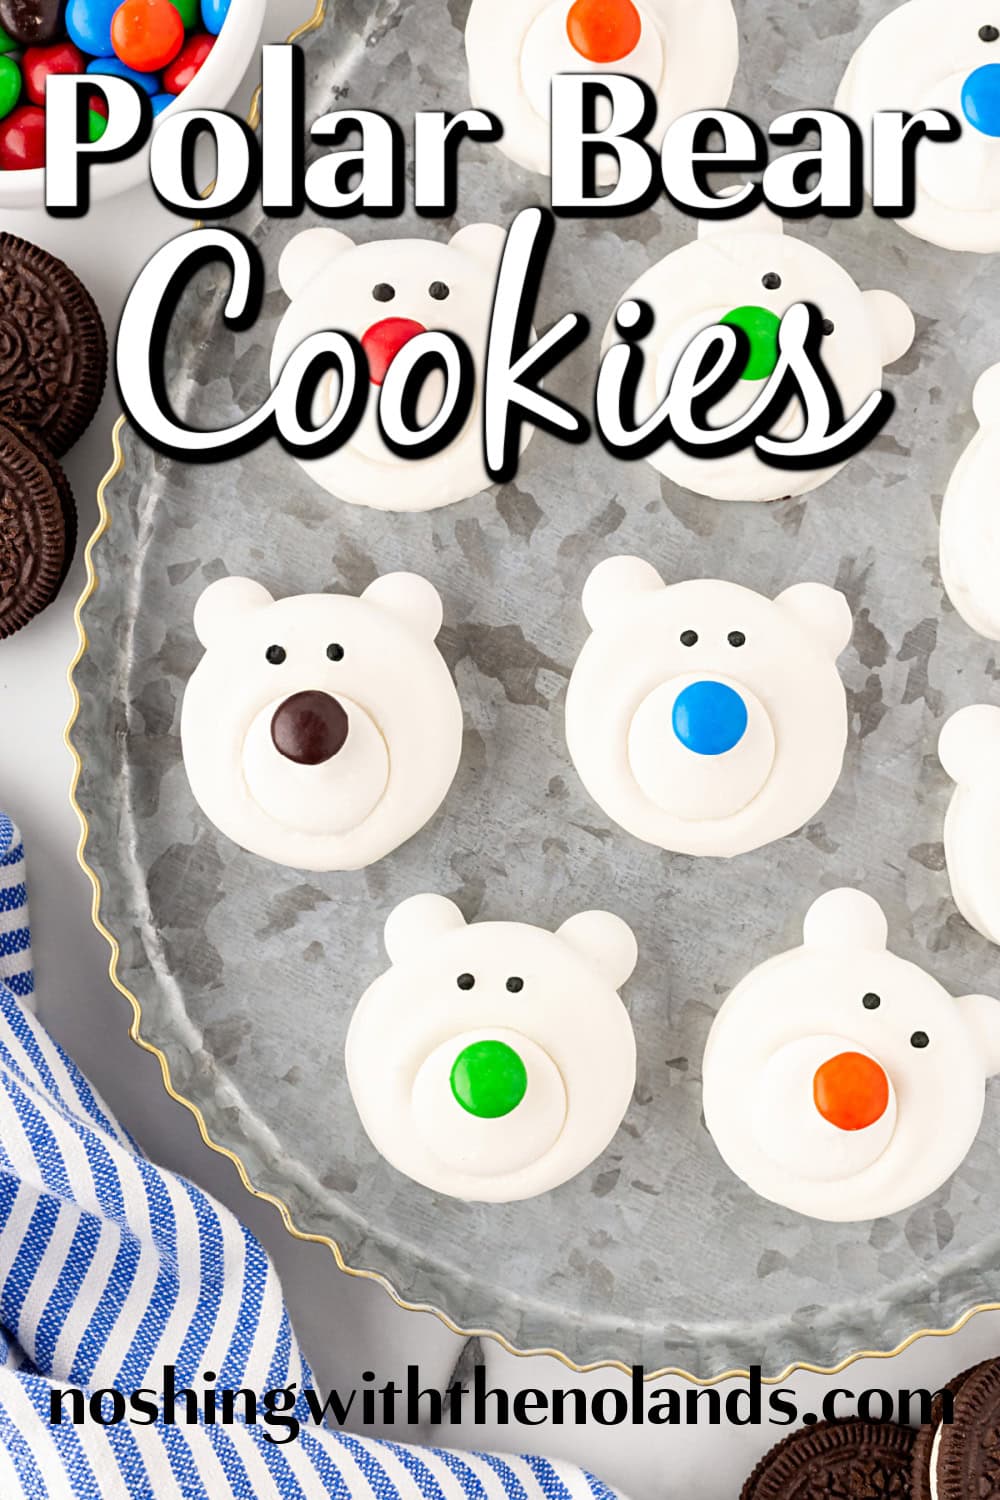
These Polar Bear Cookies are adorable and so easy to make! Oreo cookies decorated to look like sweet polar bears make the perfect winter or holiday treat. Fun for kids to craft and everyone to enjoy. Make them, along with a visit to the zoo to see a real polar bear, if you are lucky enough to have one locally.
If you would like another winter edible craft, try our fun Snowman Cake Pops or our Melted Marshmallow Snowman that is perfect for a hot cocoa topper.
Recipe adapted from Everyday Dishes.
Why I Love This Recipe
- Adorable
- Fun to make
- Easy
- Great winter edible craft
- Easy to find ingredients
Helpful Items for This Recipe
This post contains affiliate links. As an Amazon Associate, I earn a small portion from qualifying purchases at no extra charge to you.
Wilton White Candy Melts® Candy, 12 oz.
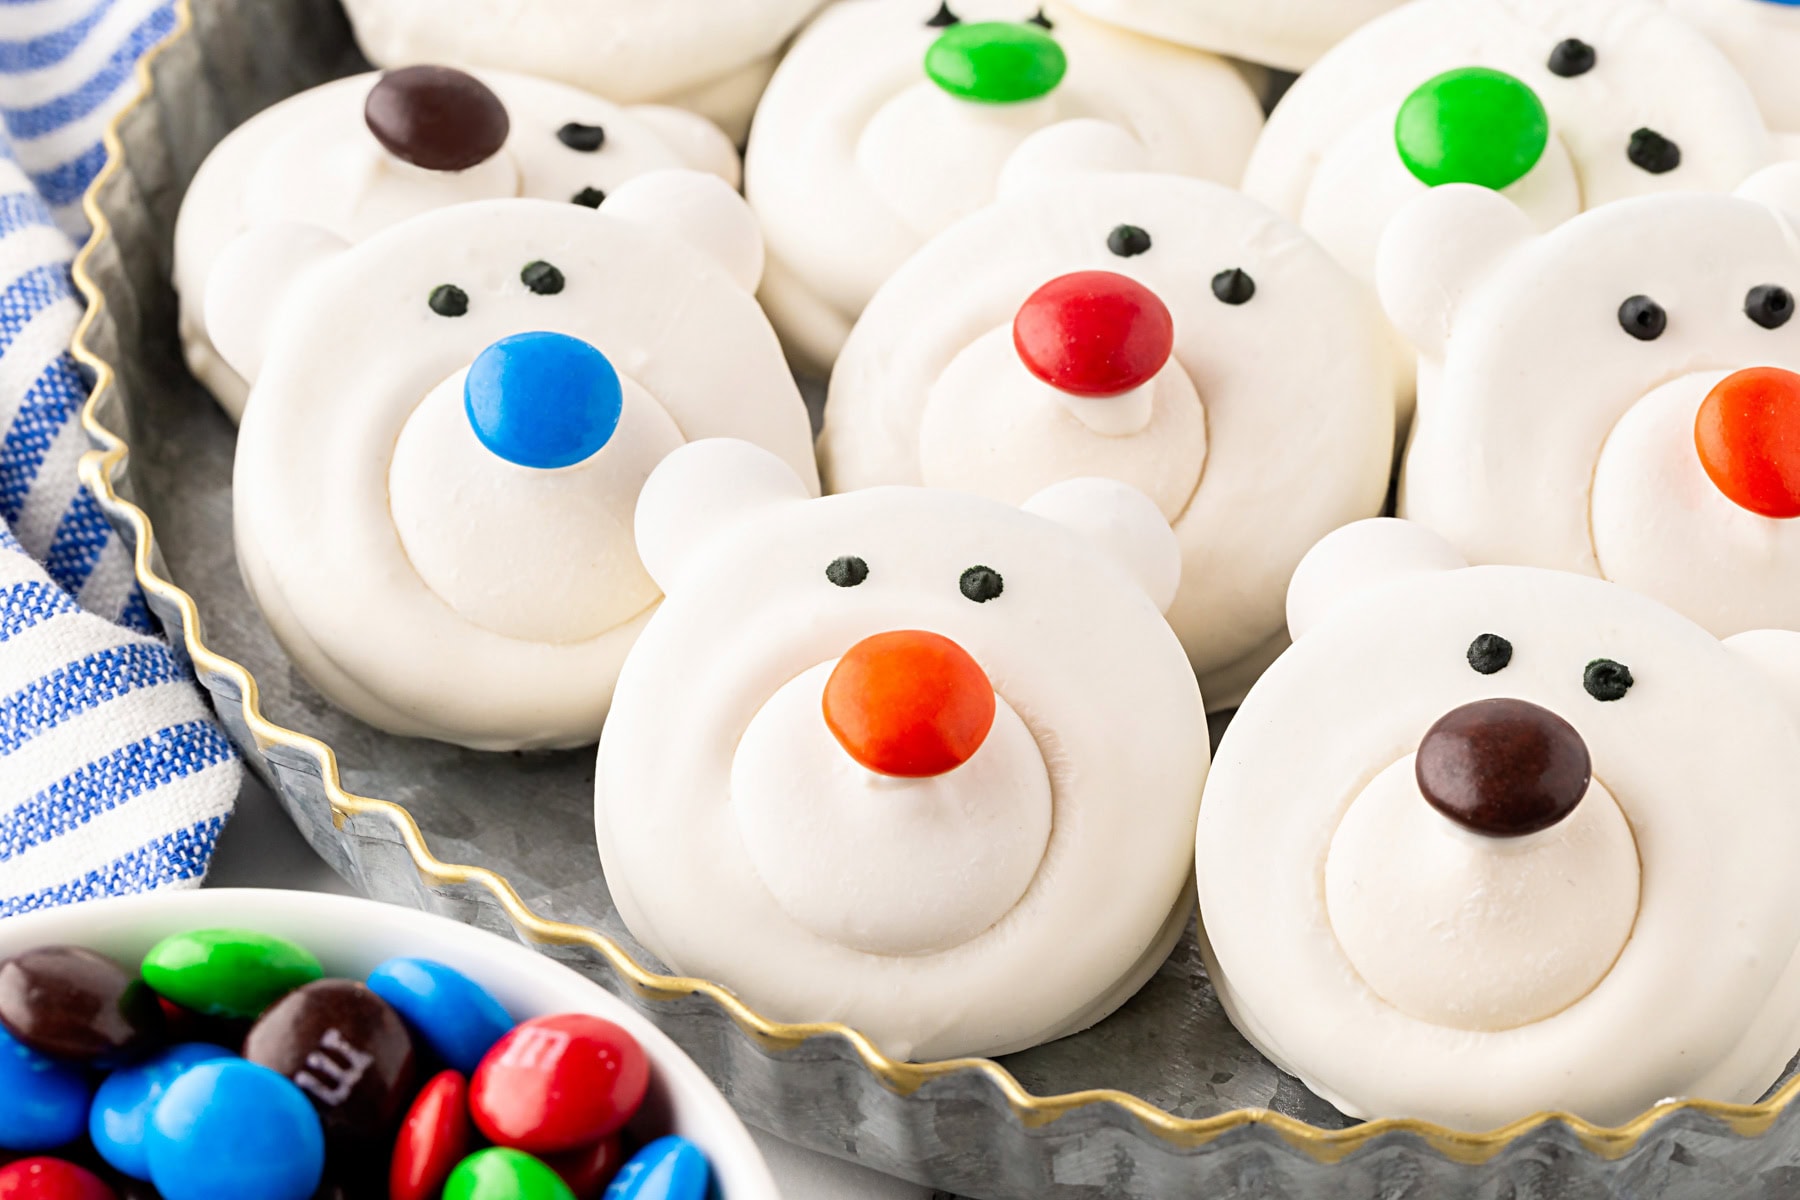
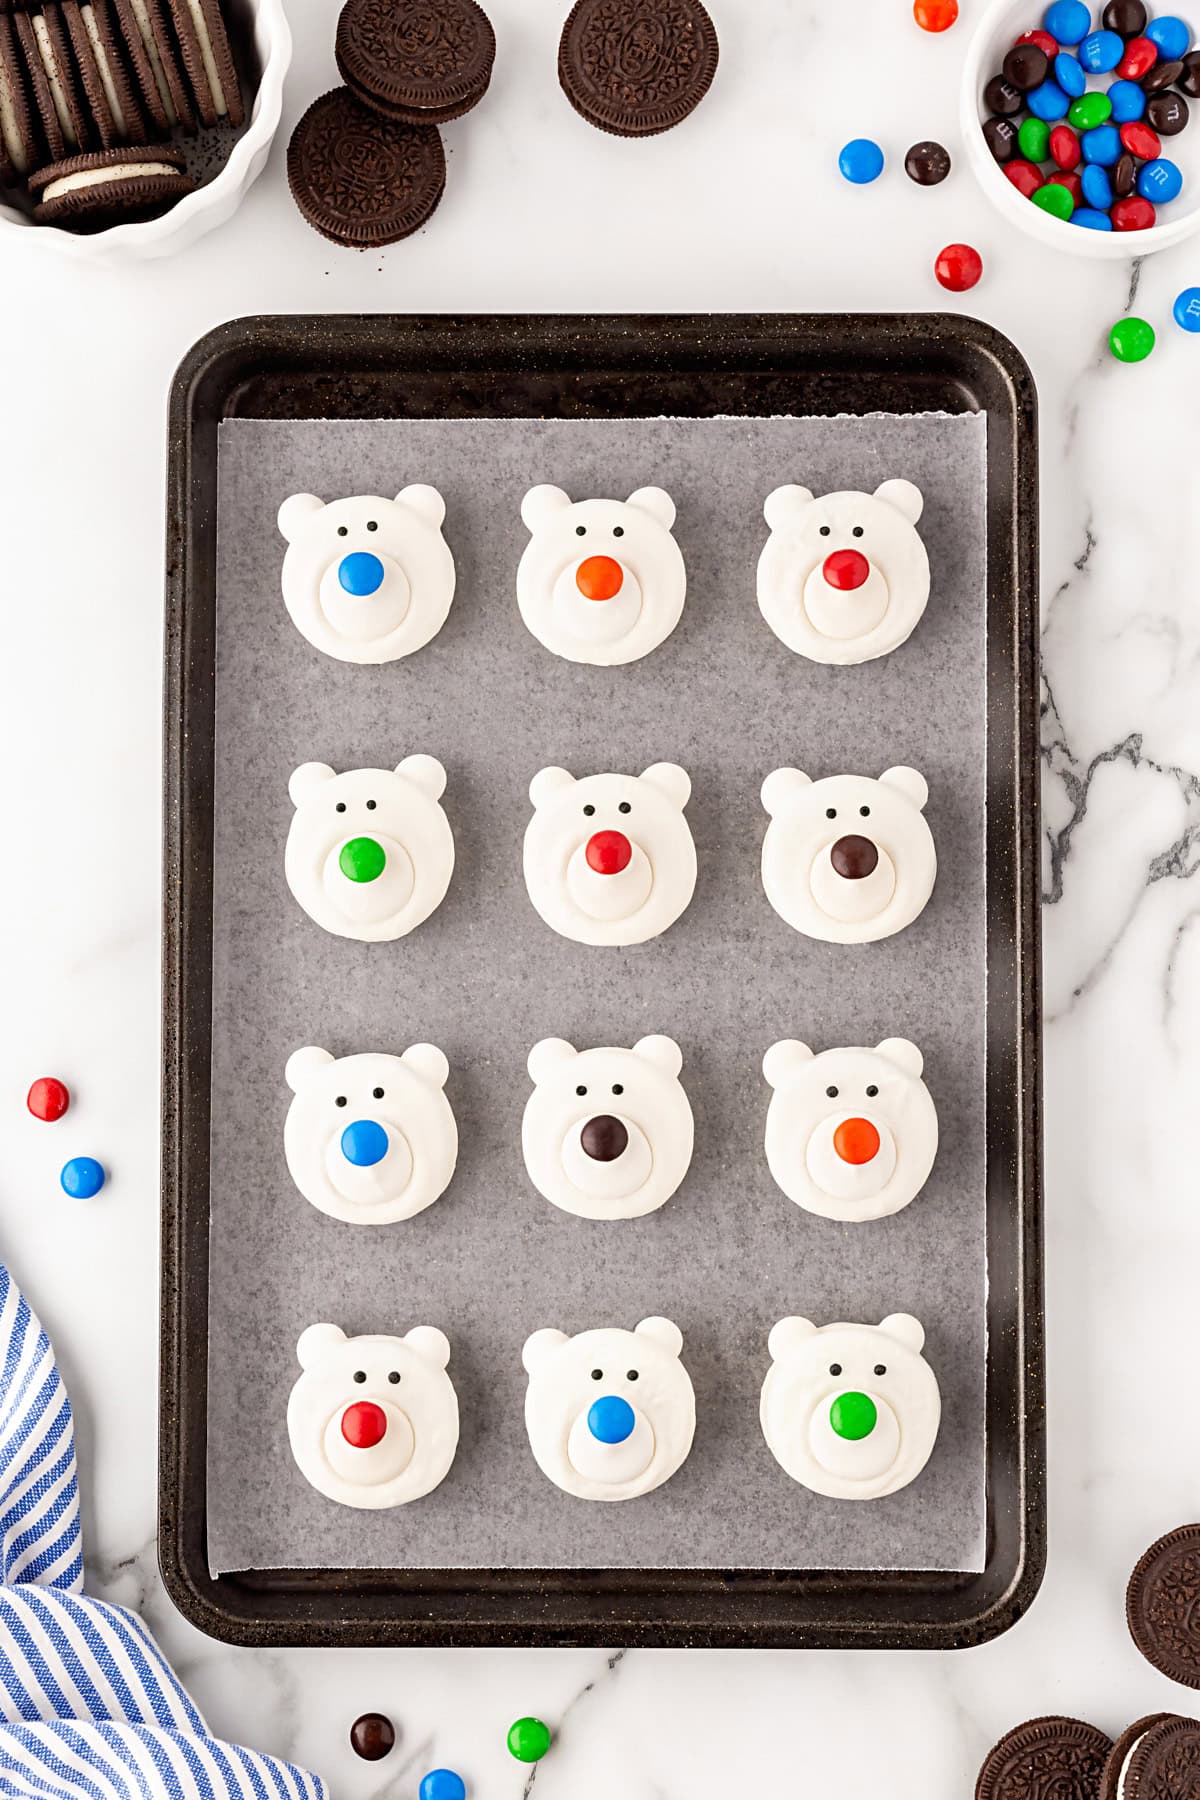
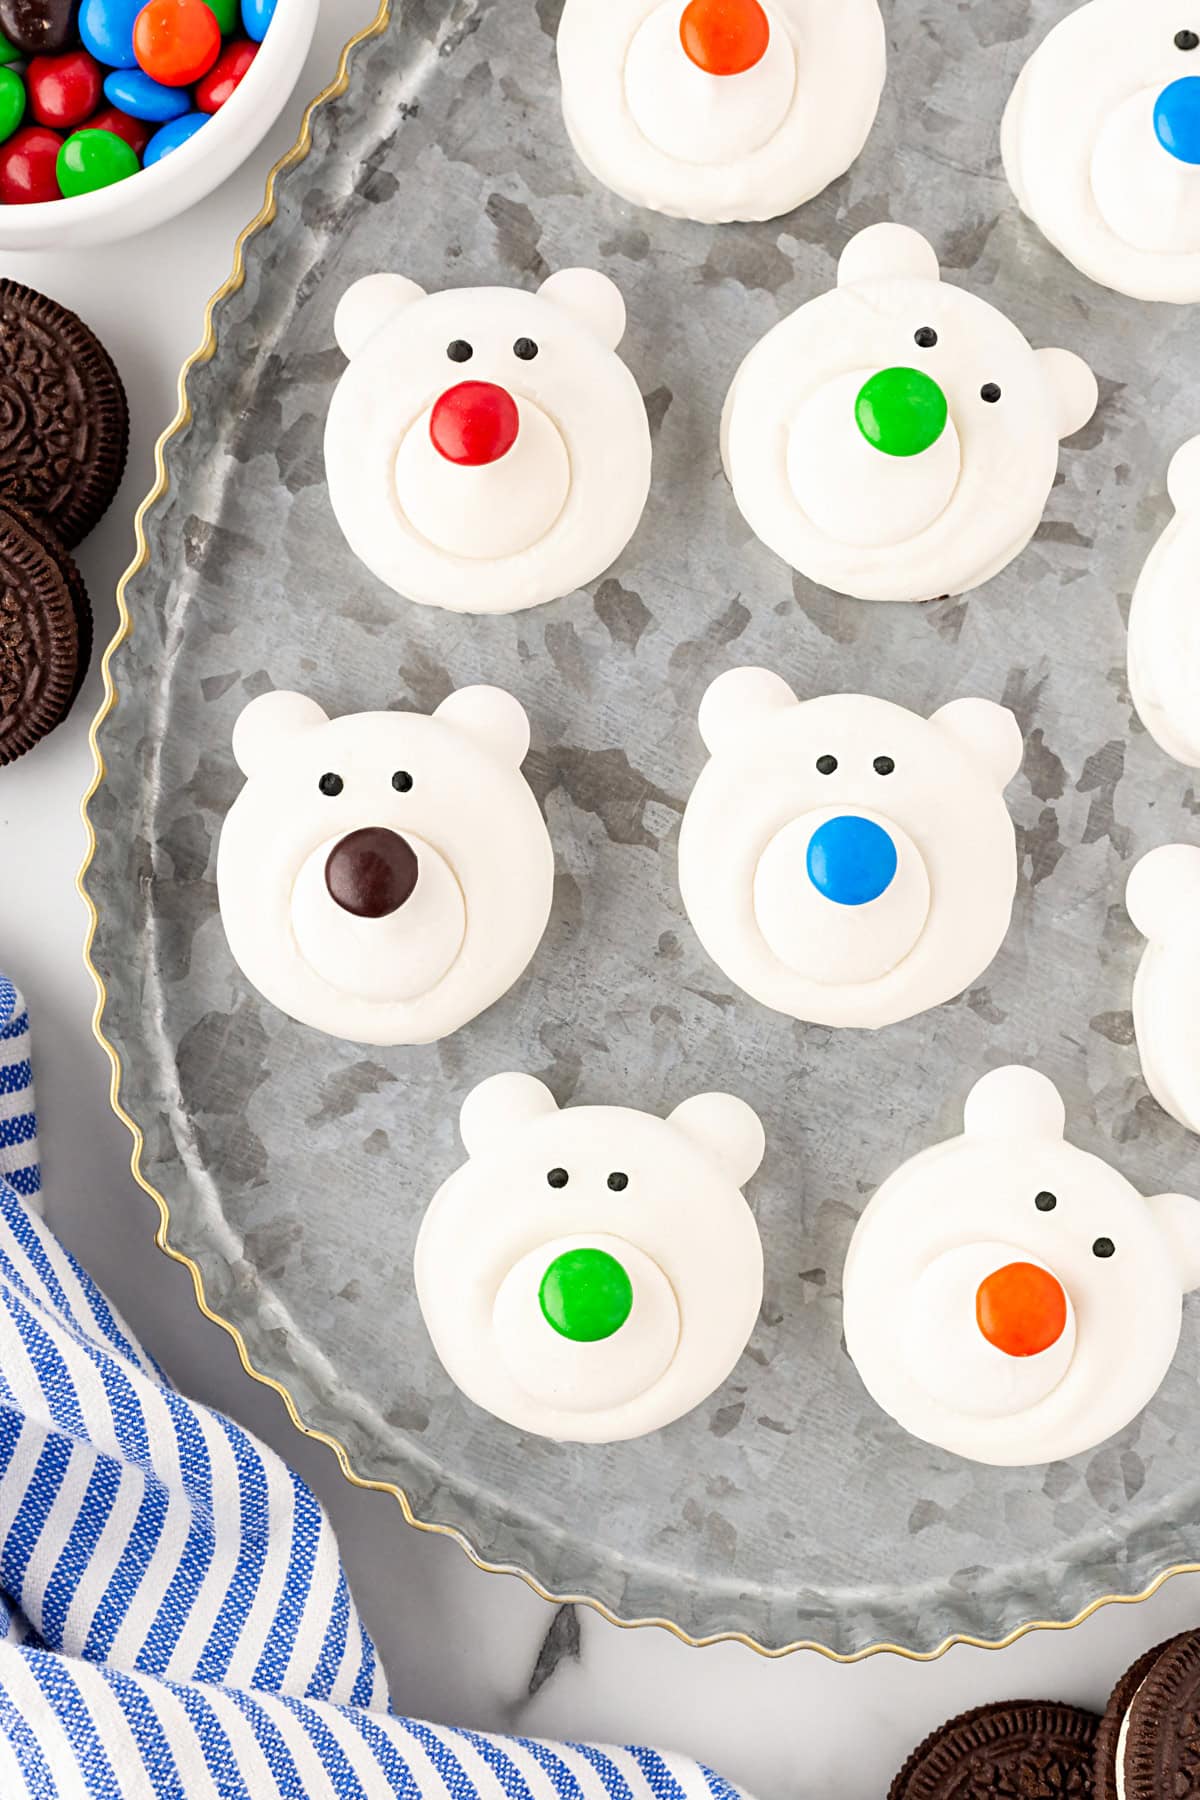
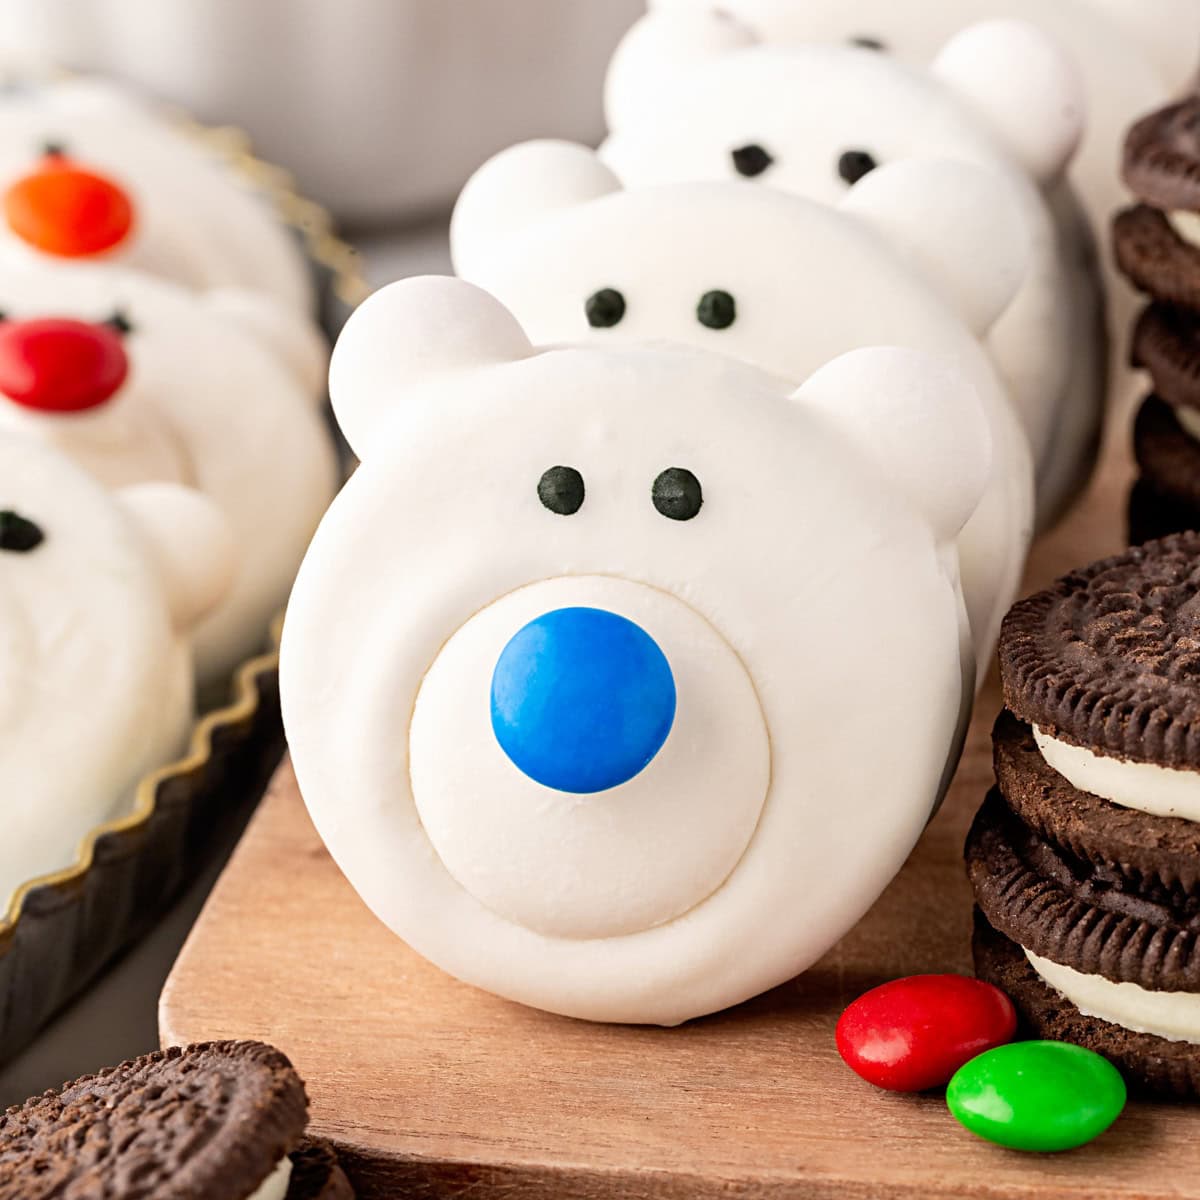
Aren’t they adorable? You don’t have to make many of these to liven up your day. They are pretty sweet anyway, so the kids will be after them for sure. The recipe makes 12, which I think is just the right amount.
What are the Ingredients for Polar Bear Cookies?
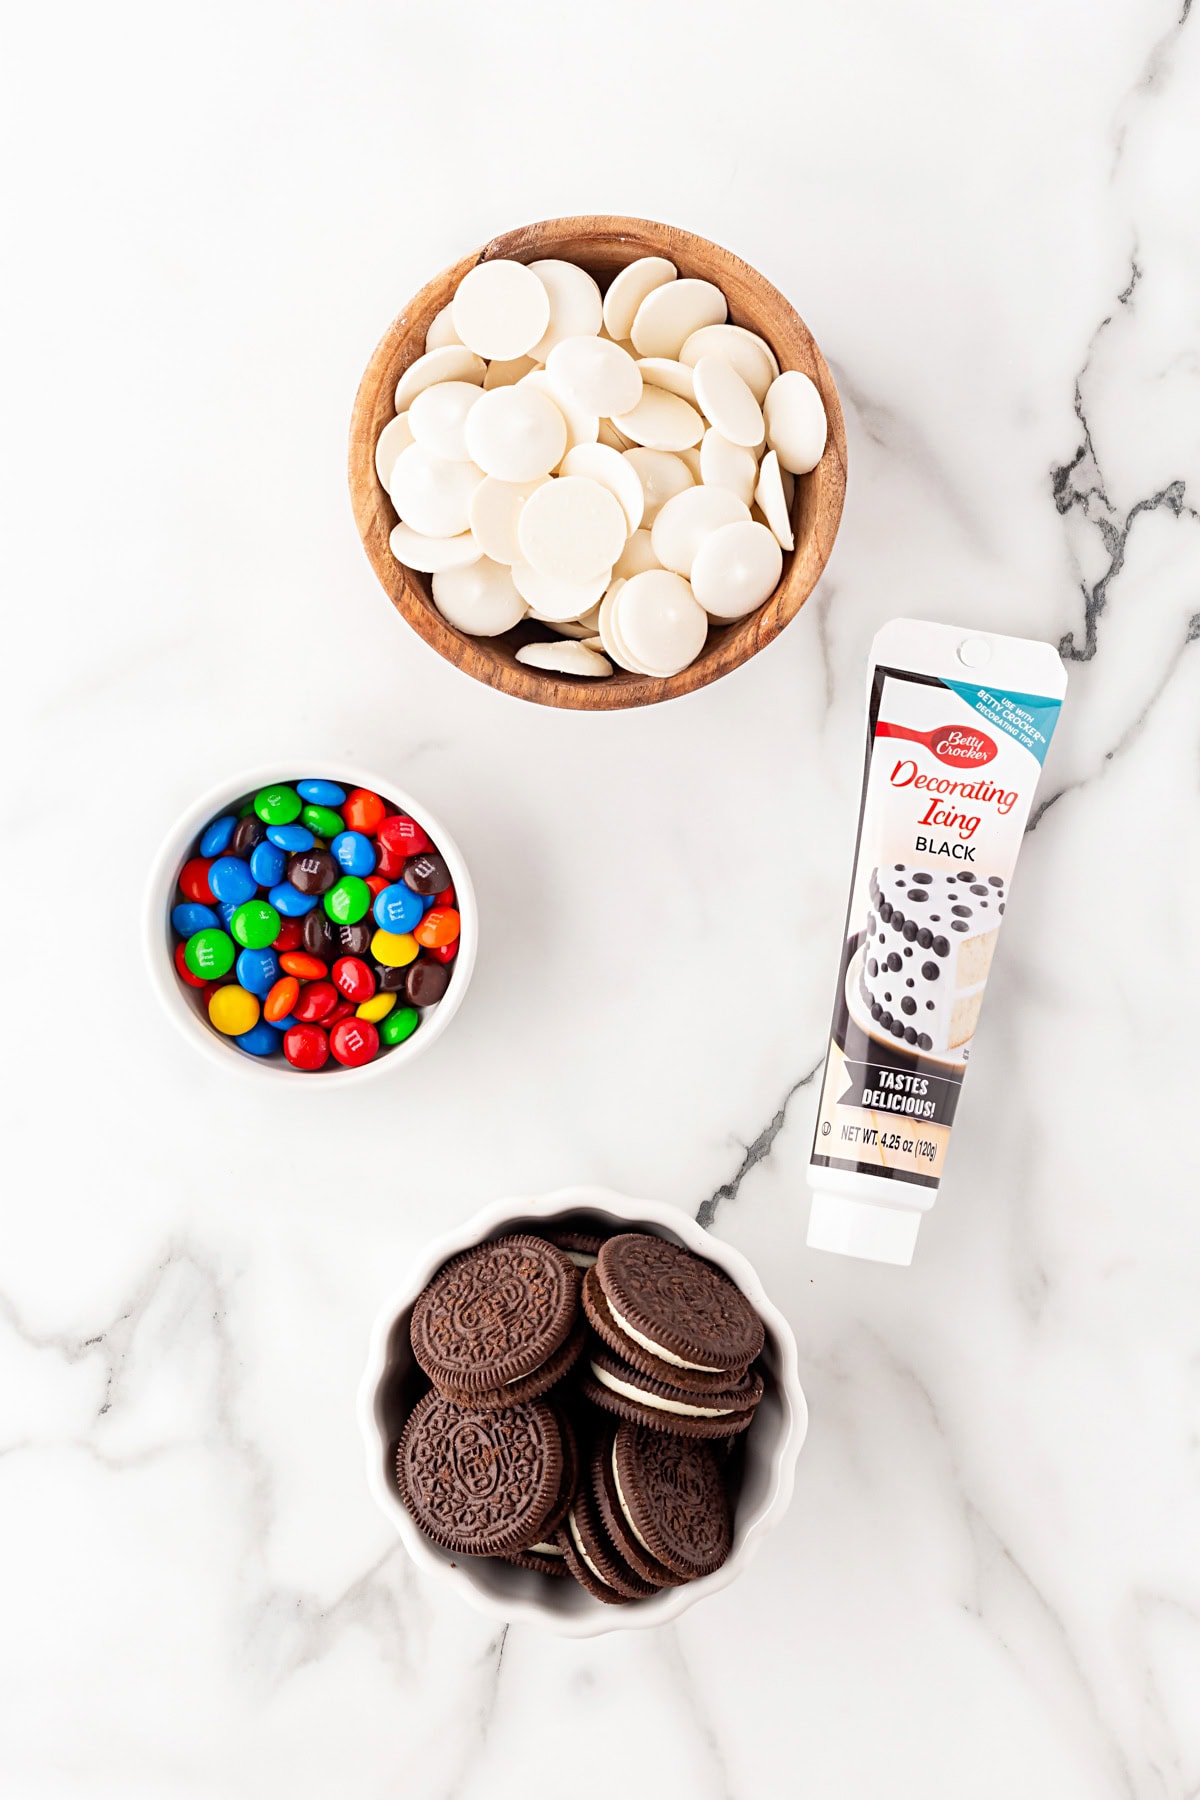
Ingredients
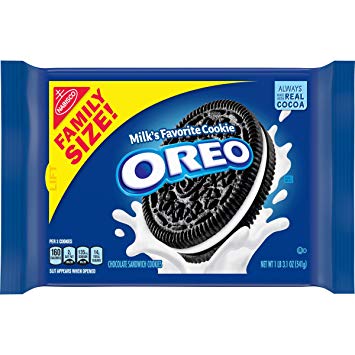
Double stuffed sandwich cookies – The brand name for these is Oreos, but other sandwich cookies would work too. I like to use the double stuffed.
Different colored candy coated chocolates – In Canada, these are Smarties; in the US, M&M’s work.
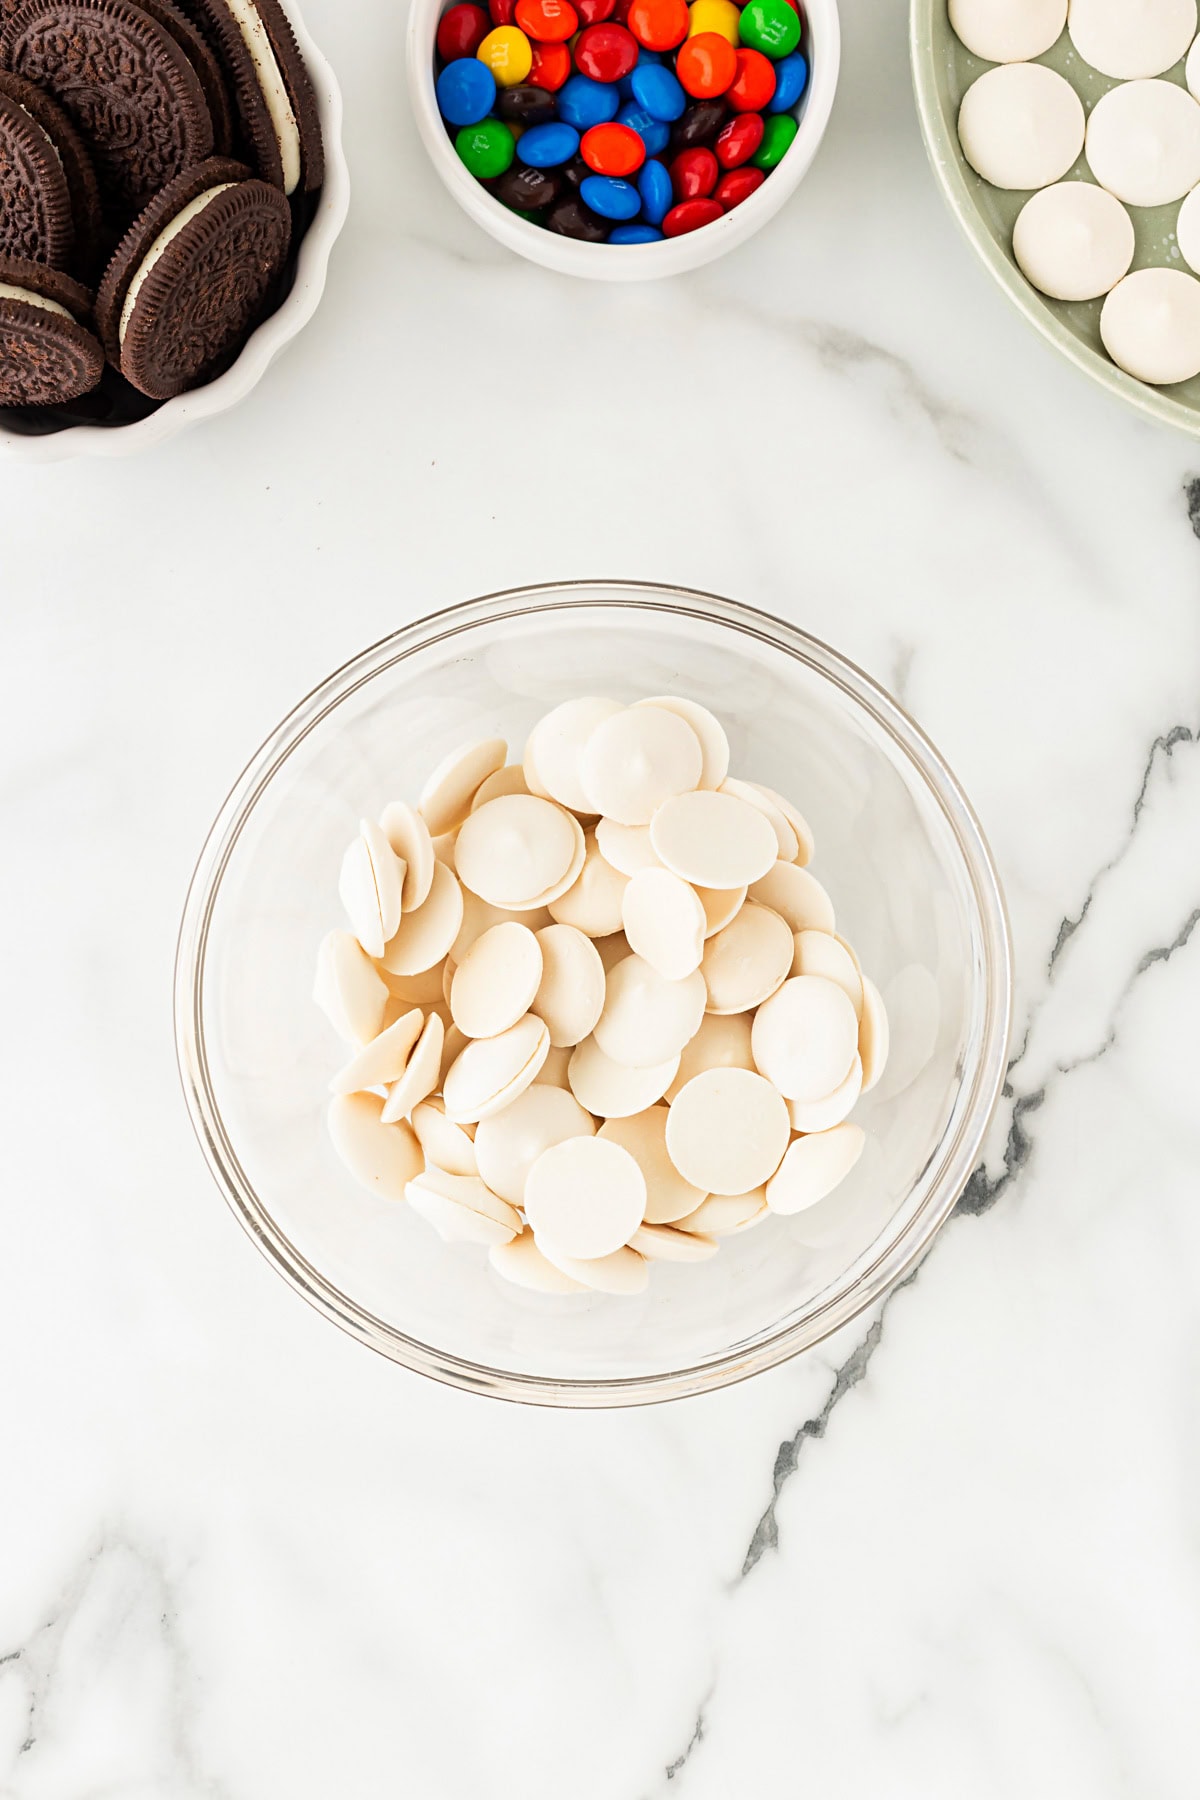
Bag white candy melts – Found at most craft stores or online.
Black icing – This is found in a tube, and I like it better than the gel, as the gel doesn’t dry.
How to Make These Polar Bear Cookies
Lay out a sheet of parchment or wax paper to lay the cookies on once dipped.
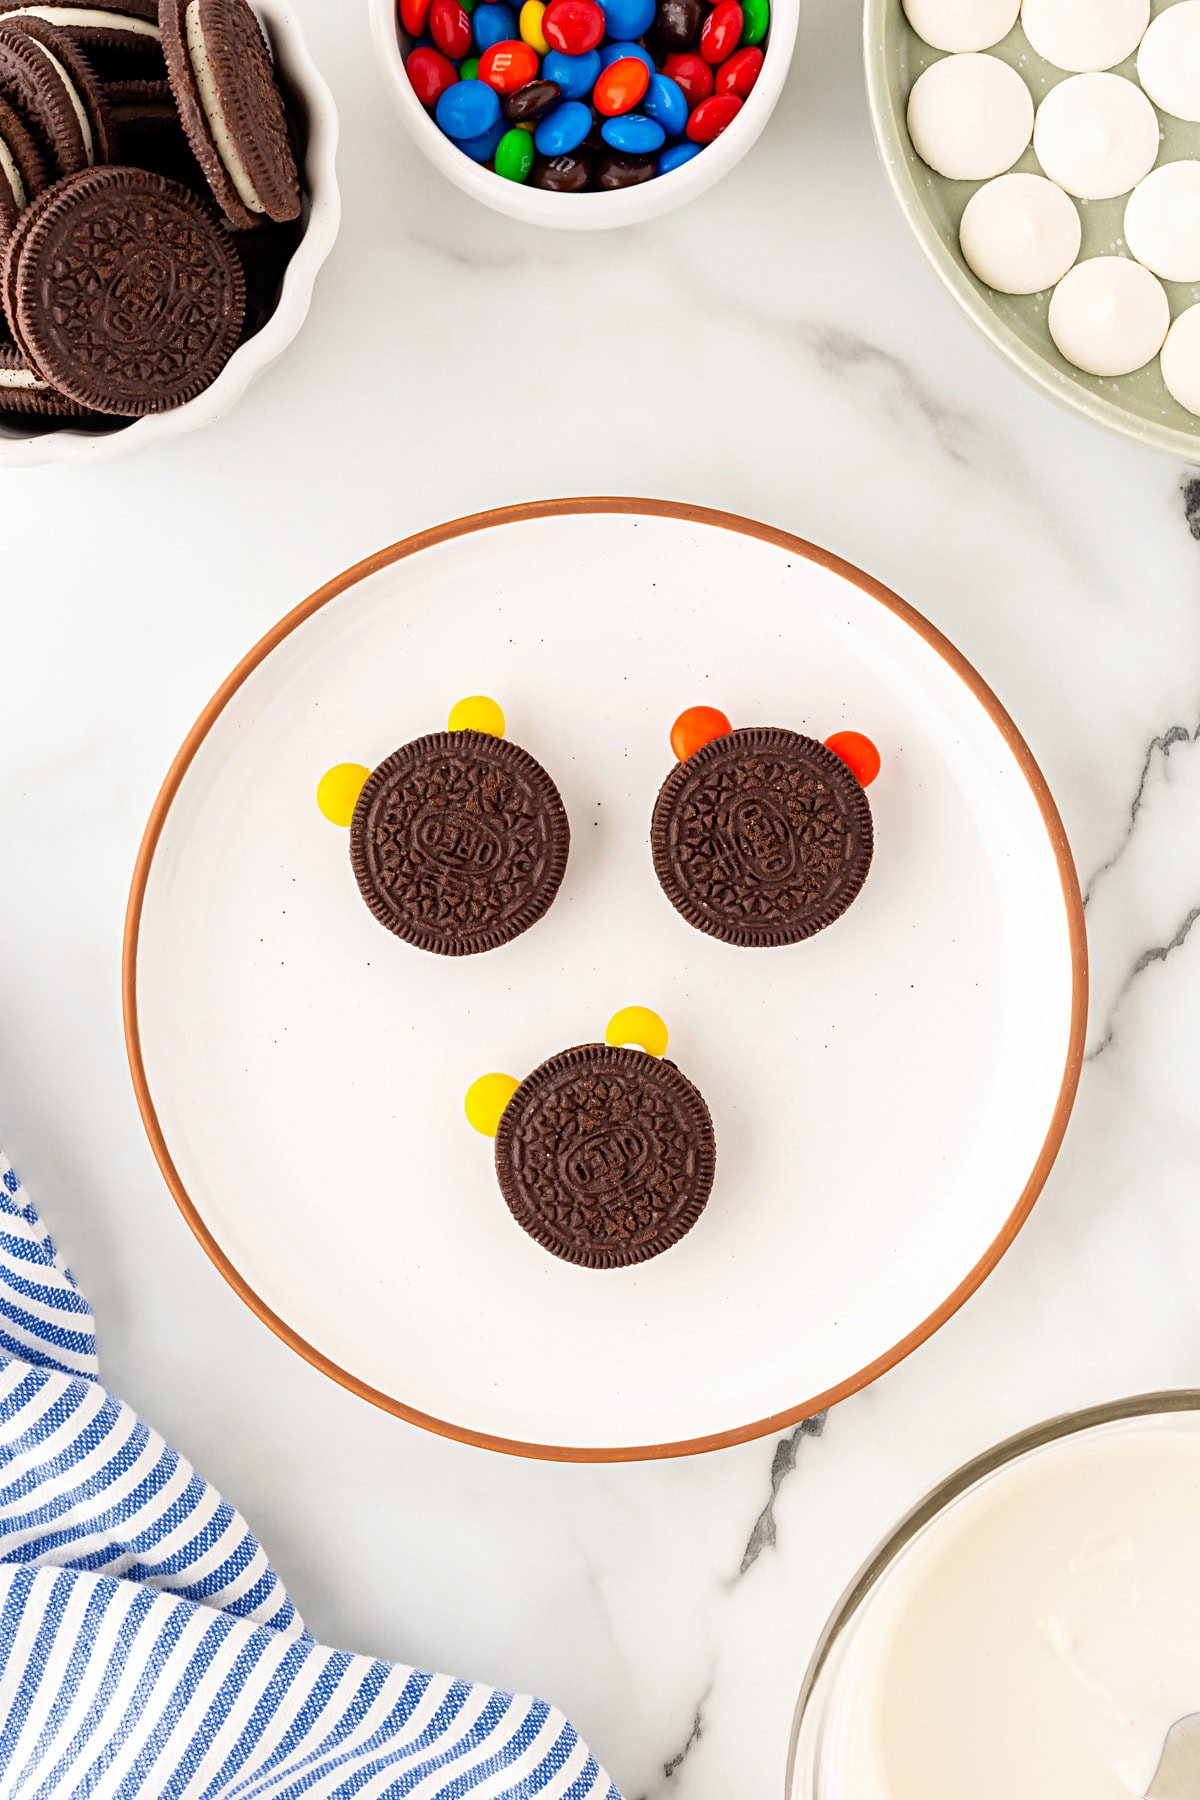
Choose lighter coloured candy coated chocolates for the ears and fun brighter, blue, brown, red and purple for the noses.
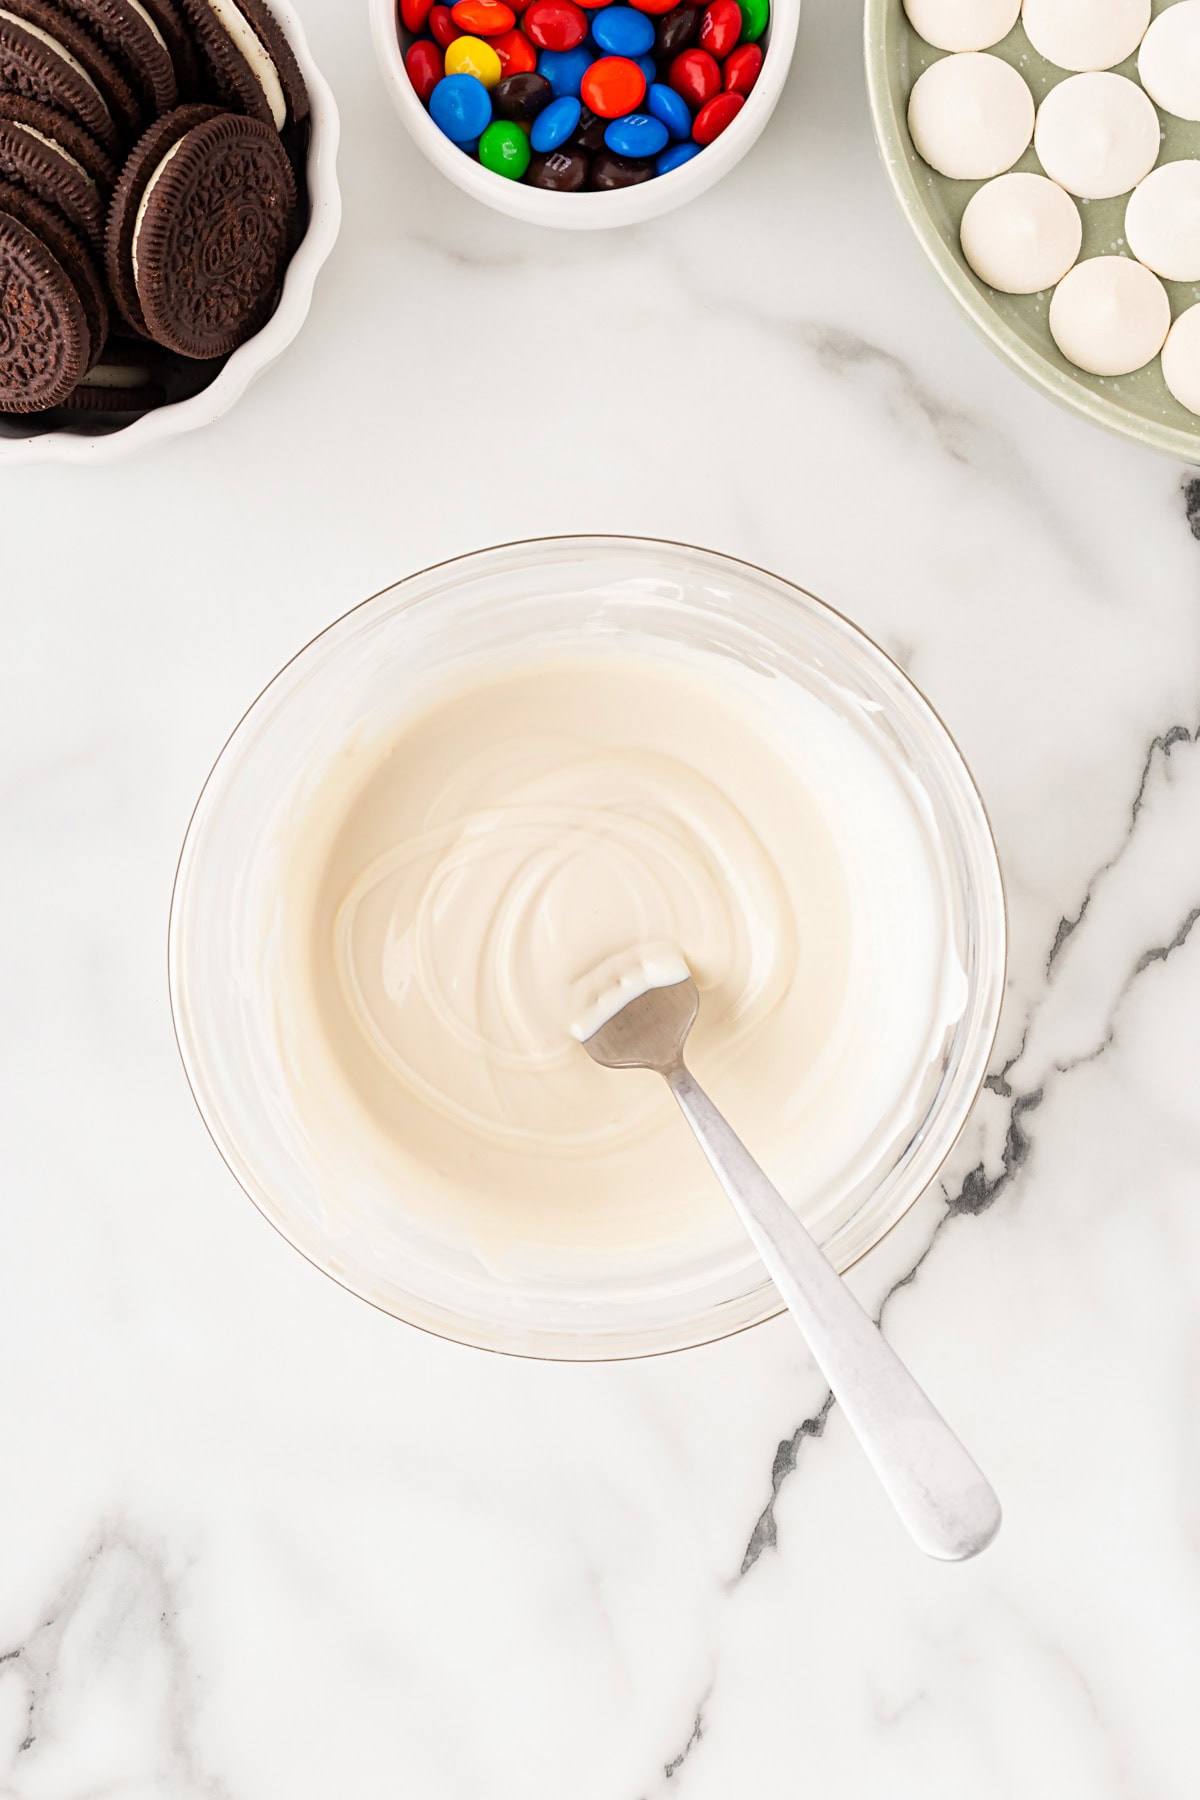
Select 12 nice looking white candy melts for the muzzle and set aside. Melt the rest of the package.
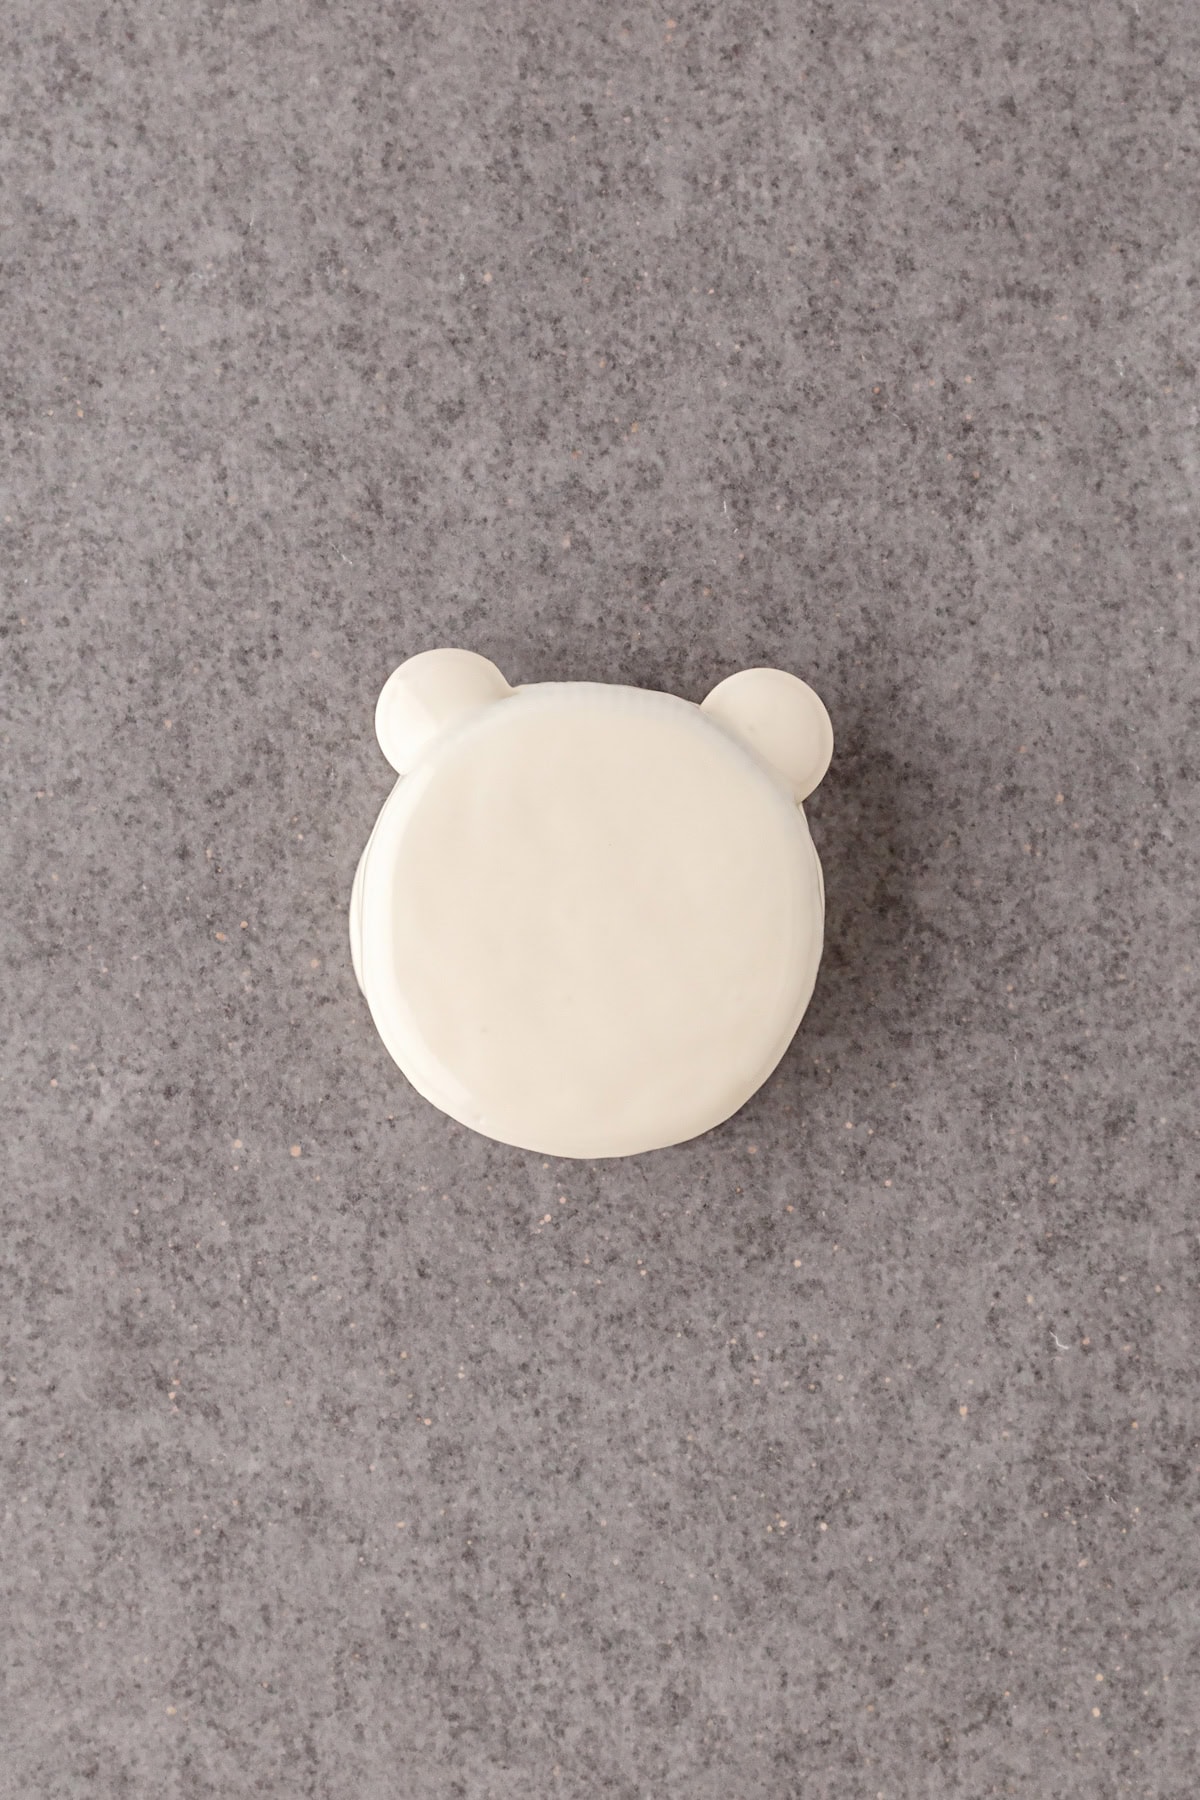
Slide the “ears” into place between the cookies, into the filling, and dip the cookies in the melted white candy. Using a fork, lift the cookie out and gently bang the side of the bowl to remove excess chocolate. Lay the cookie on the parchment.
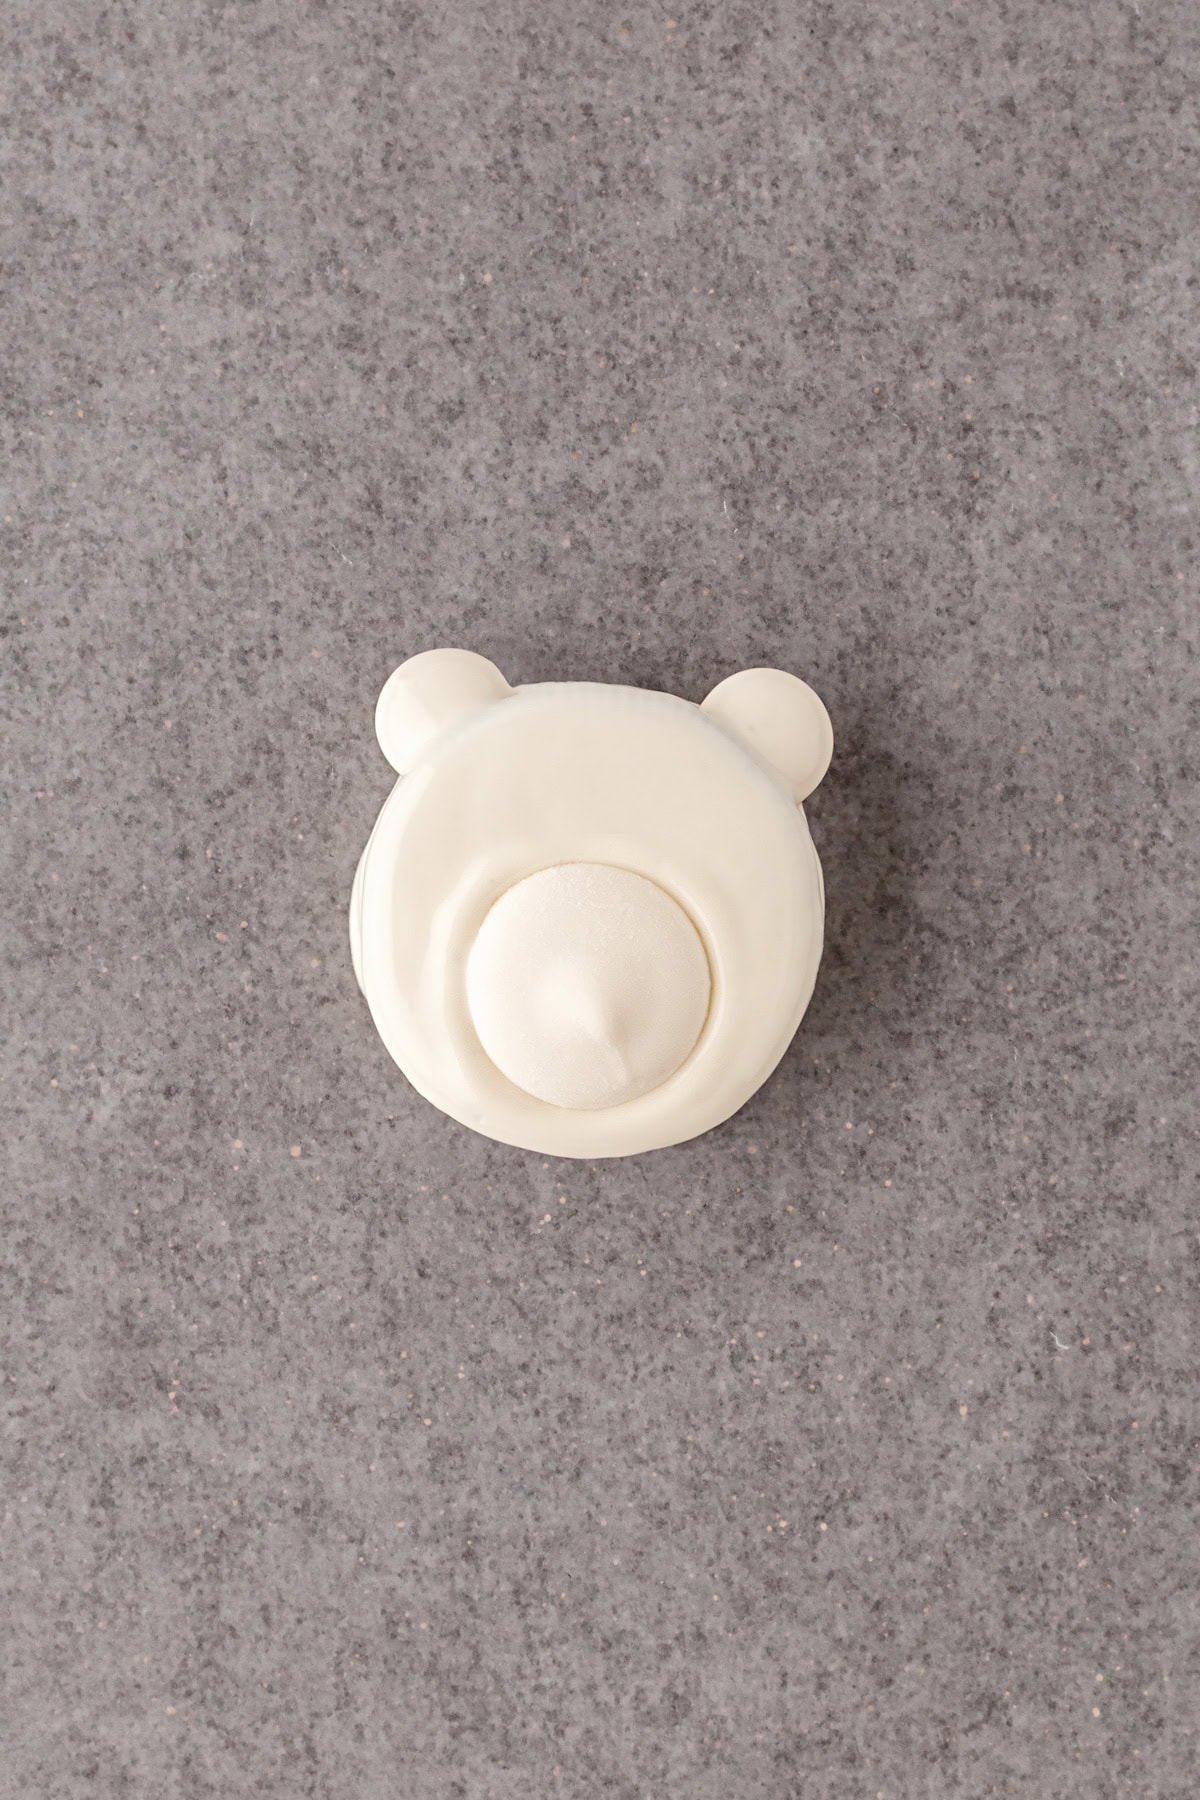
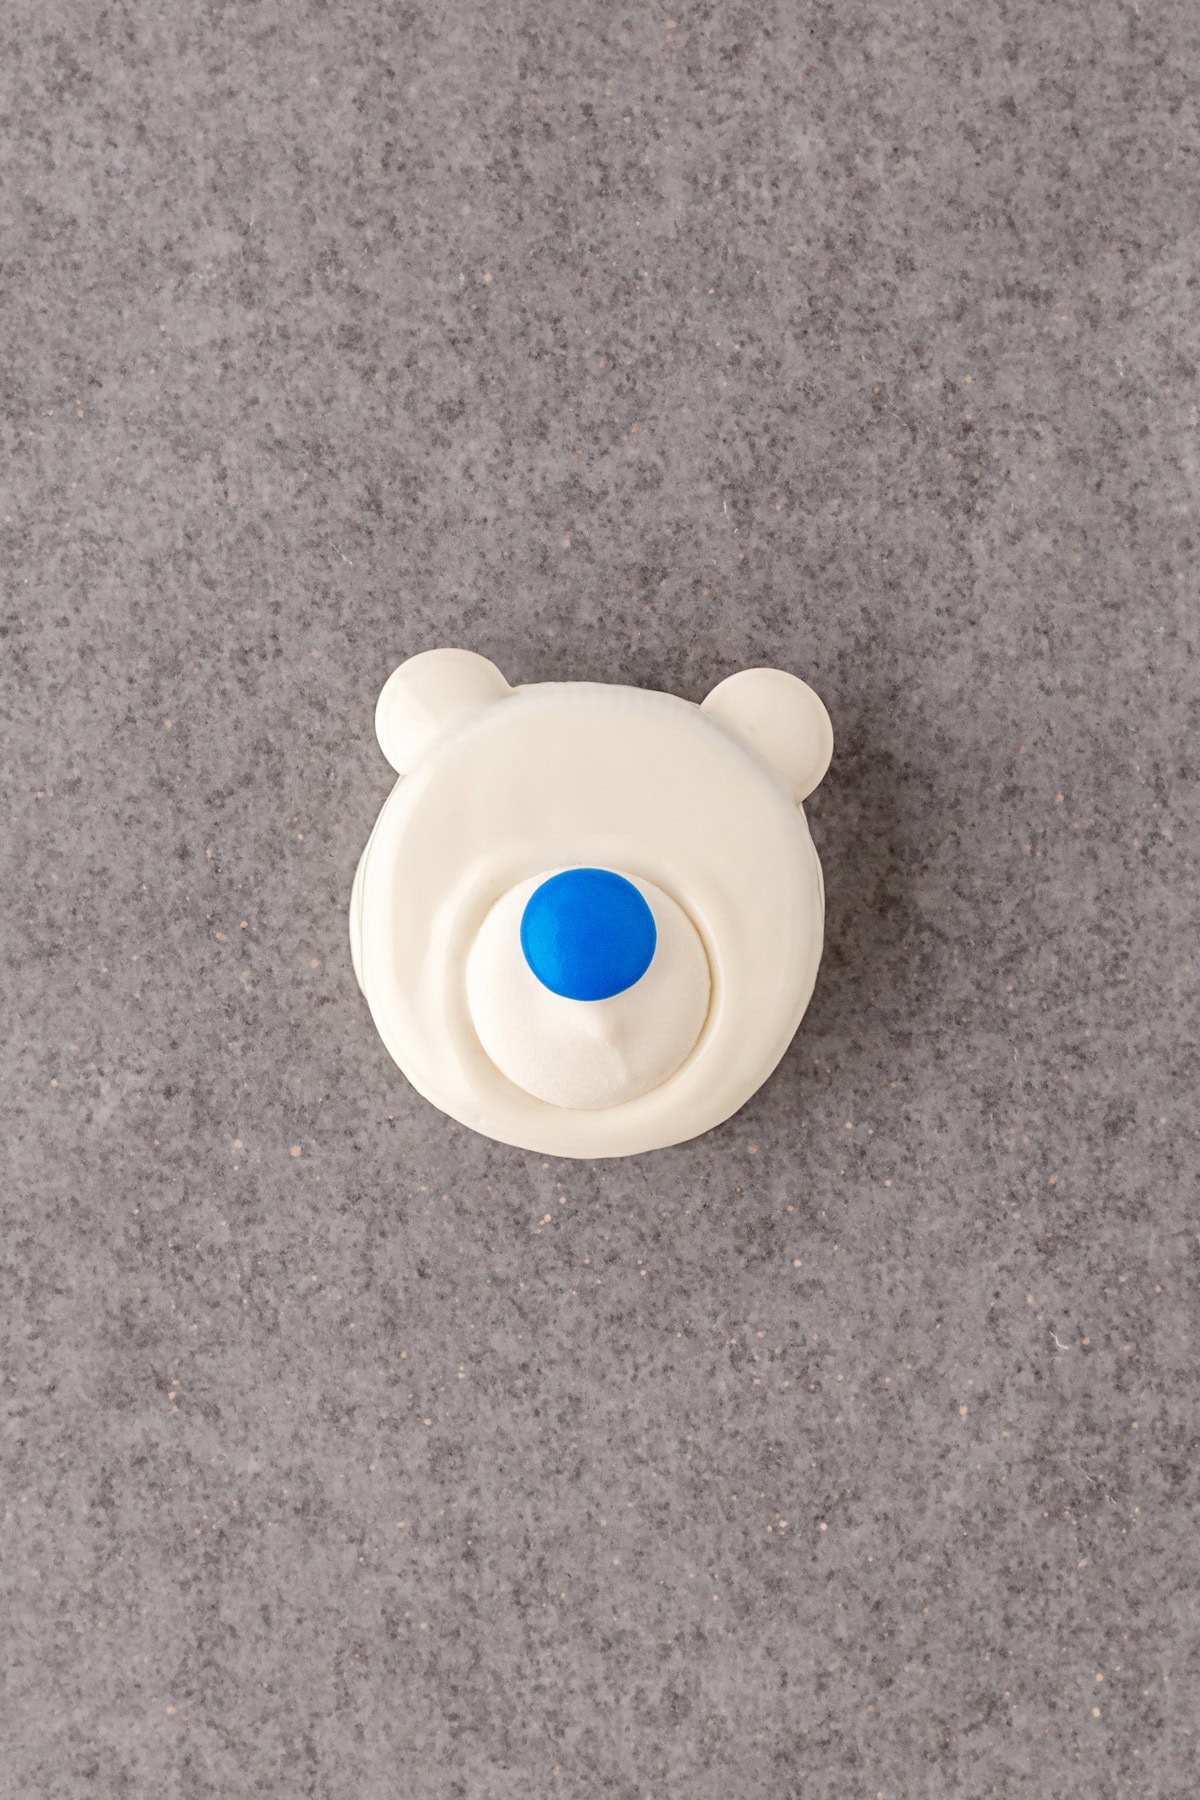
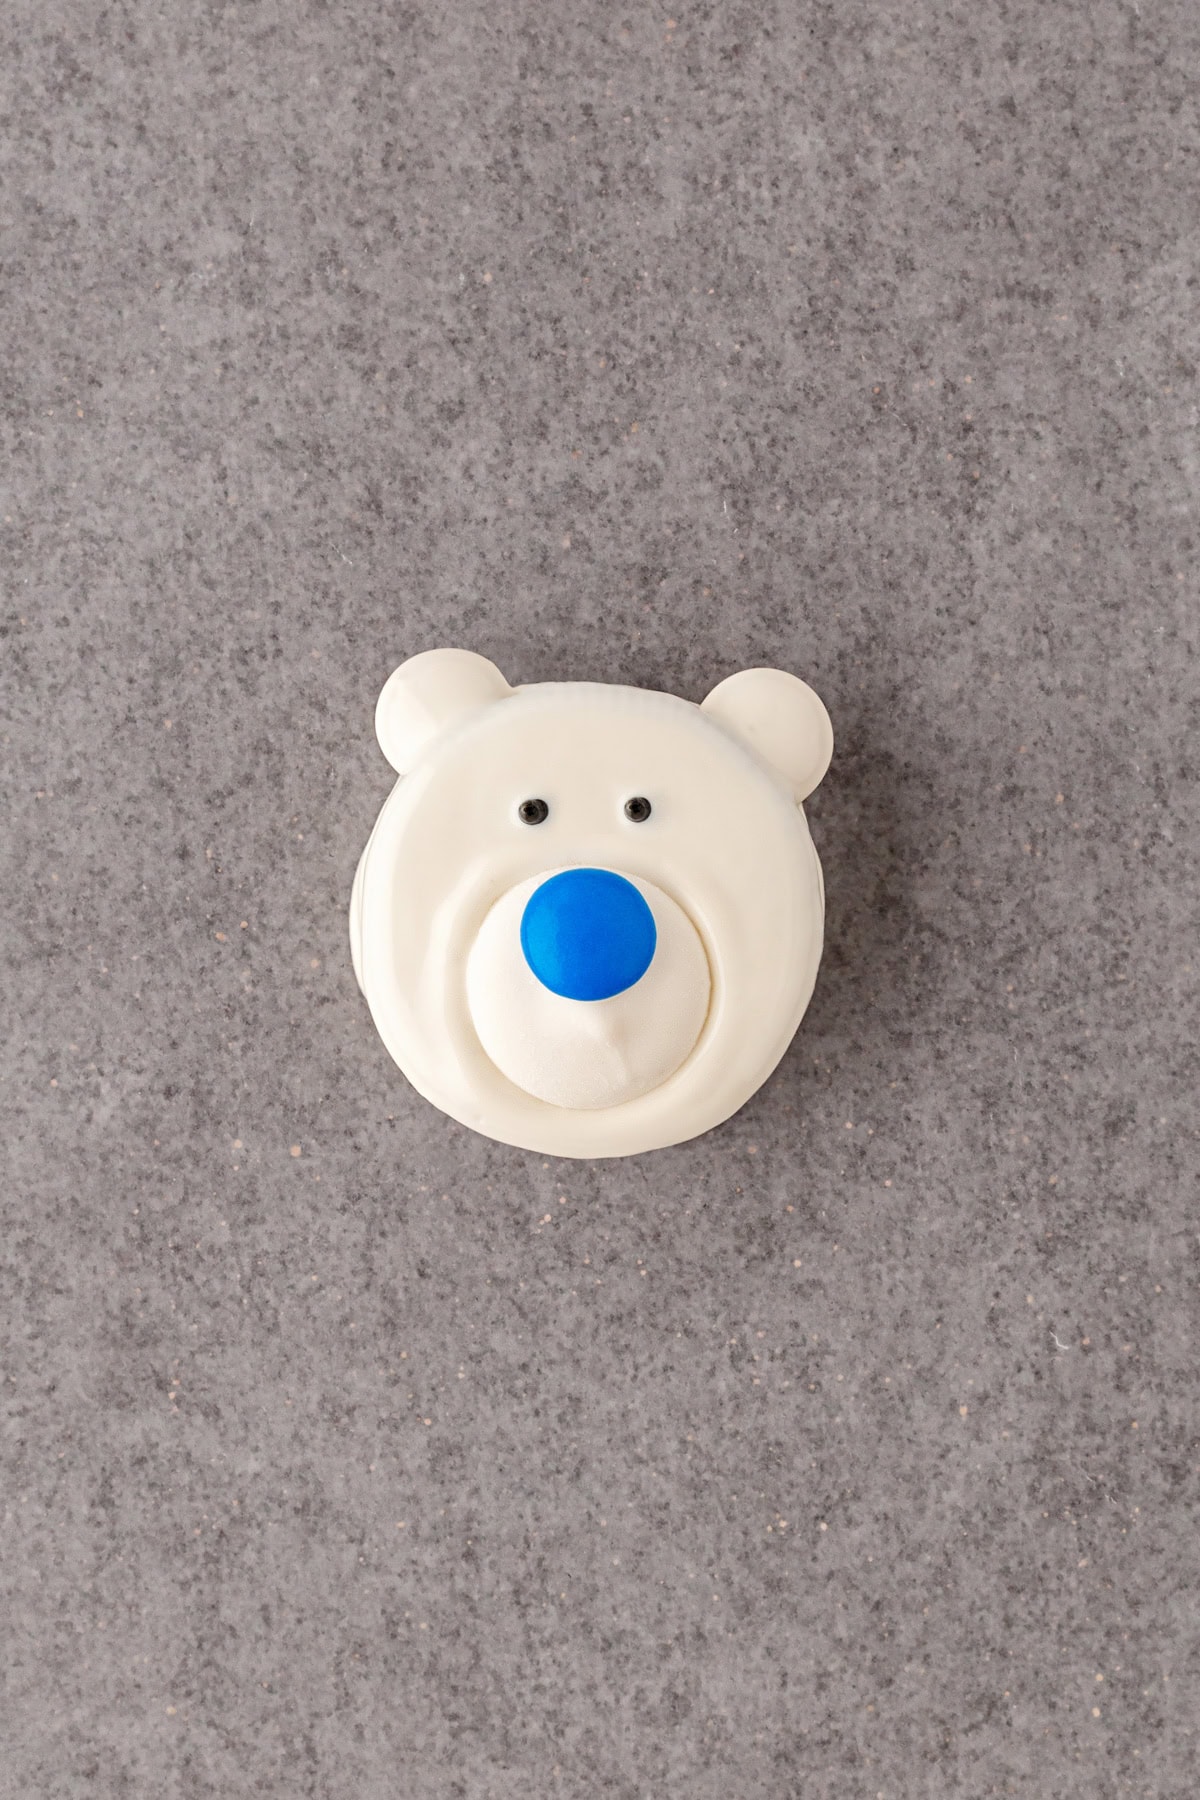
Place the candy melt on as the muzzle and press in gently to form a ridge around the muzzle. Paint a small amount of the white chocolate candy melts onto the “nose” and place it higher up on the muzzle.
When the cookies are dried, use the black icing to dot on the eyes. Let dry completely before storing in a sealed container.
Recipe Pro Tips

Tips for Making the Best Polar Bear Cookies
1. Choose a Solid Cookie Base
- Sandwich cookies, shortbread, or cereal treats work best.
- Avoid crumbly cookies — you want a sturdy “bear face.”
2. Use Candy Melts (Not Just Chocolate)
- White candy melts set firmer and smoother than white chocolate chips.
- If using white chocolate, add ½ tsp coconut oil per cup to thin.
3. Dip, Don’t Dunk
- Spoon melted coating over the cookie or dip halfway.
- Let excess drip off to avoid thick, uneven coats.
4. Add the Face While It’s Wet
- Place the muzzle immediately after coating.
- Once the coating sets, candy won’t stick.
5. Keep Decorations Simple
- Icing for eyes
- Brown M&M or get creative with color = nose
- Mini marshmallows or candy coated chocolate = ears
Simple = cuter (and faster).
6. Use Parchment Paper
- Prevents sticking and makes cleanup easy.
- Slide the whole sheet into the fridge if needed.
7. Chill Briefly, Not Too Long
- 10–15 minutes in the fridge is perfect.
- Too long = condensation when they come out.
8. Work in Small Batches
- Melt small amounts so the coating doesn’t thicken before you’re done.
- Rewarm gently in short bursts if needed.
9. Kid-Friendly Assembly Trick
- Let adults handle dipping.
- Let kids add faces — fun, less mess, and adorable results.
10. Storage Tip
- Store in a cool, dry place in a single layer.
- If stacking, separate with parchment.


Polar Bear Cookies Recipe
Video
Ingredients
- 12 double stuffed sandwich cookies
- 36 different coloured candy coated chocolates
- 16 oz. bag white candy melts
- 1 tube black icing
Instructions
- Lay out a sheet of parchment or wax paper to lay the cookies on once dipped.
- Choose lighter coloured candy coated chocolates for the ears and fun brighter, blue, brown, red and purple for the noses.
- Select 12 nice looking white candy melts for the muzzle and set aside. Melt the rest of the package.
- Slide the "ears" into place in between the cookies, into the filling, and dip the cookies in the melted white candy. Using a fork, lift the cookie out and gently bang the side of the bowl to remove excess chocolate. Lay the cookie on the parchment. Place the candy melt on as the muzzle and press in gently to form a ridge around the muzzle. Paint a small amount of the white chocolate candy melts onto the "nose" and place it higher up on the muzzle. When the cookies are dried, use the black icing to dot on the eyes. Let dry completely before storing in a sealed container.


Comments & Reviews
Janeane Davis says
These cookies look so cute. They will probably be a big hit with the family each winter.
Reesa Lewandowski says
I love how this is a treat that can be made all winter long. Often so many treats are christmas themed. Adorable!!
Brianne says
How cute are these sweet polar bears! I am definitely making these with the kiddies!
Toni | Boulder Locavore says
These are so adorable! My kids will surely enjoy these treats! Perfect gift for the holiday too!
Janis says
What a wonderfully simple and easy Polar Bear cookie to make that is. I bet that would really impress your friends if you shared some of those in a Christmas cookie exchange.
Emma @ Charlotte construction says
Those look so adorable! I enjoy a cookie that’s as cute as it is yummy. These little cookies simply make me grin every time I look at them. I can not wait to try my hand at making these.
Ann Bacciaglia says
My kids are going to love helping me make these. They look so cute and delicious.
Elizabeth Lampman says
These cookies will be perfect for our Holiday party. I will have to make some this week to try.
Tammi Roy says
These cookies are so cute and easy to make. I will have to get the ingredients I need to make these this weekend.
Jonna says
Those are so cute! I love them! Thanks so much for sharing your creativity and the recipe.
Cathi Crismon says
Oh my goodness! Easy peasy and oh so festive!! I love these!
Claudia Krusch says
I wish you had done a step by step tutorial, I would love to see you making them! You are so gifted! Love it!
Tara Noland says
Sorry about that, didn’t even think of it and wasn’t sure if they would turn out for me again. They are easy now once we had a change in plans!
Dawn Nieves says
Oh my! These are so cute. My kids would love to make these. Saving this for or annual cookie decorating party!
Vera Sweeney says
These are completely adorable!!! I love how they turned out these wold be a hit at a holiday party!
Lisa Favre says
Oh. My. Goodness. This is amazingly adorable! I really can’t handle how cute these are!!!
Pam says
These are so cute. What a fun holiday treat o make for kids or just because.
patty says
These little cookies just make me smile every time I look at them. I love that they are no bake
Connie says
These are so cute! Definitely will have to try these with the grandkids.
Stacie @ Divine Lifestyle says
Those look so cute! I love a cookie that’s as cute as it is tasty. I can’t wait to try my hand at making these.
Jennifer @ Peanut Butter and Peppers says
Oh my gosh! These are so cute. I need to make these. They would be cute at a baby shower too.
Tara Noland says
Thankyou so much Jennifer, enjoy!!
Shari says
What are white “candy melts”. ? Also what are the ears made out of? You just say “slide them
into place “. How are these attached to the cookie?
Tara Noland says
Candy melts are like a chocolate and found at craft stores like Michael’s. The ears are the same as the nose, they are what we call Smarties here but I think you can find M&M’s that would work if you are in the US. The Smarties are slid into the stuffing of the cookie and stay in place on their own. Then all is dipped in the melted candy melts.
Debra says
Thank you for clarifying the “sliding” of the ears
Tracey Shattuck says
How are far in advance can you make these? Or, I suppose I should ask, how long do they keep? These are adorbs! Can’t wait to make them for the littles.
Tara Noland says
We had ours around for maybe a week but they would last longer even in the fridge, nothing to go on them at all.
Arlene says
I have a question I think these would be a great idea for my work but we make everything from scratch do you think I could make a sugar cookie an use in place of the Oreo?
Tara Noland says
I think if you made a sandwich cookie that would work. I am sure your fellow workers would also forgive you because of the cuteness overload on these ones!!
Beth says
Oreos make a white chocolate dipped cookie this year. You could skip all of the dipping and get to the decorating. Plus, the white dipped Oreo is AWESOME tasting.
Tara Noland says
Do you have an idea of how to attach ears? That would be the only thing I can think of that would be hard. There are way more great products in the US that we never see in Canada!
Trish says
If you could cut a bit of of the candy piece, you can “glue” the ears to the side using the same method as attaching the nose
Tara Noland says
Worth a try Trish!!
Leatha says
White chocolate M&M’s