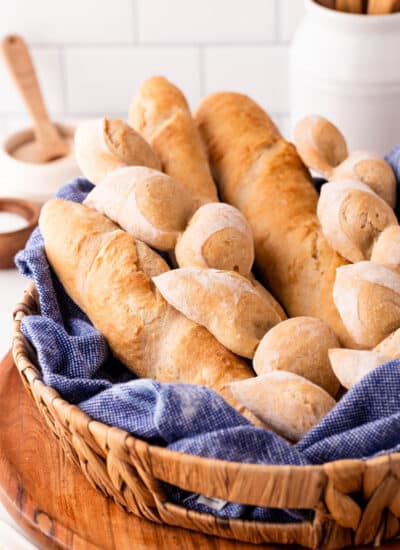
Is there anything better than homemade bread? Our French Baguette Recipe is tried and true to get you that wonderful golden crust on the outside and fluffy on the inside, giving you that perfect baguette chew every time.
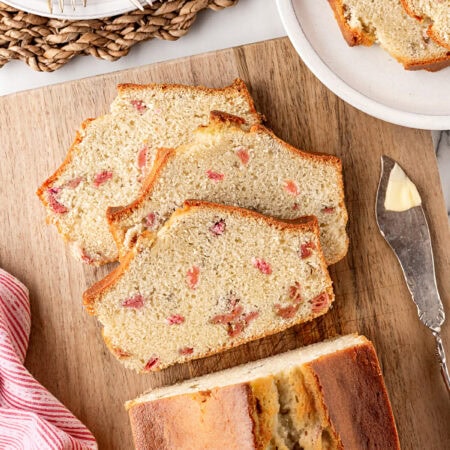
Want more homemade bread recipes? Then try our Cheesecake Factory Brown Bread, Homemade Whole Wheat Bread or our White Braided Bread.

After years of buying baguettes from my local French bakery, I thought, why not develop my own French Baguette Recipe? After some trial and error, I think I have hit on the perfect recipe! And it’s so easy to make at home that you are never going to buy another baguette loaf again!
Helpful Items For This Recipe
This post contains affiliate links. As an Amazon Associate, I earn a small portion from qualifying purchases at no extra charge for you.
Acacia Wood Cutting Board, for Meat, Cheese, Bread, Vegetables & Fruits, with Grip Handle (15″ x 7″)

What are the Ingredients in a French Baguette Recipe?

Nothing fancy here; you may have all the ingredients already.
Ingredients
Warm water – This is the best water to use; warm water will help your yeast come alive; hot or cold water will kill your yeast, but yeast loves to grow in a warm environment.
Granulated yeast – You can use any kind: bread machine, quick rising, or active dry yeast.
Kosher salt – I use this almost exclusively for all my cooking and baking.
All-purpose flour – What is the best flour to use for baguettes? The French use a Type 55 flour (a hard wheat white flour) that is not commonly found over here, so good old all-purpose flour is what we used. I do have a link above, though, from Amazon.
Other equipment
5 – 6 quart bowl or bucket with a lid
Wooden handled spoon or Danish Dough Whisk
Parchment paper
Large pizza stone or cast-iron griddle
Pizza peel
Metal broiler tray

How to Make a Baguette
Making the Dough for a French Baguette Recipe
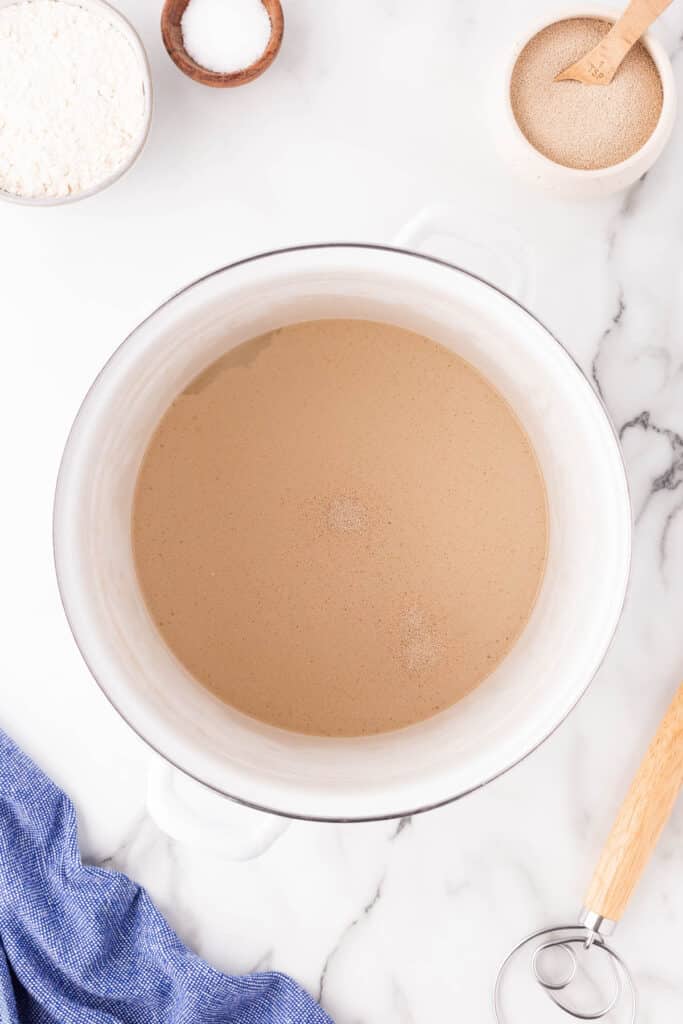
- Add the warm water to a bowl or a bucket with a lid (DO NOT use hot water as it will kill the yeast).
- Add the yeast to the water (you do not need to stir).
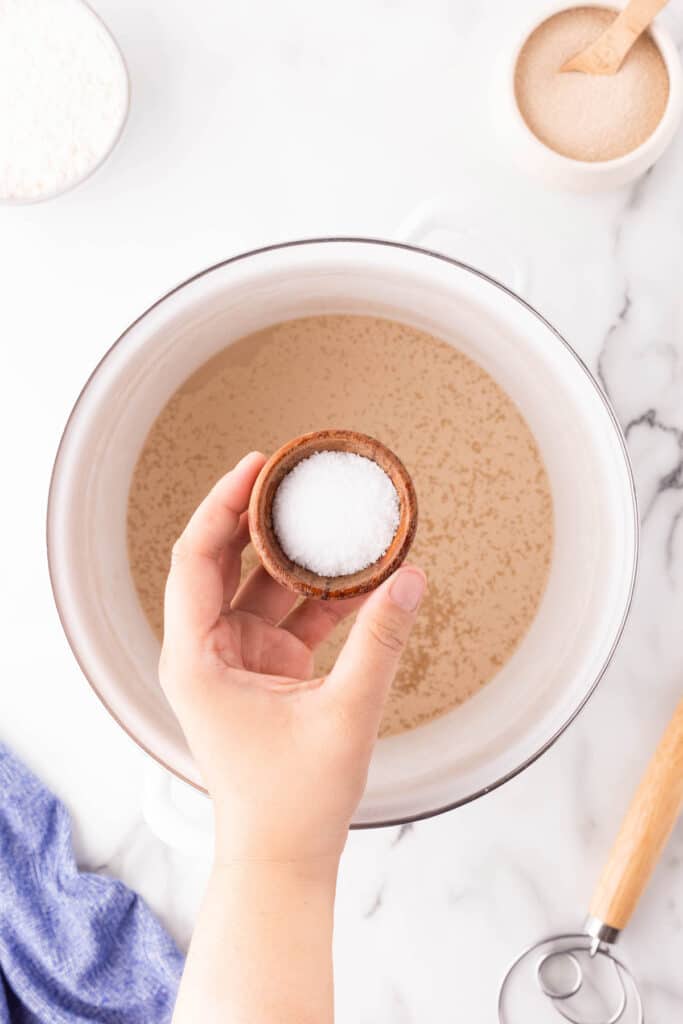
- Add the Kosher salt to the water and yeast (don’t worry about killing the yeast; everything is mixed together quickly, so the yeast will be fine!).
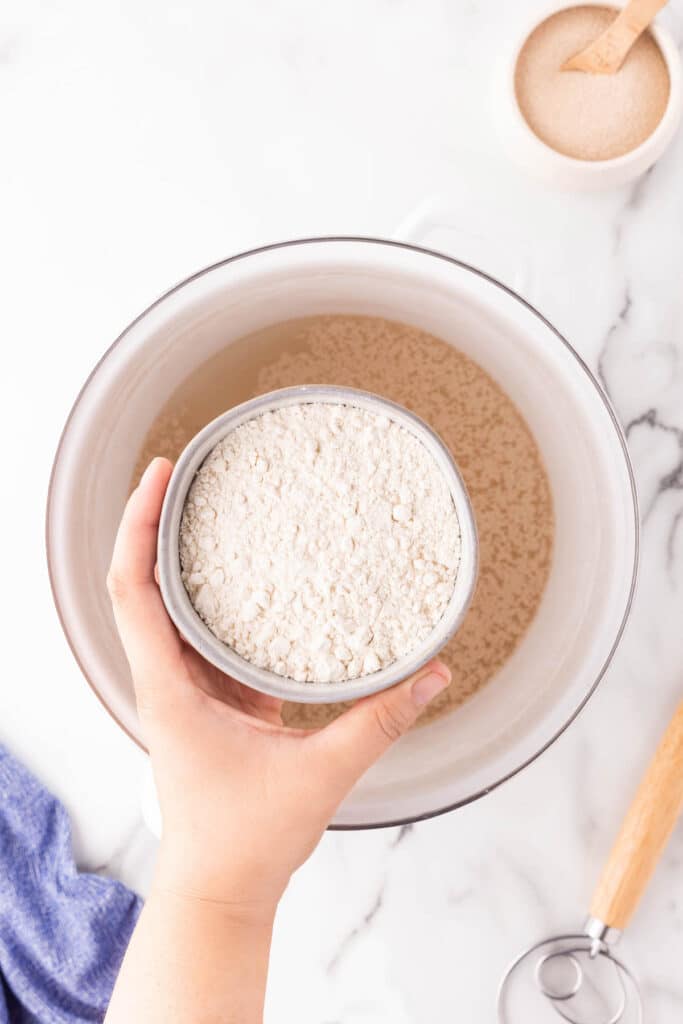
- Add in all the flour all at once and stir with a long-handled wooden spoon or Danish dough whisk.

- Continue to mix until the flour is completely incorporated; the dough should be wet and rough.
- Place the lid on the container on the bowl, but DO NOT snap it on tightly. You need to make sure that the gases produced by the yeast can escape.

- Allow the dough to sit at room temperature for about 2 hours to rise. The dough should more than double in size. It may take a little longer than 2 hours, depending upon the room temperature and your yeast.
- The dough will be flat on top with some bubbles. DO NOT punch it down. You can use the dough right after the initial rise, or it can now be refrigerated. Note: the dough is much easier to work with when it is chilled.
- Leave the lid ajar for the first 2 days in the refrigerator to allow the gases to continue to escape.
- You can keep the dough in the refrigerator for up to 2 weeks, ready for you to use anytime.
Shaping the Dough
- Lightly dust the top of the dough in the bowl or bucket and your hands to help prevent the dough from sticking.
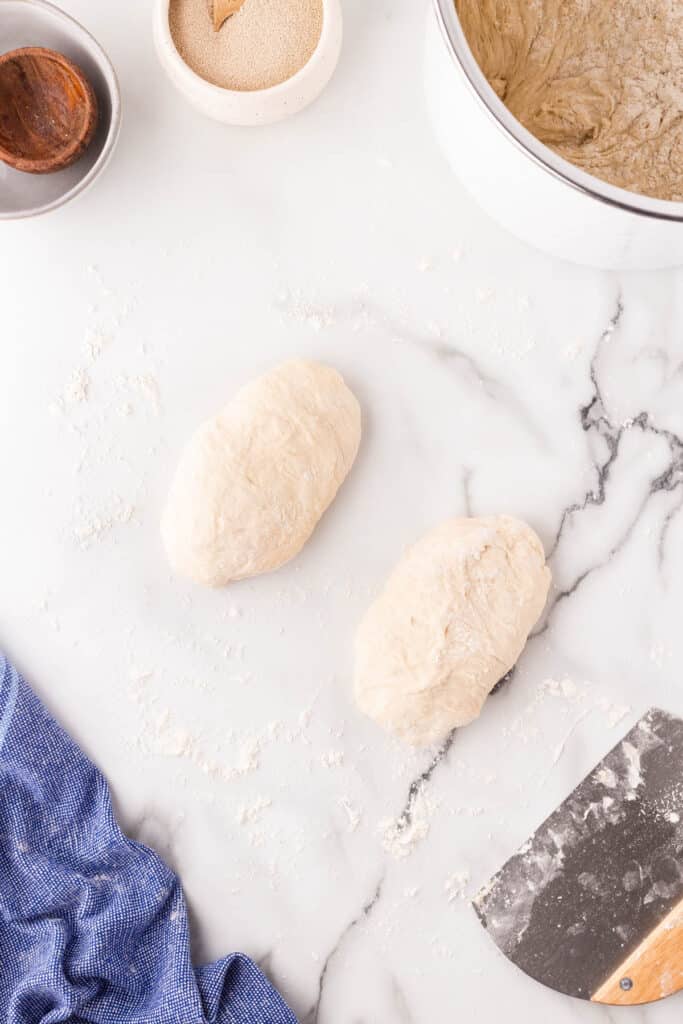
- Pull about ¼ of the dough up to bake with (about a pound). The dough should have a lot of stretch once it has rested. I use kitchen scissors to cut the dough I want to bake from the rest; it works great (if your dough breaks off and does not stretch, it is too dry, add a couple tablespoons of water and allow to rest again until the water has absorbed).
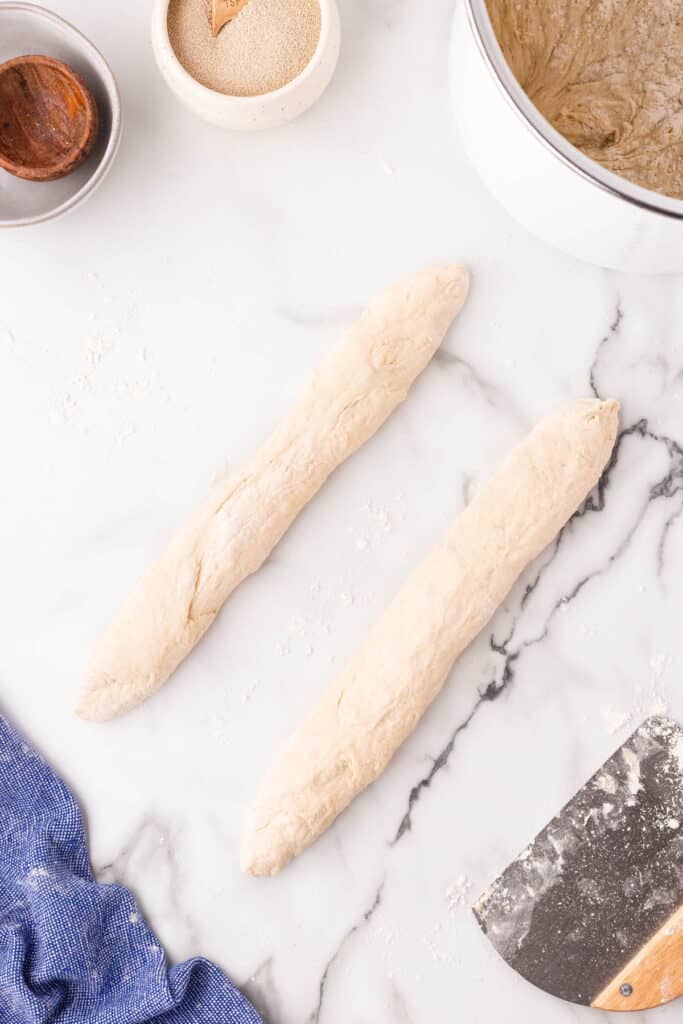
- Working on a lightly floured surface, cut the dough in half so you have 2 equal pieces. Starting with the first piece of dough, press it into an oval shape using your fingertips until it is about 6 – 8 inches long. Fold the top edge into the middle and then repeat with the bottom edge. Gently pinch the seams together. Using your hands, roll the dough into a cylinder about 14 – 16 inches in length. Roll each end of the cylinder so it is slightly tapered. Repeat with the second piece of dough.
- Place each piece on a lightly floured sheet of parchment paper. Allow the dough to rest for at least 40 minutes in a warm spot. If you can let it rest for 60 or even 90 minutes, so much the better. The longer you let it rest, the more open the hole structure will be in the bread.
- Place the baking stone or cast-iron griddle (flat side up) in the oven on the middle rack. Place the metal broiler pan on the lower rack. (Note: DO NOT use a glass vessel in place of the metal broil pan; it will shatter!)
- Preheat the oven to 450 degrees F.

Baguette
- If you are making baguettes, brush the tops of the loaves with lightly beaten egg whites. Then, using a bread lame or very sharp knife, score the top of the loaves 3 times. The cuts should be about 4 inches long and at a 45-degree angle the length of each loaf.
Epi Bread or Pain D’epi
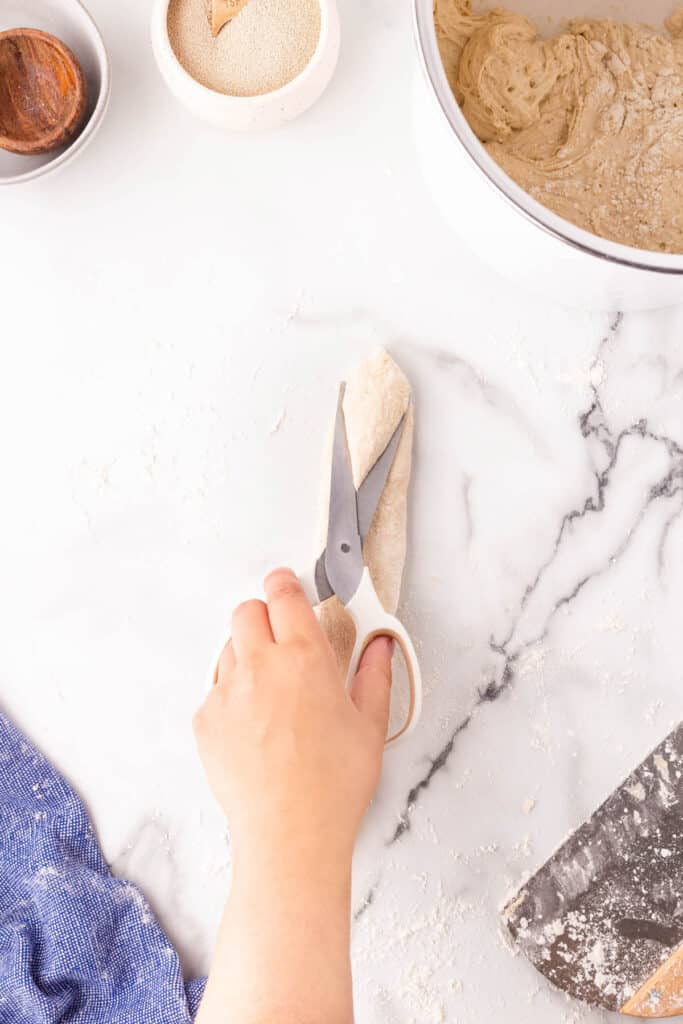
- If you are making Epi loaves, first lightly flour the entire top of each of the loaves.
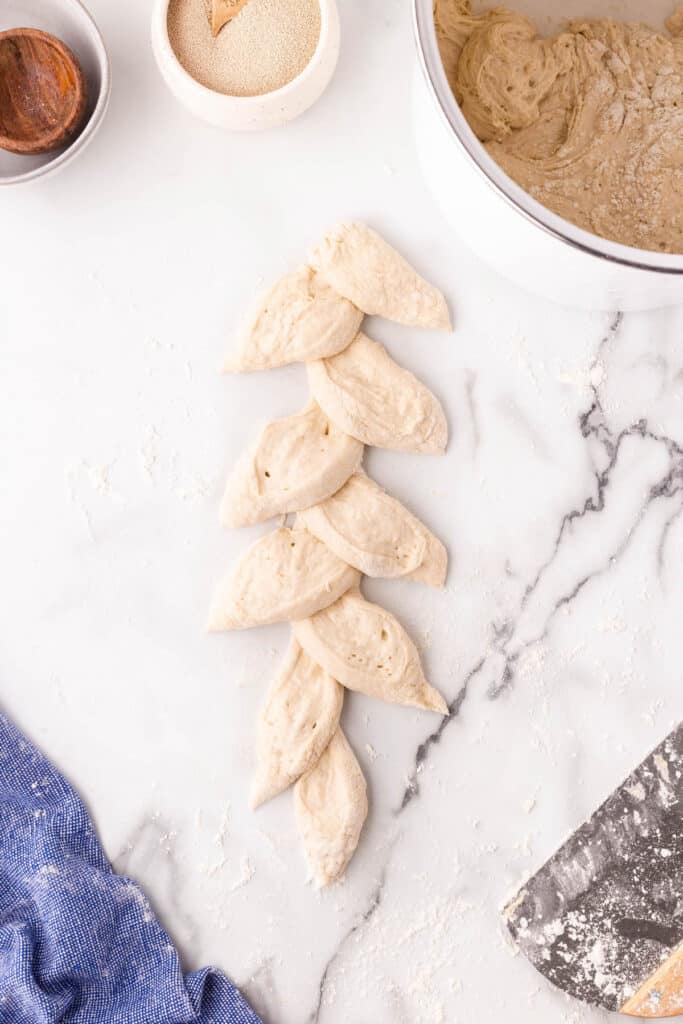
- Then, using your kitchen scissors, cut on a 20-degree angle up from the countertop almost all the way through the loaf and move the cut section 45 degrees to the right. Move down the loaf a few inches and make the next cut; move that cut section to the left. Repeat down the loaf you should have 5 – 6 cuts or more.
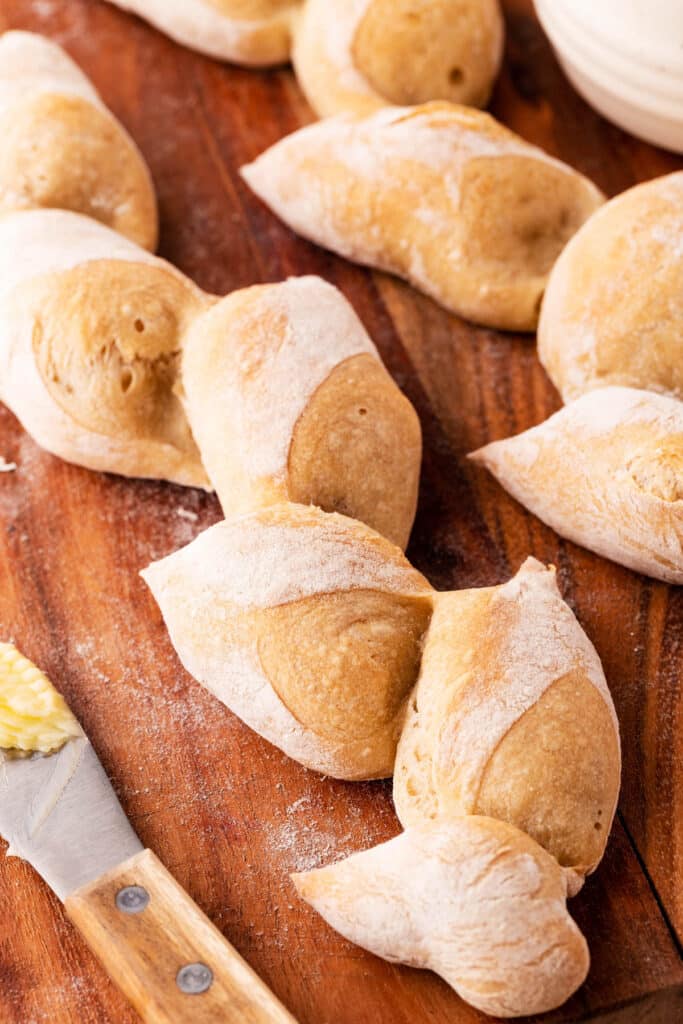
- When you are done with the loaf, it should have the appearance of a wheat sheaf.

Baking the Loaves
- Using a pizza peel (affiliate link), gently slide the loaves on the parchment paper onto the oven stone or cast-iron griddle.
- Carefully pour 1 cup of near-boiling water into the metal broiler pan and close the oven door.
- Do not open the door for the first 10 minutes to let the water vapor do its job.
- Bake for 15 – 18 minutes or until the top of the bread is a dark golden brown. When you tap on the bottom, it should sound hollow.
- Allow the loaves to cool before slicing.

Recipe Pro Tips!
Why is the dough not smooth when made?
Do not add too much water or over-mix the dough; it should be rough and ragged, as shown in the picture.
Why do I add a pan of water to the oven?
The water helps the crust to keep it soft and easily expand during cooking. This will give you a delicious baguette or epi loaf, and your crust will be perfect.
Why is the temperature of the water so important in bread making?
If the water is too cold or too hot, it will kill the yeast. Room-temperature water is perfect for this recipe.
For making a baguette, practice makes perfect. Your epi loaf and baguette may not be perfect the first time you make it, but after making it a few times, you will get better and better at it.

WANT EVEN MORE BREAD RECIPES?
We love making homemade bread in our house, either sweet or savory!! Here are some of our absolute favorites.


French Baguette Recipe
Video
Ingredients
- 3 cups warm water
- 1 Tbsp Granulated yeast you can use any kind: bread machine, quick rising, or active dry
- 1 – 1 ½ Tbsp Kosher salt
- 6 ½ cups all purpose flour
Instructions
Making the Dough
- Add the warm water to the bowl of a bucket or large bowl with a lid (DO NOT use hot water as it will kill the yeast).
- Add the yeast to the water (you do not need to stir).
- Add the Kosher salt to the water and yeast (don’t worry about killing the yeast; everything is mixed together quickly, so the yeast will be fine!).
- Add in all the flour all at once and stir with a long-handled wooden spoon or Danish dough whisk.
- Continue to mix until the flour is completely incorporated; the dough should be wet and rough.
- Place the lid on the container on the bowl, but DO NOT snap it on tightly. You need to make sure that the gases produced by the yeast can escape.
- Allow the dough to sit at room temperature for about 2 hours to rise. The dough should more than double in size. It may take a little longer than 2 hours, depending upon the room temperature and your yeast.
- The dough will be flat on top with some bubbles. DO NOT punch it down. You can use the dough right after the initial rise, or it can now be refrigerated. Note: the dough is much easier to work with when it is chilled.
- Leave the lid ajar for the first 2 days in the refrigerator to allow the gases to continue to escape.
- You can keep the dough in the refrigerator for up to 2 weeks, ready for you to use anytime.
- Shaping the Dough
- Lightly dust the top of the dough in the bowl or bucket and your hands to help prevent the dough from sticking.
- Pull about ¼ of the dough up to bake with (about a pound). The dough should have a lot of stretch once it has rested. I use kitchen scissors to cut the dough I want to bake from the rest; it works great (if your dough breaks off and does not stretch, it is too dry, add a couple tablespoons of water and allow to rest again until the water if is absorbed).
- Working on a lightly floured surface, cut the dough in half so you have 2 equal pieces. Starting with the first piece of dough, press it into an oval shape using your fingertips until it is about 6 – 8 inches long. Fold the top edge into the middle and then repeat with the bottom edge. Gently pinch the seams together. Using your hands, roll the dough into a cylinder about 14 – 16 inches in length. Roll each end of the cylinder so it is slightly tapered. Repeat with the second piece of dough.
- Place each piece on a lightly floured sheet of parchment paper. Allow the dough to rest for at least 40 minutes in a warm spot. If you can let it rest for 60 or even 90 minutes, so much the better. The longer you let it rest, the more open the hole structure will be in the bread.
- Place the baking stone or cast-iron griddle (flat side up) in the oven on the middle rack. Place the metal broiler pan on the lower rack. (Note: DO NOT use a glass vessel in place of the metal broil pan; it will shatter!)
- Preheat the oven to 450 degrees F.
- Baguette
- If you are making baguettes, brush the tops of the loaves with lightly beaten egg whites. Then, using a bread lame or very sharp knife, score the top of the loaves 3 times. The cuts should be about 4 inches long and at a 45-degree angle the length of each loaf.
- Epi Bread or Pain D’epi
- If you are making Epi loaves, first lightly flour the entire top of each of the loaves.
- Then, using your kitchen scissors, cut on a 20-degree angle up from the countertop almost all the way through the loaf and move the cut section 45 degrees to the right. Move down the loaf a few inches and make the next cut; move that cut section to the left. Repeat down the loaf you should have 5 – 6 cuts.
- When you are done with the loaf, it should have the appearance of a wheat sheaf.
- Baking the Loaves
- Using the pizza peel, gently slide the loaves on the parchment paper onto the oven stone or cast-iron griddle.
- Carefully pour 1 cup of near-boiling water into the metal broiler pan and close the oven door.
- Do not open the door for the first 10 minutes to let the water vapor do its job.
- Bake for 15 – 18 minutes or until the top of the bread is a dark golden brown. When you tap on the bottom, it should sound hollow.
- Allow the loaves to cool before slicing.


Let us know what you think!
We’d love to know what you and your family think! Make sure to leave a review below and follow us on your favorite social network!