This Best Homemade Cherry Pie recipe is fantastic with fresh or frozen cherries. The advantage of frozen fruit is that it is picked at its peak and already pitted for you. The pie filling has a hint of vanilla and the freshness of lemon to bring out the cherry flavor even more. There is nothing better than a fruit pie!
If you love baking pies, try our Easy Homemade Blueberry Pie, Old-Fashioned Oatmeal Pie, Peach Pie Recipe with Almond Cream, Lemon Meringue Pie, or Chocolate Pudding Pie, to name a few. We love pies here!! And if you love pies but want something easy and fun then try our Hand Pies, they can be filled with your favorite jam!!

Helpful Items For This Post
This post contains affiliate links. As an Amazon Associate, I earn a small portion from qualifying purchases at no extra charge to you.

What Goes Into Cherry Pie?

You only need a few ingredients to make this delicious pie. As mentioned using frozen cherries is easy as they have been pitted already, and you can therefore make cherry pie year-round. A gorgeous cherry pie at Christmas time is delightful too when there is not a fresh cherry insight.
Using pre-made pie crust is not only fast and easy, and I do like it better than frozen. It is easier to work with, and when your pie is made, it looks homemade also. But if you want to make your own pie crust, we have two delicious crusts for you to choose from. They are linked below.
Instead of vanilla extract, you can substitute almond extract, which gives the pie a lovely new flavor.
Ingredients
Frozen dark sweet cherries, thawed
Granulated sugar
Vanilla extract
Lemon, zested, and juiced
Cornstarch
Water
Pre-made Pie Crust (or homemade; choose from this butter pie crust or this one made with a combination of butter and lard)
How To Make Cherry Pie

Filling
Follow these easy instructions to make the best cherry pie filling ever!
Preheat the oven to 425 degrees Fahrenheit.
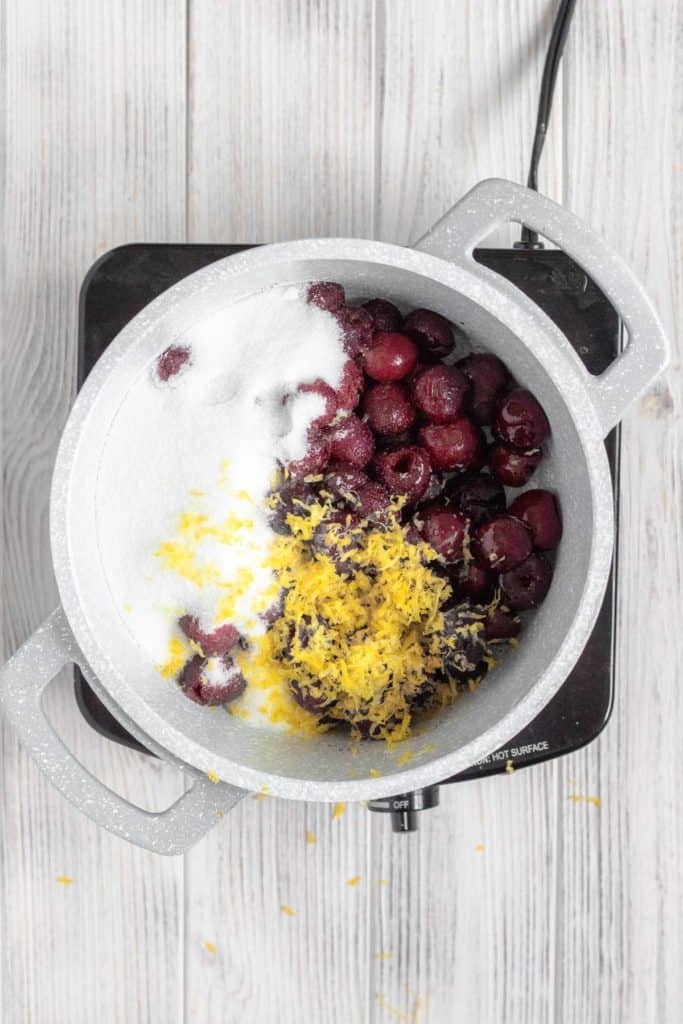
In a medium pot, add thawed cherries, lemon zest of 1 lemon, and granulated sugar. Cook over medium heat until the cherries begin to release juice and liquid forms in the bottom of the pot.
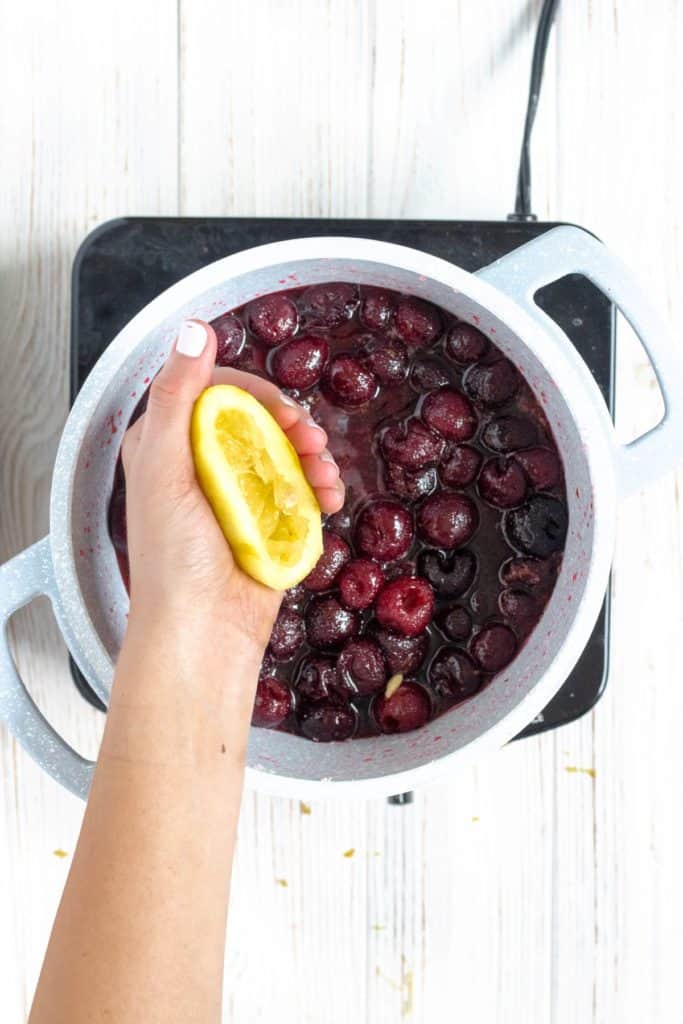
Add vanilla and ¼ cup lemon juice into the pot. Continue stirring over heat until the filling warms through and begins to simmer.
In a small bowl, combine the cornstarch and water to form a slurry. Mix until the cornstarch completely dissolves into the water.
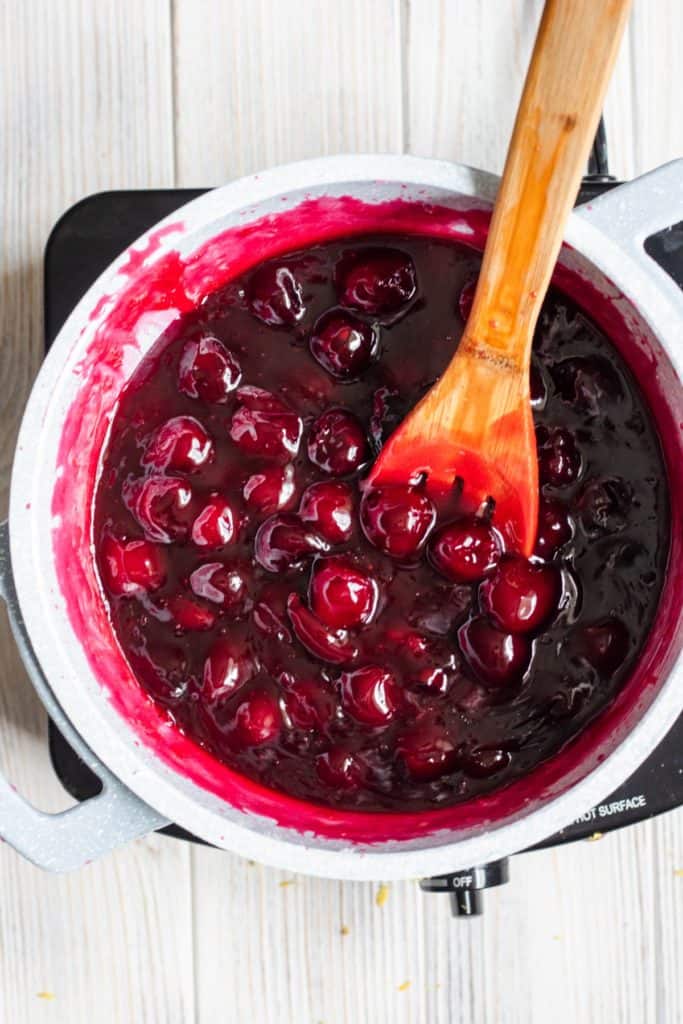
Add the slurry into the cherry mixture and stir until the filling thickens (about 3-5 minutes). You will know the filling is ready when it coats the back of a wooden spoon and seems slightly gelatinous.
Remove the filling from the heat and allow it to cool as you roll out the pie crust.

Assembly
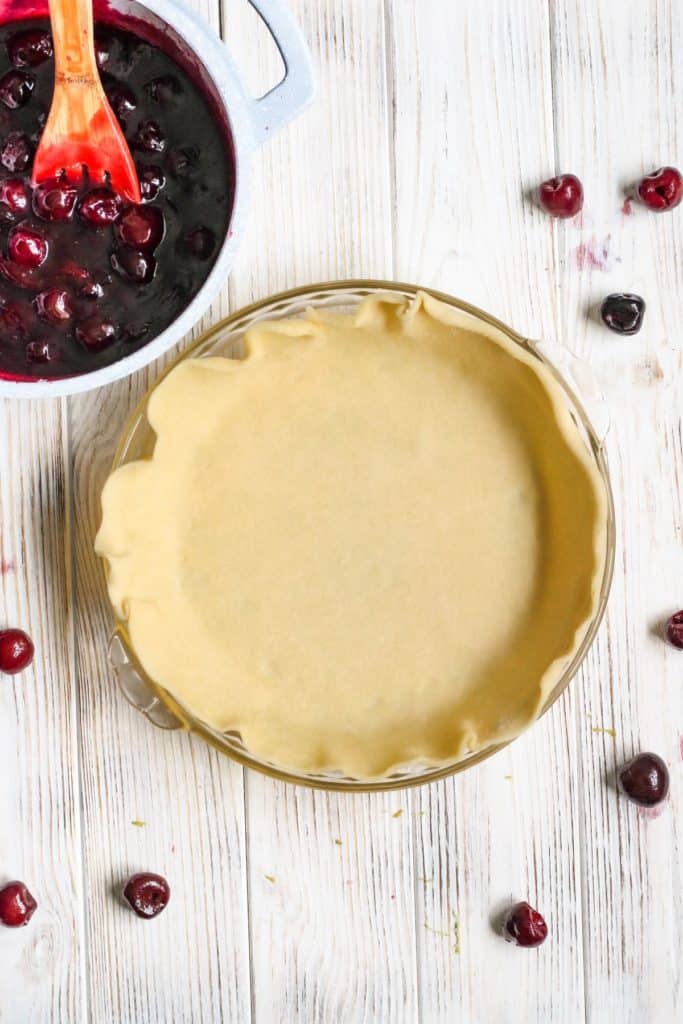
Lay one sheet of pie crust in the bottom of an ungreased glass 9×2” pie pan. Use your hands to lightly press the crust into the bottom edges of the pan.
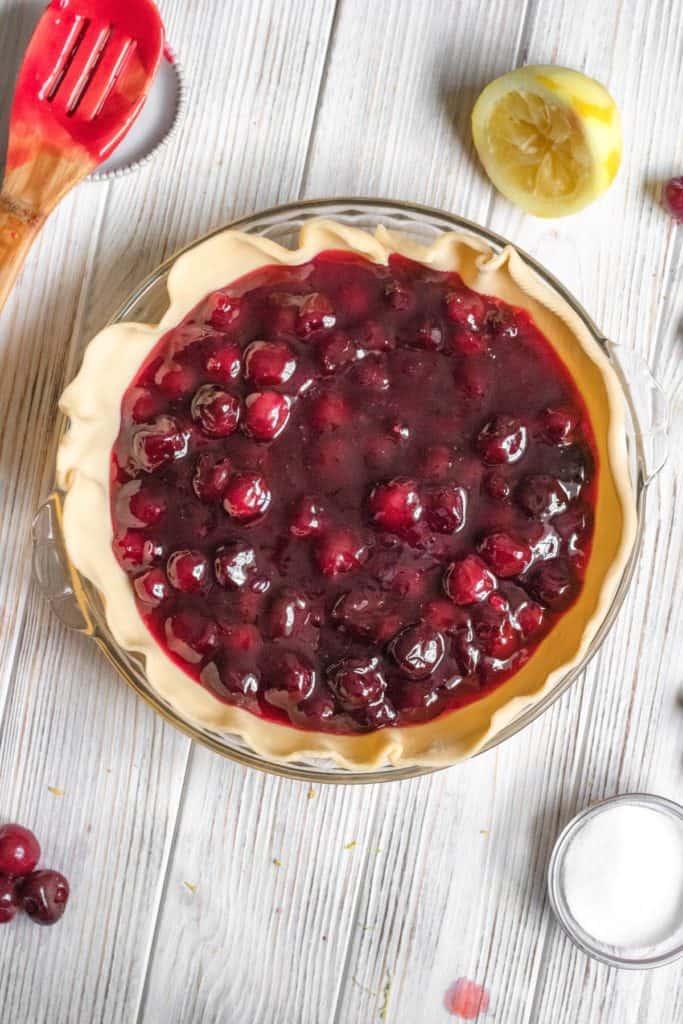
Pour the cherry filling into the bottom crust.
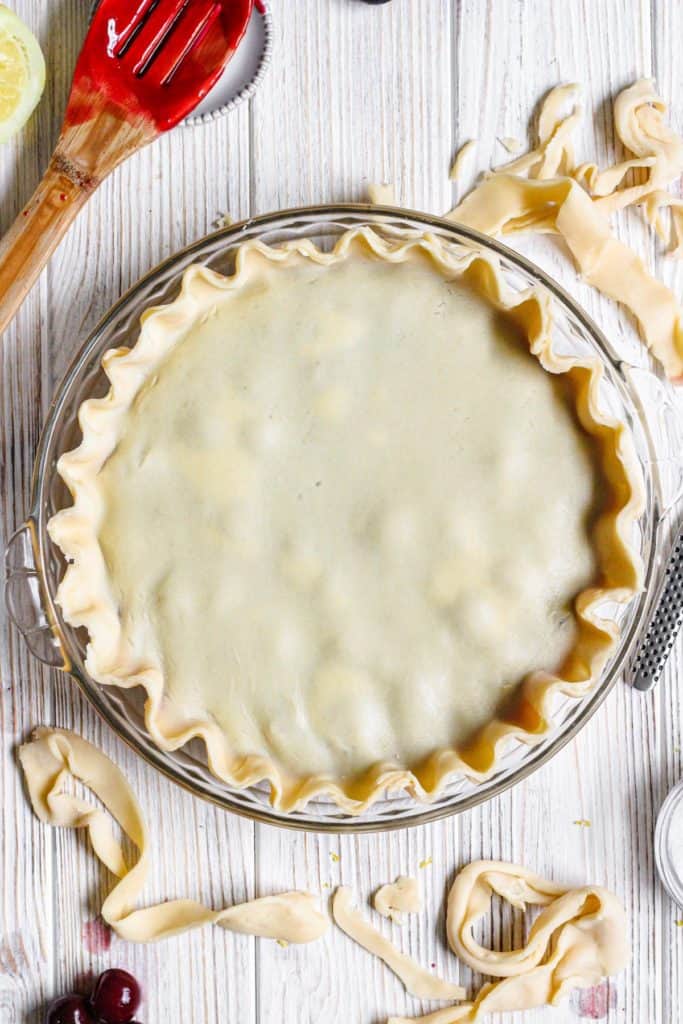
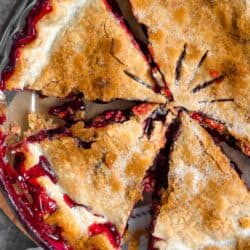
Place the second pie crust over the top of the filling. Use your fingers to pinch together the top and bottom pie crusts around the edges. Then use your thumb and forefinger to press the dough into scalloped edges. Using a knife, cut a few slits in a circle around the center of the pie.
Bake in the oven for about 45 minutes or until the crust is brown.
Remove the pie from the oven and allow it to cool on the countertop for an hour. Then, transfer it to the fridge. Allow the pie to cool completely and set up before serving.
Tips and Tricks To Make the Best Cherry Pie

You can use fresh sweet cherries to make this recipe as well. Follow the same instructions as above.
Adding ¼ tsp of cinnamon is an optional but great addition to the filling.
Keep in mind that the filling will continue to thicken as the pie cooks and cools.
The top piece of pie crust may hang over the edge of the pie plate. In this case, use a knife to trim the pie dough down until it lines up with the edge of the bottom crust. Then, pinch the pieces together.
For a smoother-looking finish to the crust, you can also mix 1 egg with 1 tbsp of water to form an egg wash and brush the top piece of crust with this combination.
For a sweeter crust, you can sprinkle some coarse sugar on the pie dough before baking.
After about 20 minutes of baking, the edges of the pie may begin to brown. In this case, place 2” wide strips of aluminum foil around only the edges of the pie, leaving the center uncovered. This will keep the pie edges from burning.
Does Cherry Pie Need to be Refrigerated?

- We usually don’t have much pie left after we have served this gorgeous pie. Wrap the pie loosely with plastic wrap. Refrigerate the pie for up to 5 days.
For good-sized pieces, we cut the pie into sixes. If you need more, bake two pies!!
What to Serve With Cherry Pie?

Classically, cherry pie is served with vanilla ice cream, but here are a few other ways to serve up this amazing pie. Plus, some more ideas on how to make a cherry pie besides the classic top crust.
- Serve with whipped cream and a sprinkle of cinnamon.
- Blend it into a milkshake, I am not kidding, this is really wonderful. One slice of pie with 2-3 scoops of vanilla ice cream and about a cup or more of milk. Blend until smooth.
- Mixed up into homemade ice cream. In the final step of putting the ice cream into a container, layer in chunks of cherry pie. Don’t over mix it as it will then turn pink. I just had this with a peach cobbbler made into ice cream and it was heavenly.
- Cherry and chocolate go great together so with whipped cream add a little chocolate sauce.
- Serve the pie warm for an extra treat. Cherry pie is also great cold or at room temperature.
- Serve the pie with a salted almond or caramel ice cream for a different flavor than just vanilla.
- Don’t like a double crust, try the pie with a crumble topping like we do with our apple pie or apple crisp.
- Want to learn how to make a lattice topping for your cherry pie? Here are some great instructions for lattice pie making.

Pin it HERE!!

Pin it HERE!!

Best Homemade Cherry Pie
Ingredients
- 4 cups Frozen dark sweet cherries thawed
- 1 cup granulated Sugar
- 1 tsp Vanilla
- 1 Lemon zested and juiced
- 3 tbsp Cornstarch
- 5 tbsp water
- 1 pre-made Pie Crust
Instructions
- Preheat the oven to 425 degrees Fahrenheit.
- In a medium pot, add thawed cherries, lemon zest of 1 lemon, and granulated sugar. Cook over medium heat until the cherries begin to release juice and liquid forms in the bottom of the pot.
- Add vanilla and ¼ cup lemon juice into the pot. Continue stirring over heat until the filling warms through and begins to simmer.
- In a small bowl, combine the cornstarch and water to form a slurry. Mix until the cornstarch completely dissolves into the water.
- Add the slurry into the cherry mixture and stir until the filling thickens (about 3-5 minutes). You will know the filling is ready when it coats the back of a wooden spoon and seems slightly gelatinous.
- Remove the filling from the heat and allow it to cool completely as you roll out the pie crust.
- Lay one sheet of pie crust in the bottom of an ungreased glass 9×2” pie pan. Use your hands to lightly press the crust into the bottom edges of the pan.
- Pour the cooled cherry filling into the bottom crust.
- Place the second pie crust over the top of the filling. Use your fingers to pinch together the top and bottom pie crusts around the edges. Then use your thumb and forefinger to press the dough into scalloped edges. Using a knife, cut a few slits in a circle around the center of the pie.
- Bake in the oven for about 45 minutes or until the crust is brown.
- Remove the pie from the oven and allow it to cool on the countertop for an hour. Then, transfer it to the fridge. Allow the pie to cool completely and set up before serving.
- Serve alone or warm with ice cream. Enjoy!


Let us know what you think!
We’d love to know what you and your family think! Make sure to leave a review below and follow us on your favorite social network!