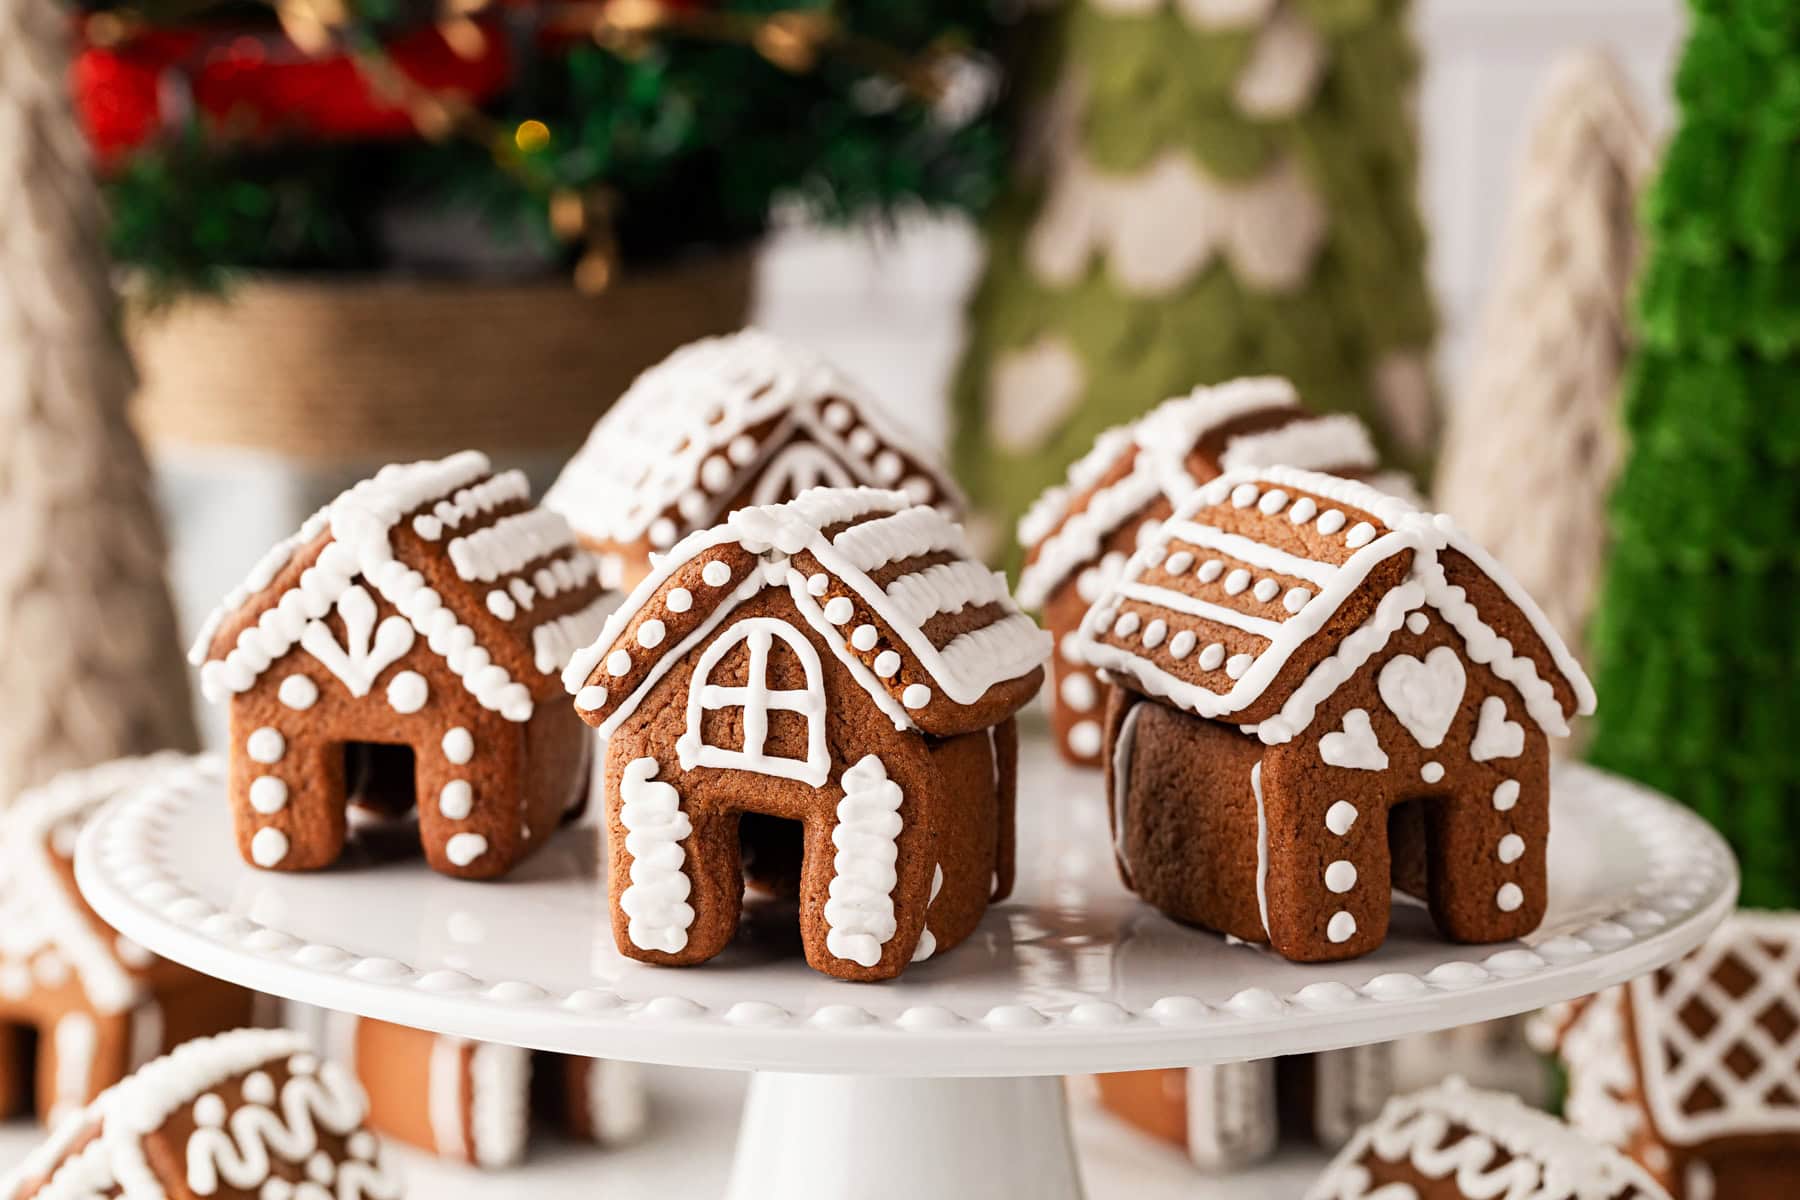
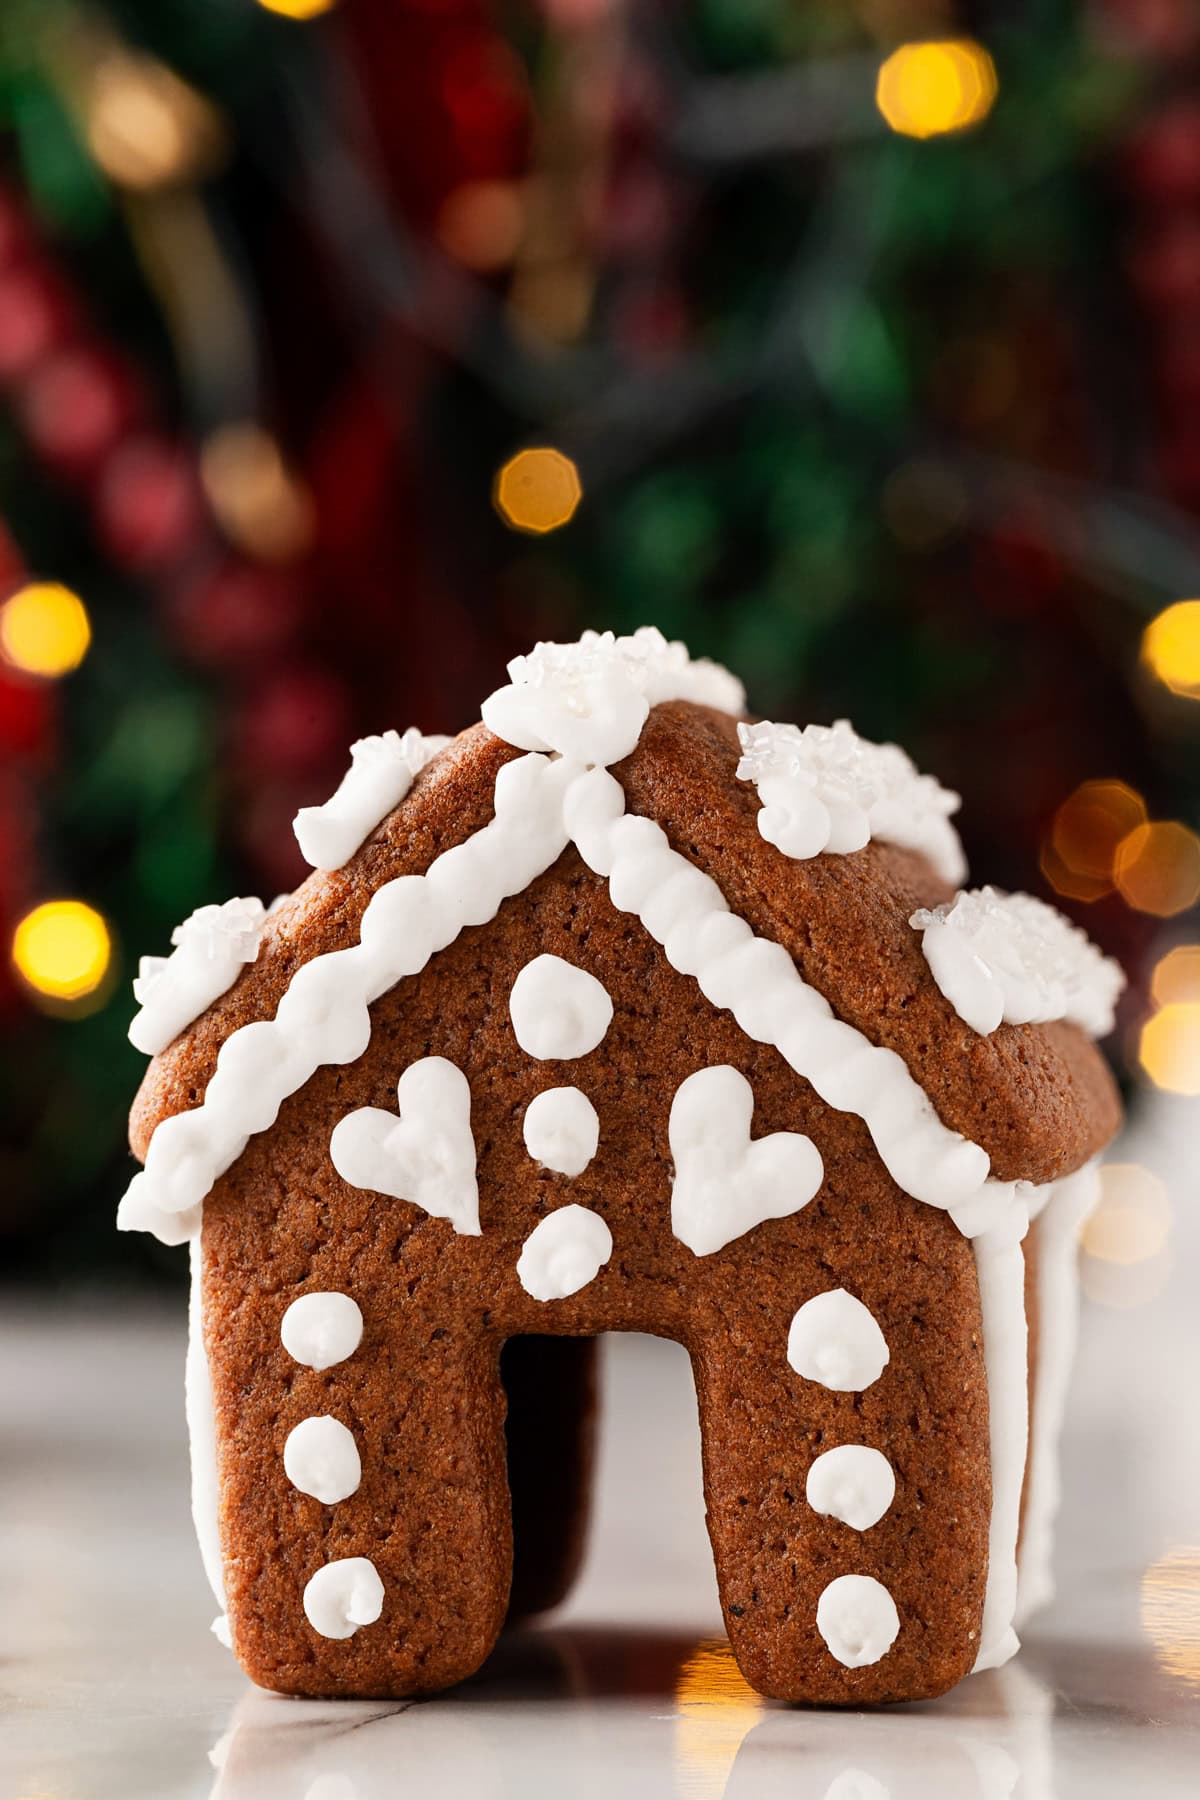
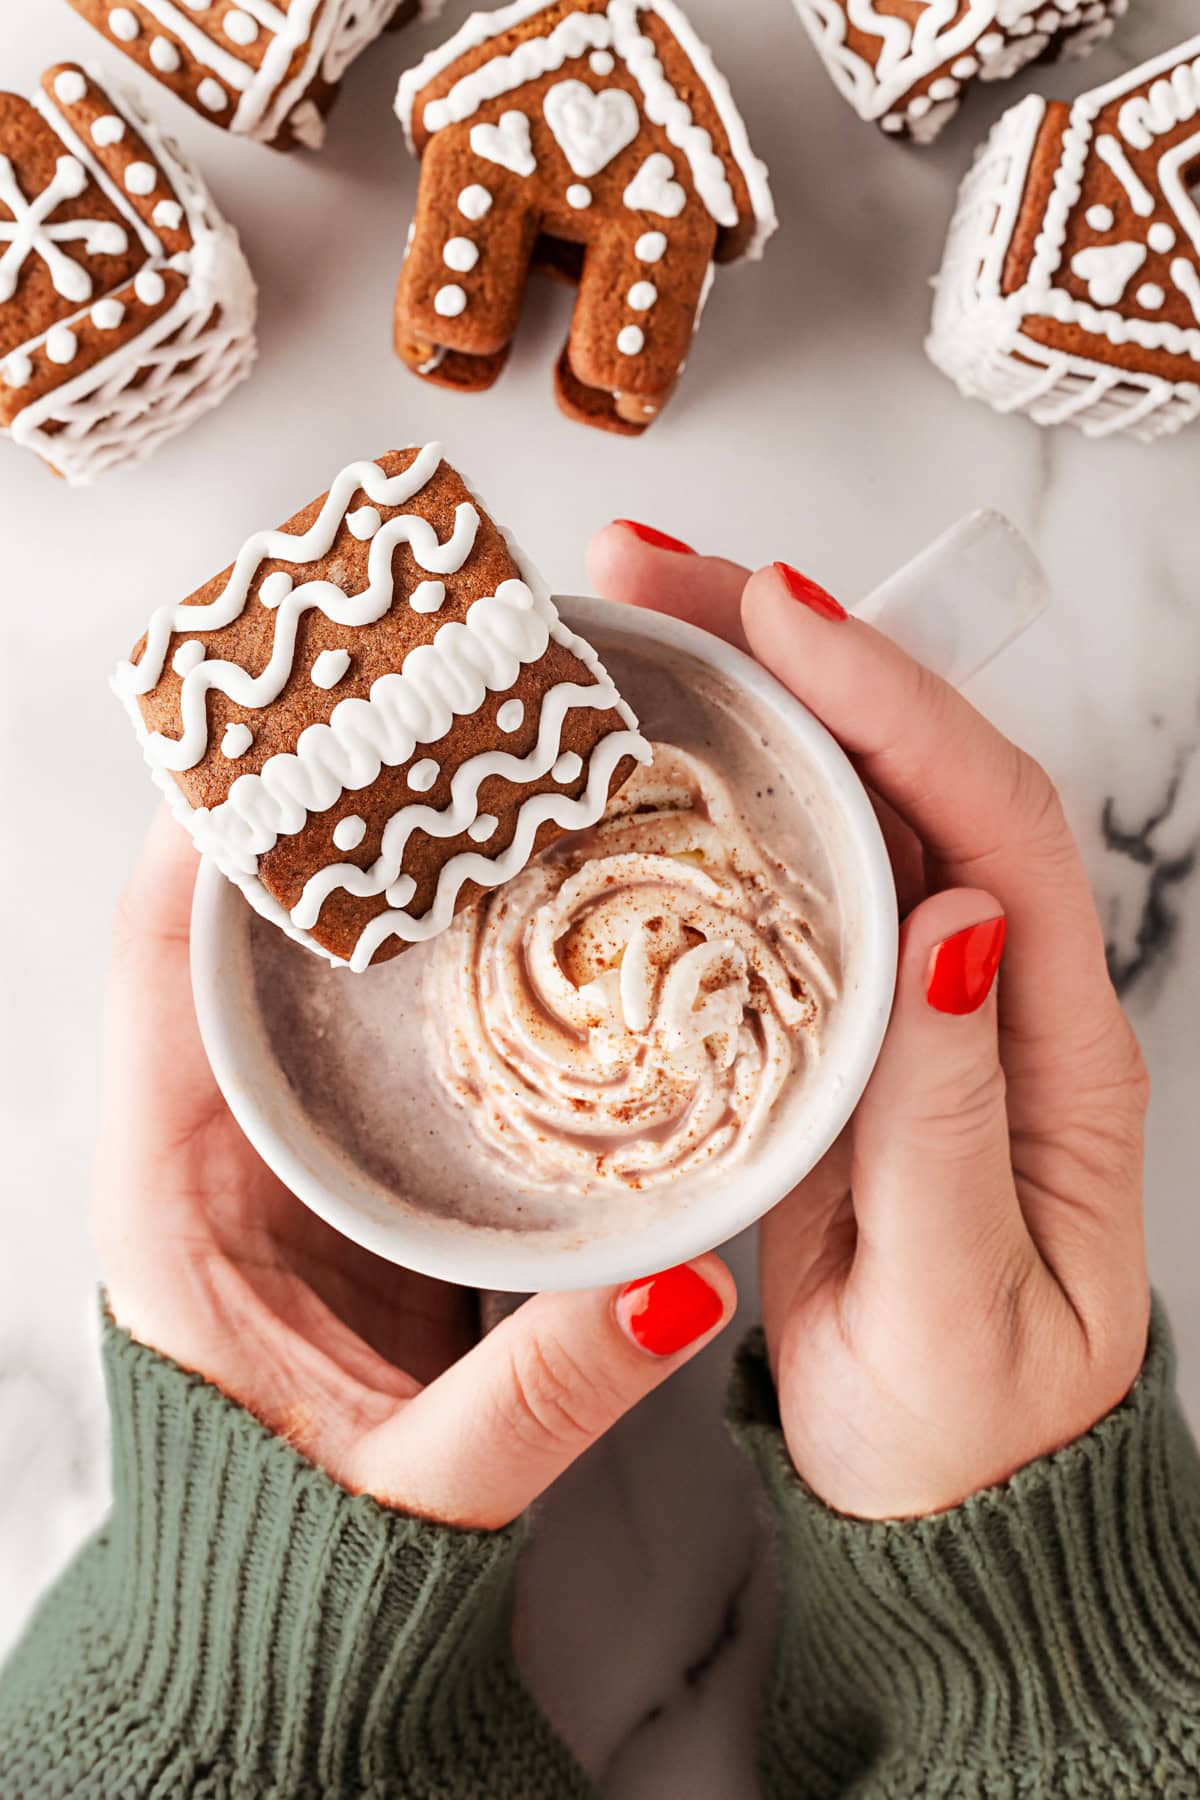
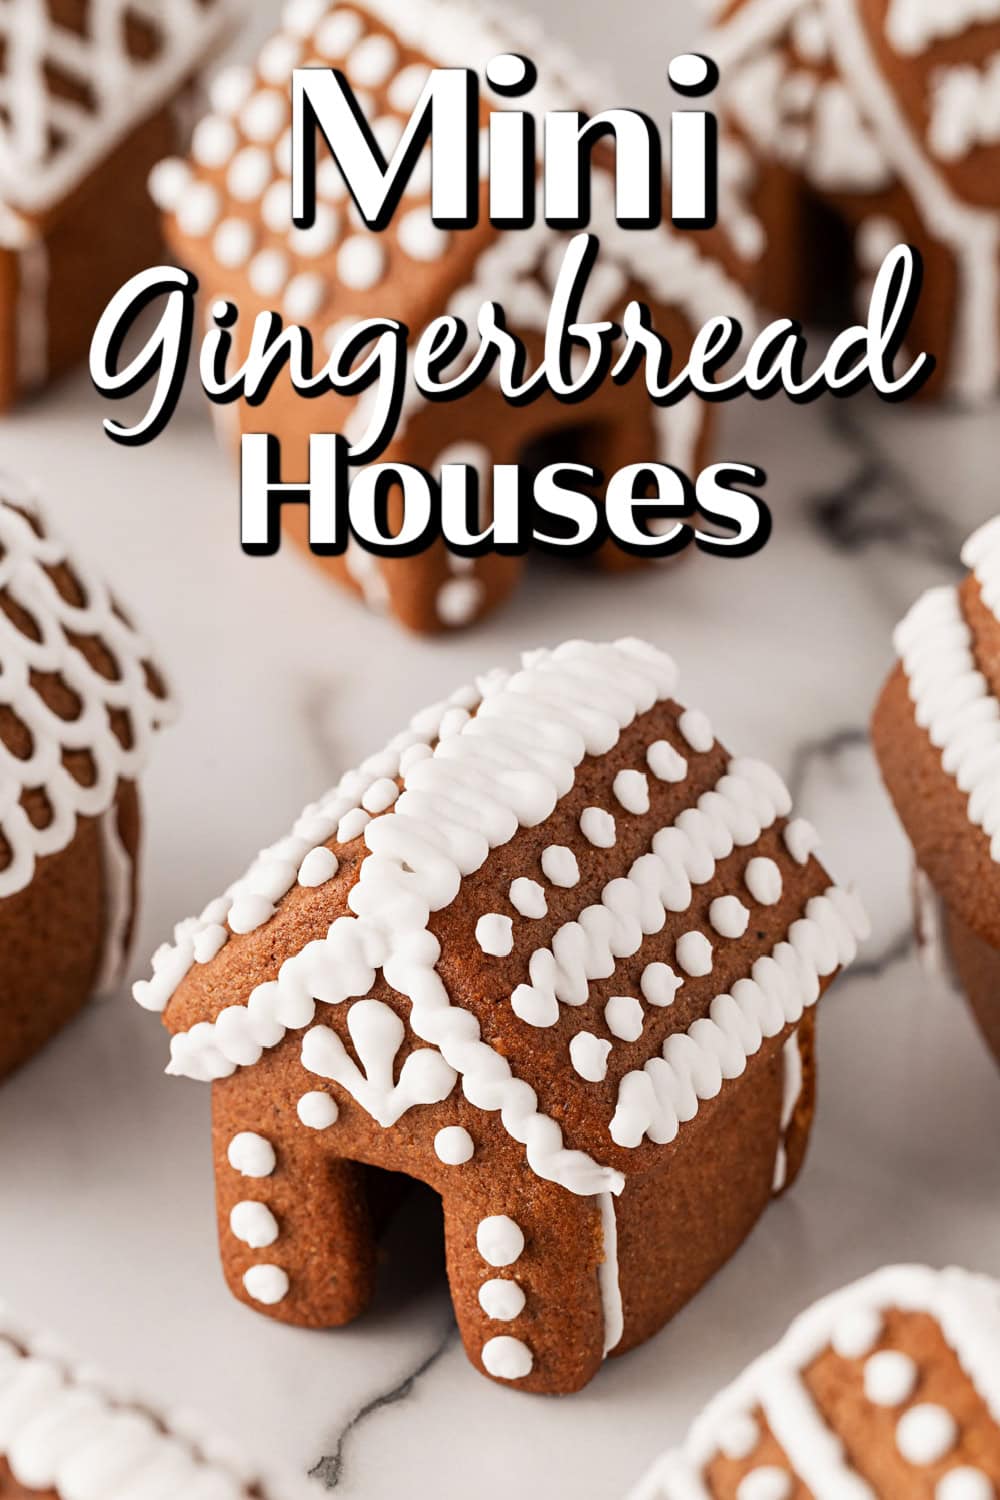
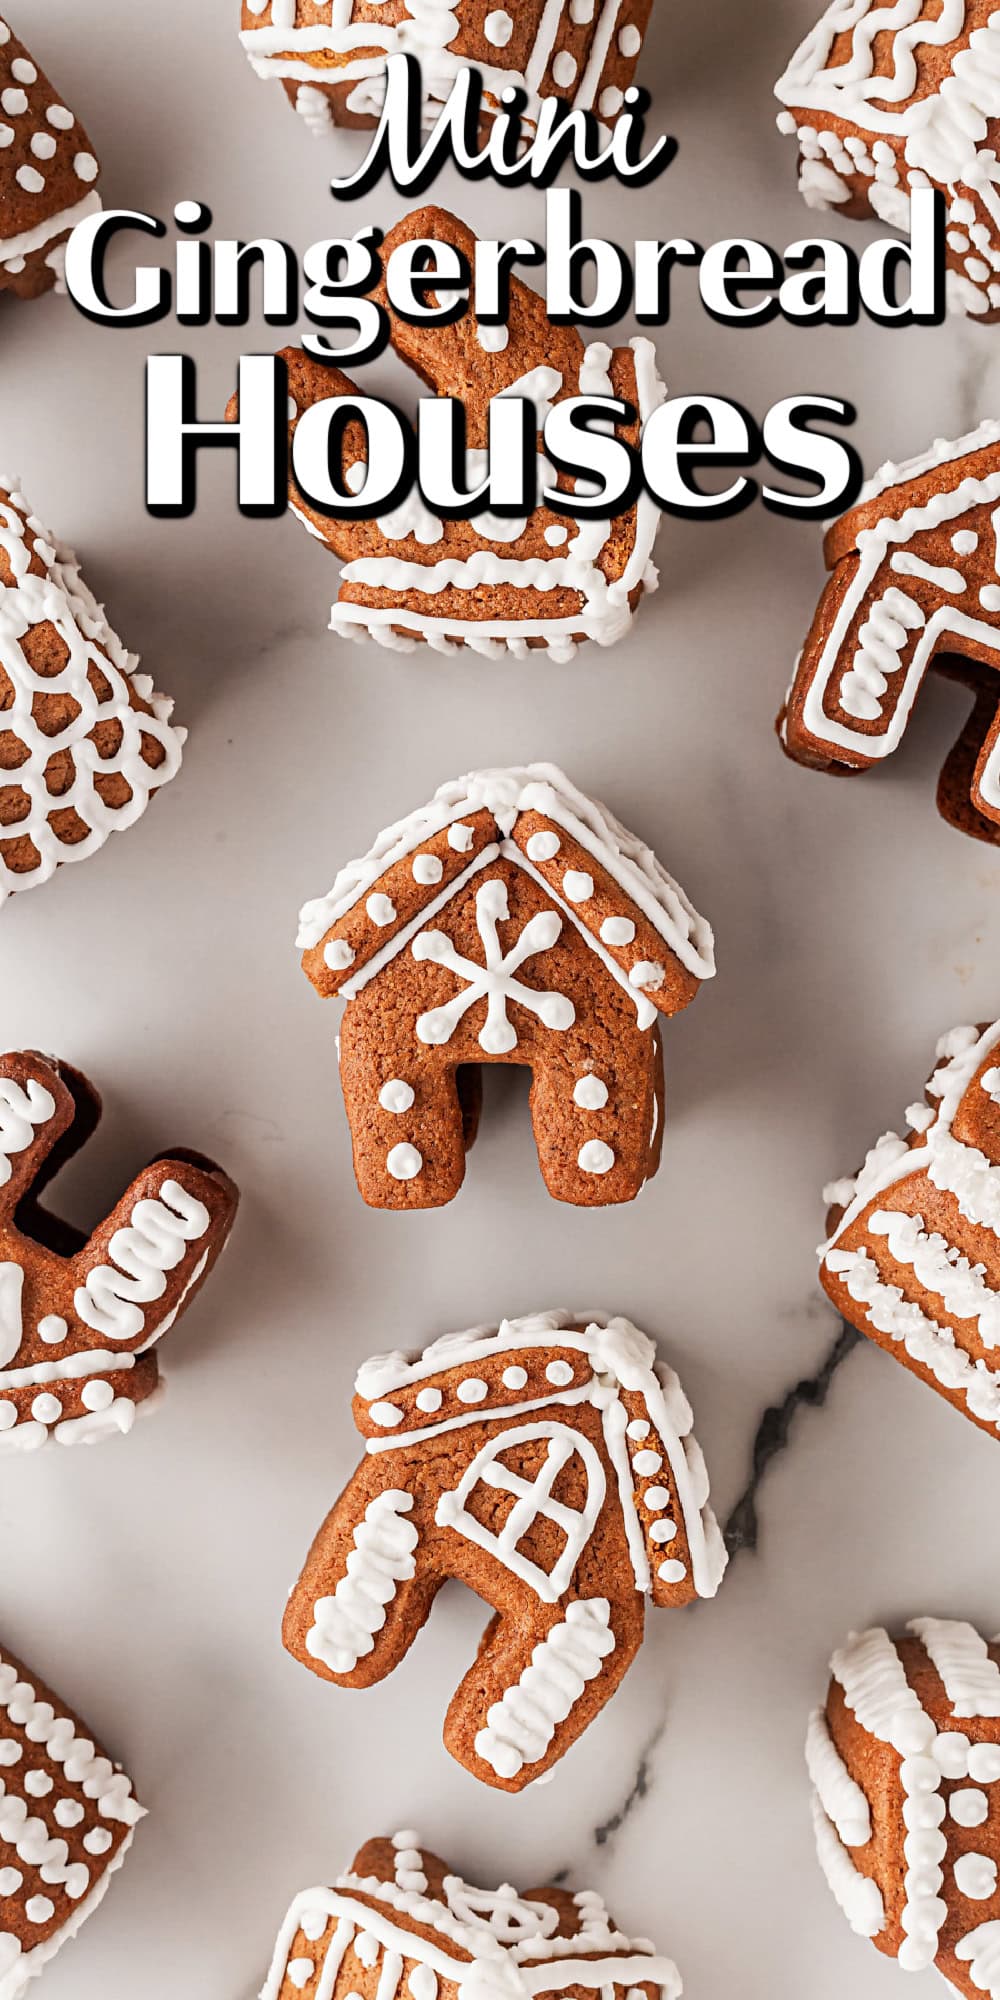
What could be more fun to make than a cute Mini Gingerbread House? Gather the kids and make this edible craft for your hot chocolate, make a village or give as gifts. They would be perfect with a homemade cocoa, too.
If you love gift giving and making your own, check out our 37 Homemade DIY Christmas Gifts or our 30 Cute Christmas Treats for the best ideas for the holidays.

Why I Love This Recipe
- Cute as can be
- Delicious, tried-and-true gingerbread recipe
- Great gift idea
- Easier than you think to make and decorate
- Fun edible craft
Helpful Items for This Recipe
This post contains affiliate links. As an Amazon Associate, I earn a small portion from qualifying purchases at no extra charge for you.
Mini Gingerbread House Cookie Cutter Kit 3pcs
What Ingredients are in a Mini Gingerbread House?
This recipe is good to make these little houses, as the cookies don’t rise or spread too much, maintaining their original shapes.
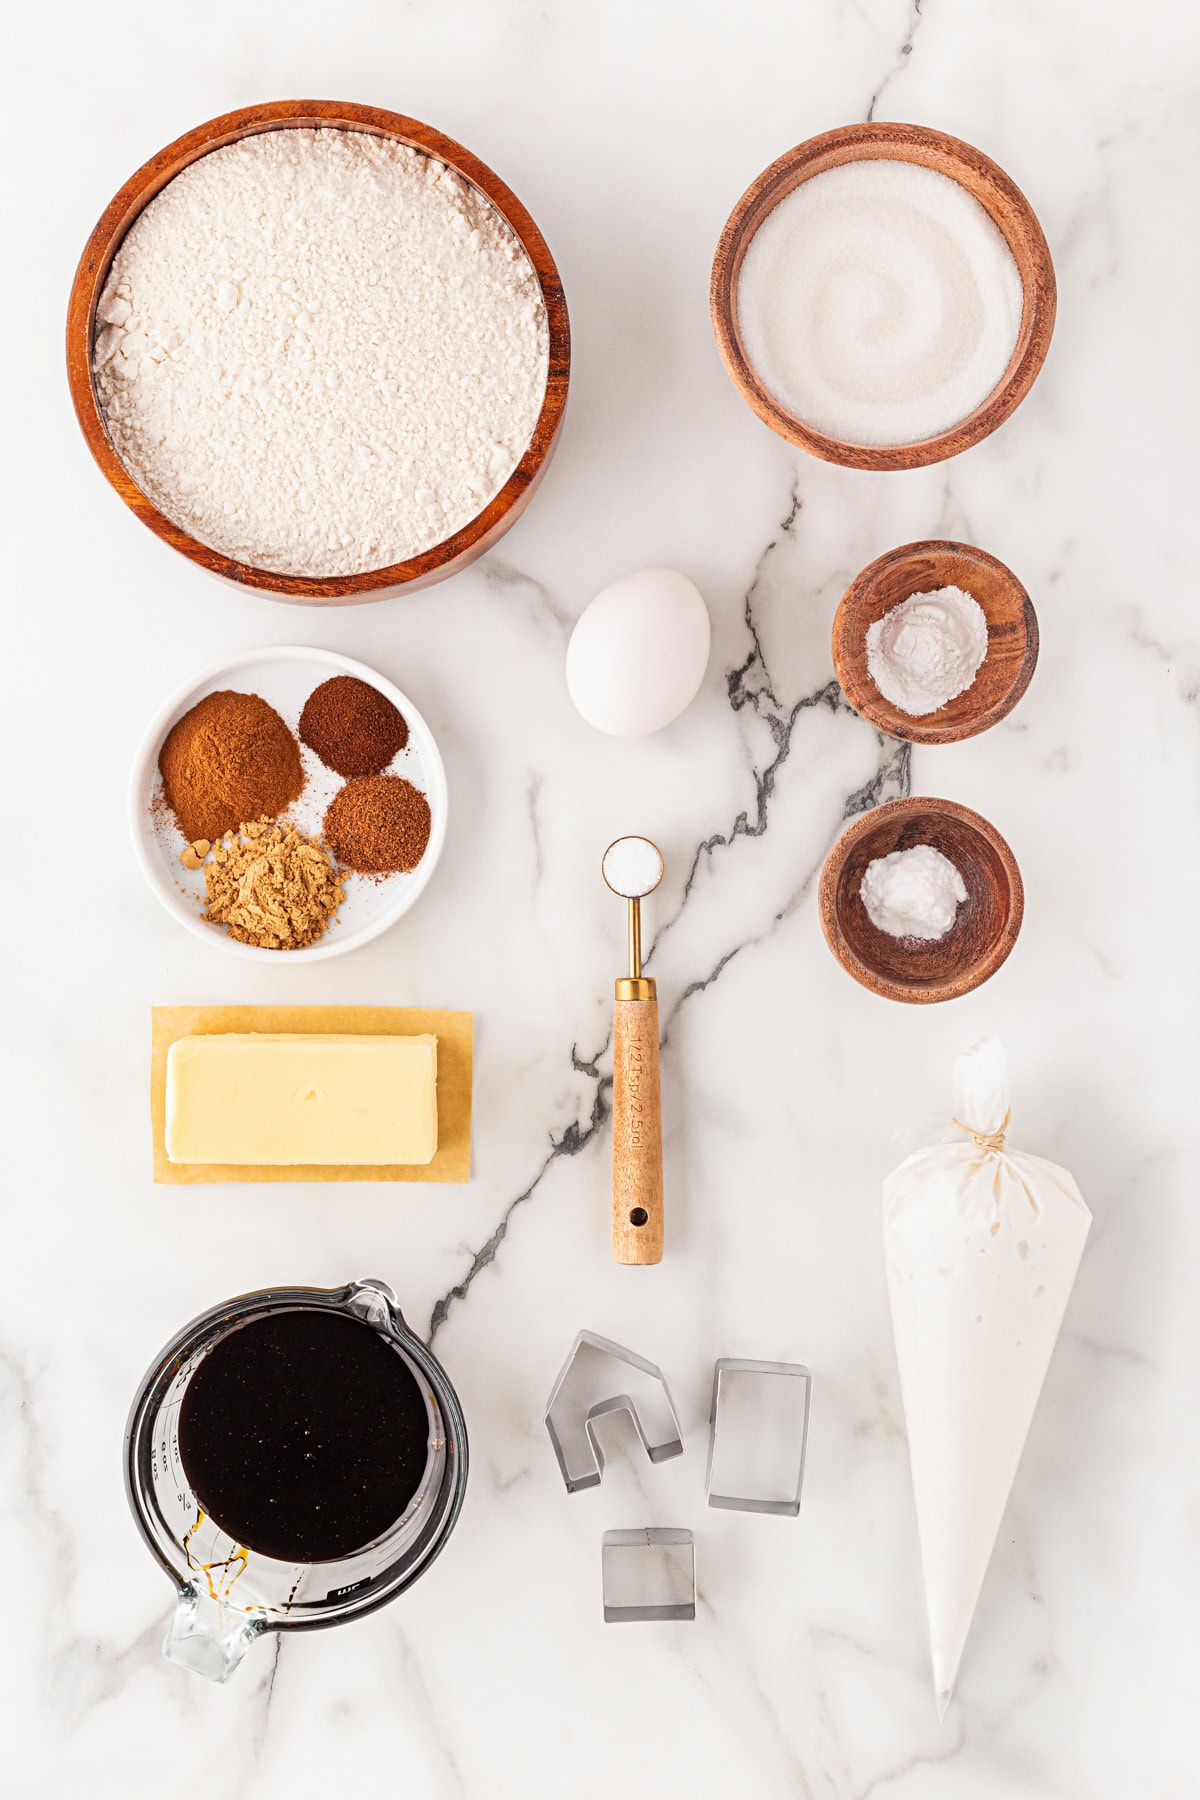
Recipe Ingredients
Gingerbread
All Purpose flour – I have not tried making these cookies with any other flour.
Sugar – I use granulated sugar for the sweetness in this recipe.
Butter – I use softened and salted; if you use unsalted, then adjust the salt accordingly. This is the butter I use most for baking and cooking.
Molasses – This adds not only sweetness but a great flavor that is typical of gingerbread.
Egg – Brings all the other ingredients together.
Ground cinnamon, ground ginger, ground cloves, grated or ground nutmeg – All the essential spices needed for a great gingerbread.
Baking powder and baking soda – These are used for leavening and add crispness to the cookies.
Salt – This is just as important in baking as it is in cooking. It helps bring out all the other flavors.
Royal Icing
(Yields approx: 1 cup)
Egg white – This helps the icing bind and then harden when finished.
Powdered sugar – You can adjust this for desired thickness. You need to use a sugar like this as it dissolves easily and won’t leave your icing grainy.
Cream of tartar – This is a stabilizer for icing to keep it from weeping or not setting properly. It gives the icing a smooth, hard finish.
Vanilla extract (optional) – This adds a nice flavor to the icing, which otherwise would be just sweet.
How to Make The Gingerbread
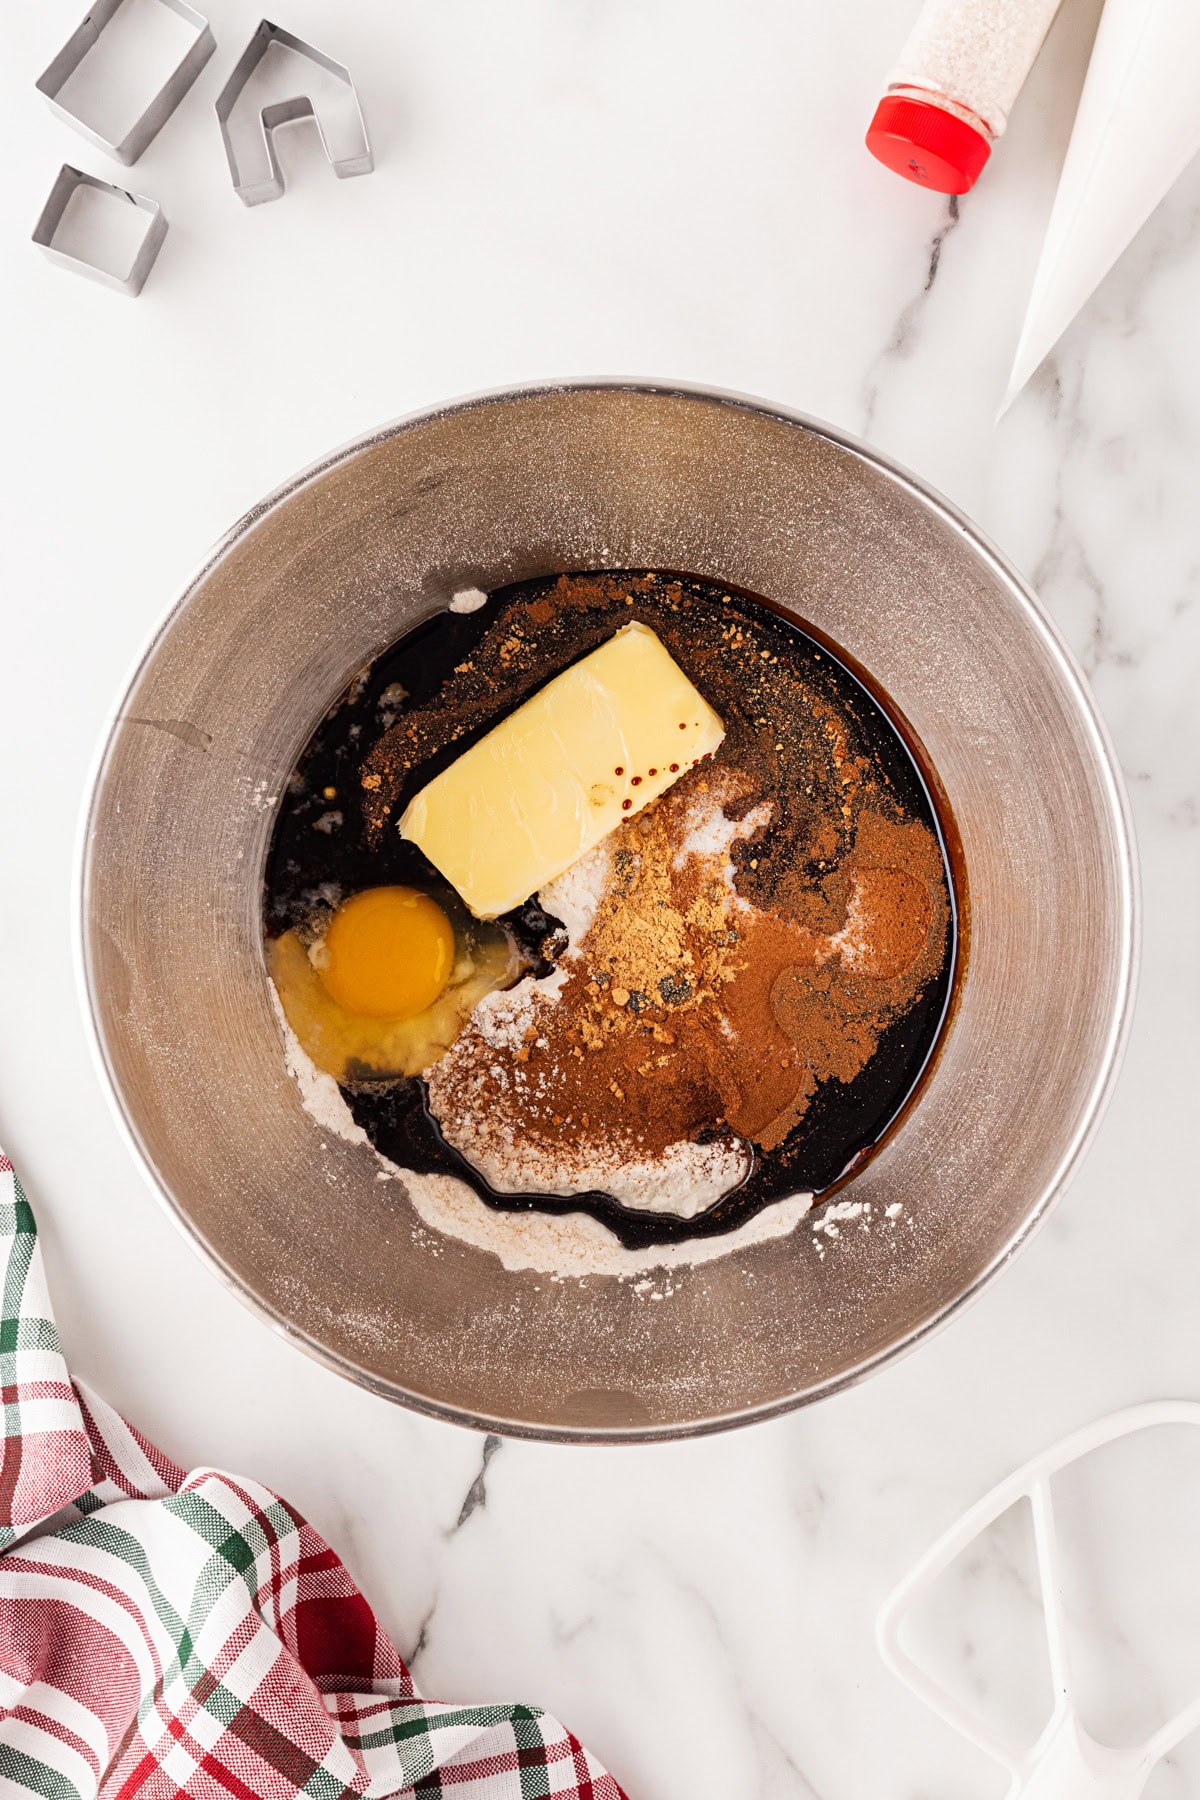
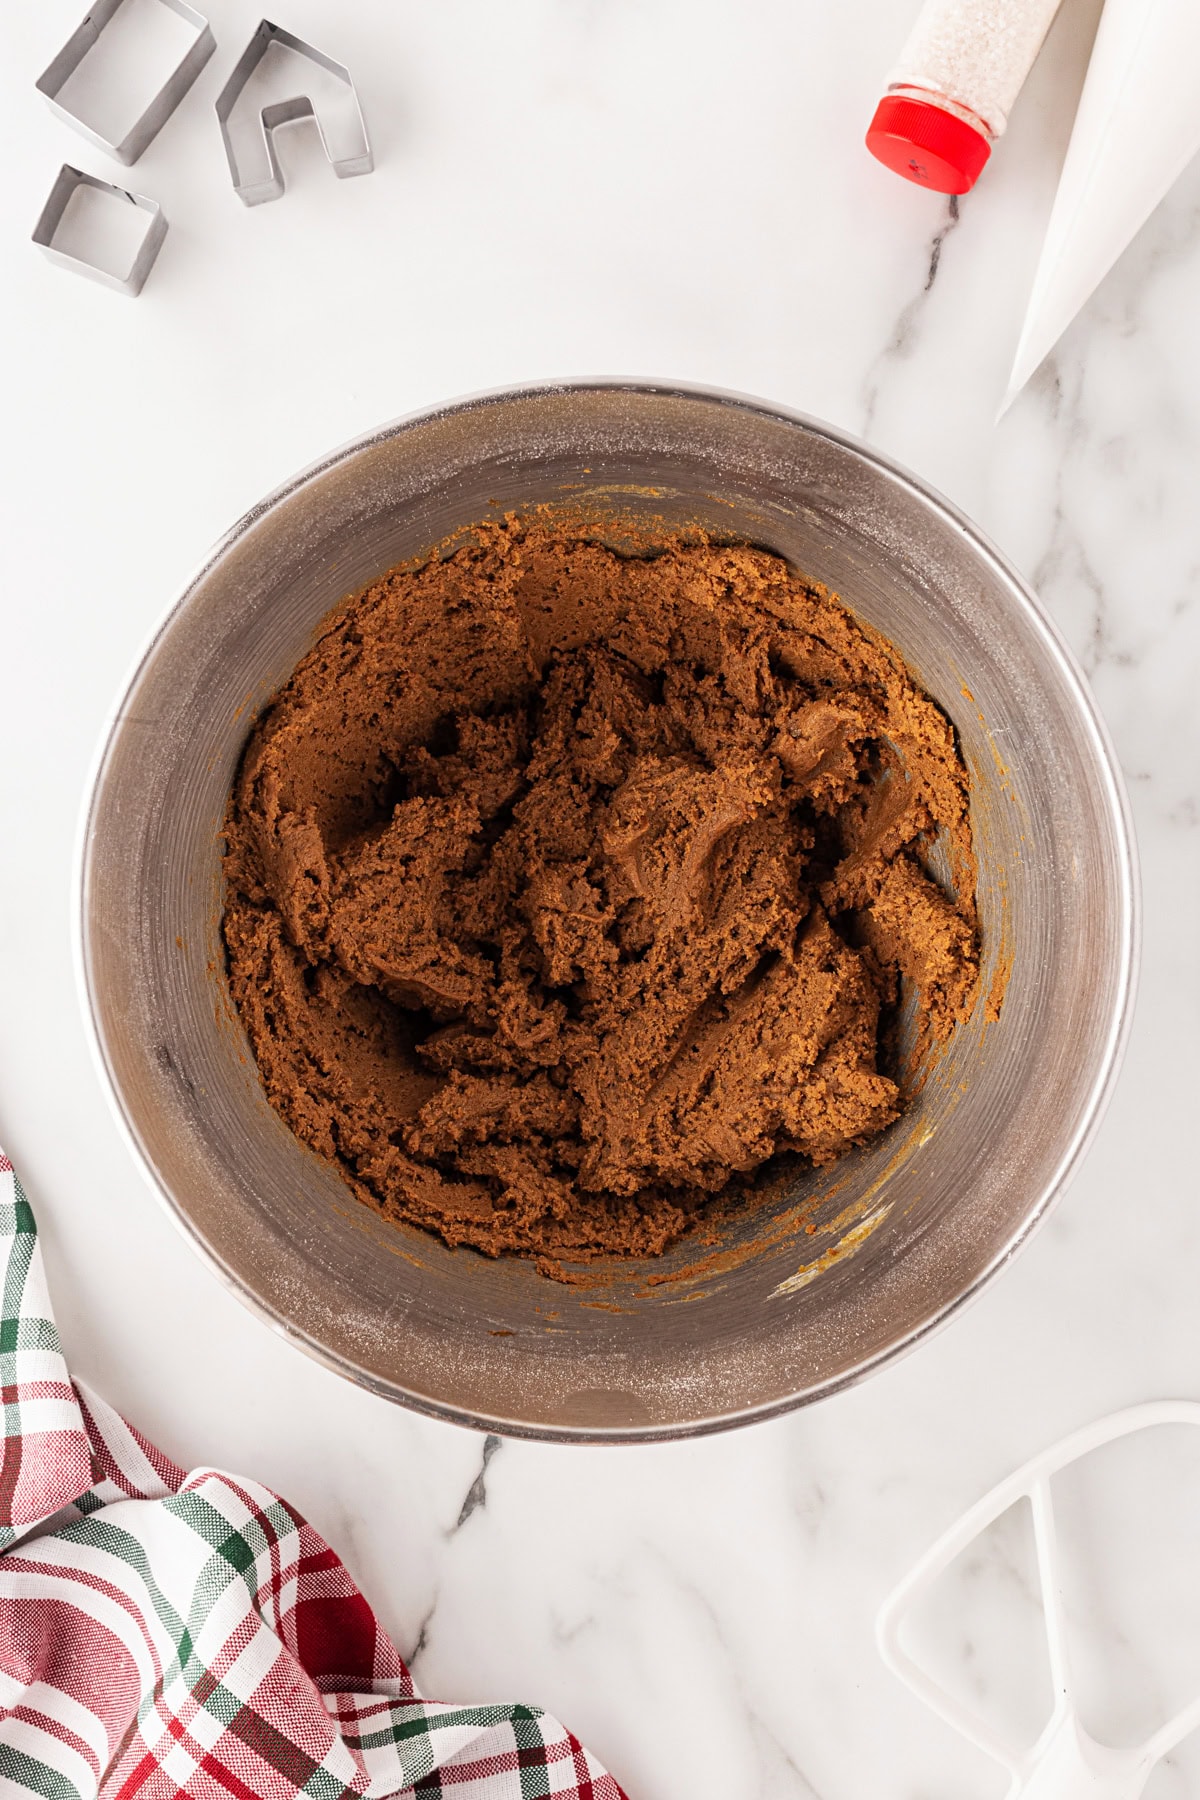
In a large bowl of a stand-up mixer with a paddle attachment, add all the gingerbread ingredients and mix well together (I know that is weird, but it works just fine, everyone in the pool!!).
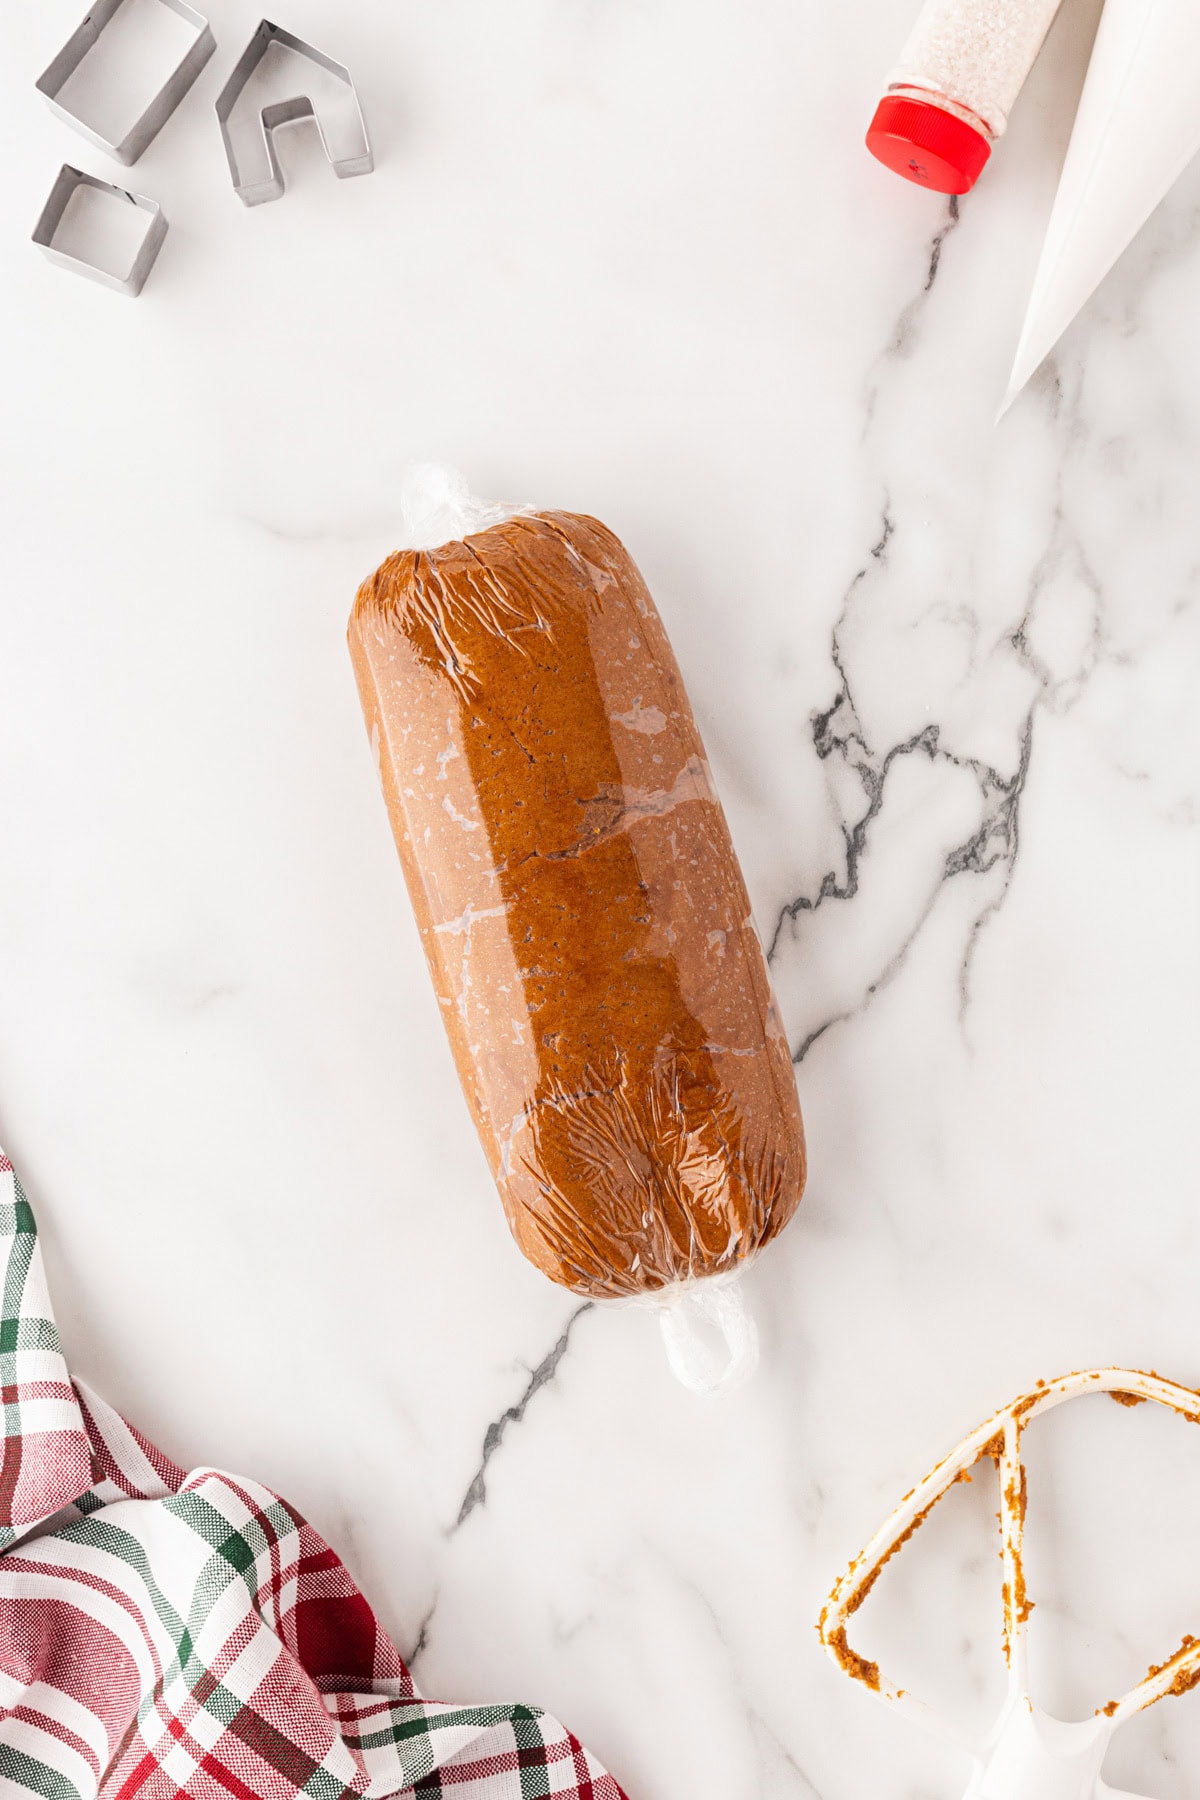
Transfer dough to plastic wrap and place in the refrigerator for at least one hour.
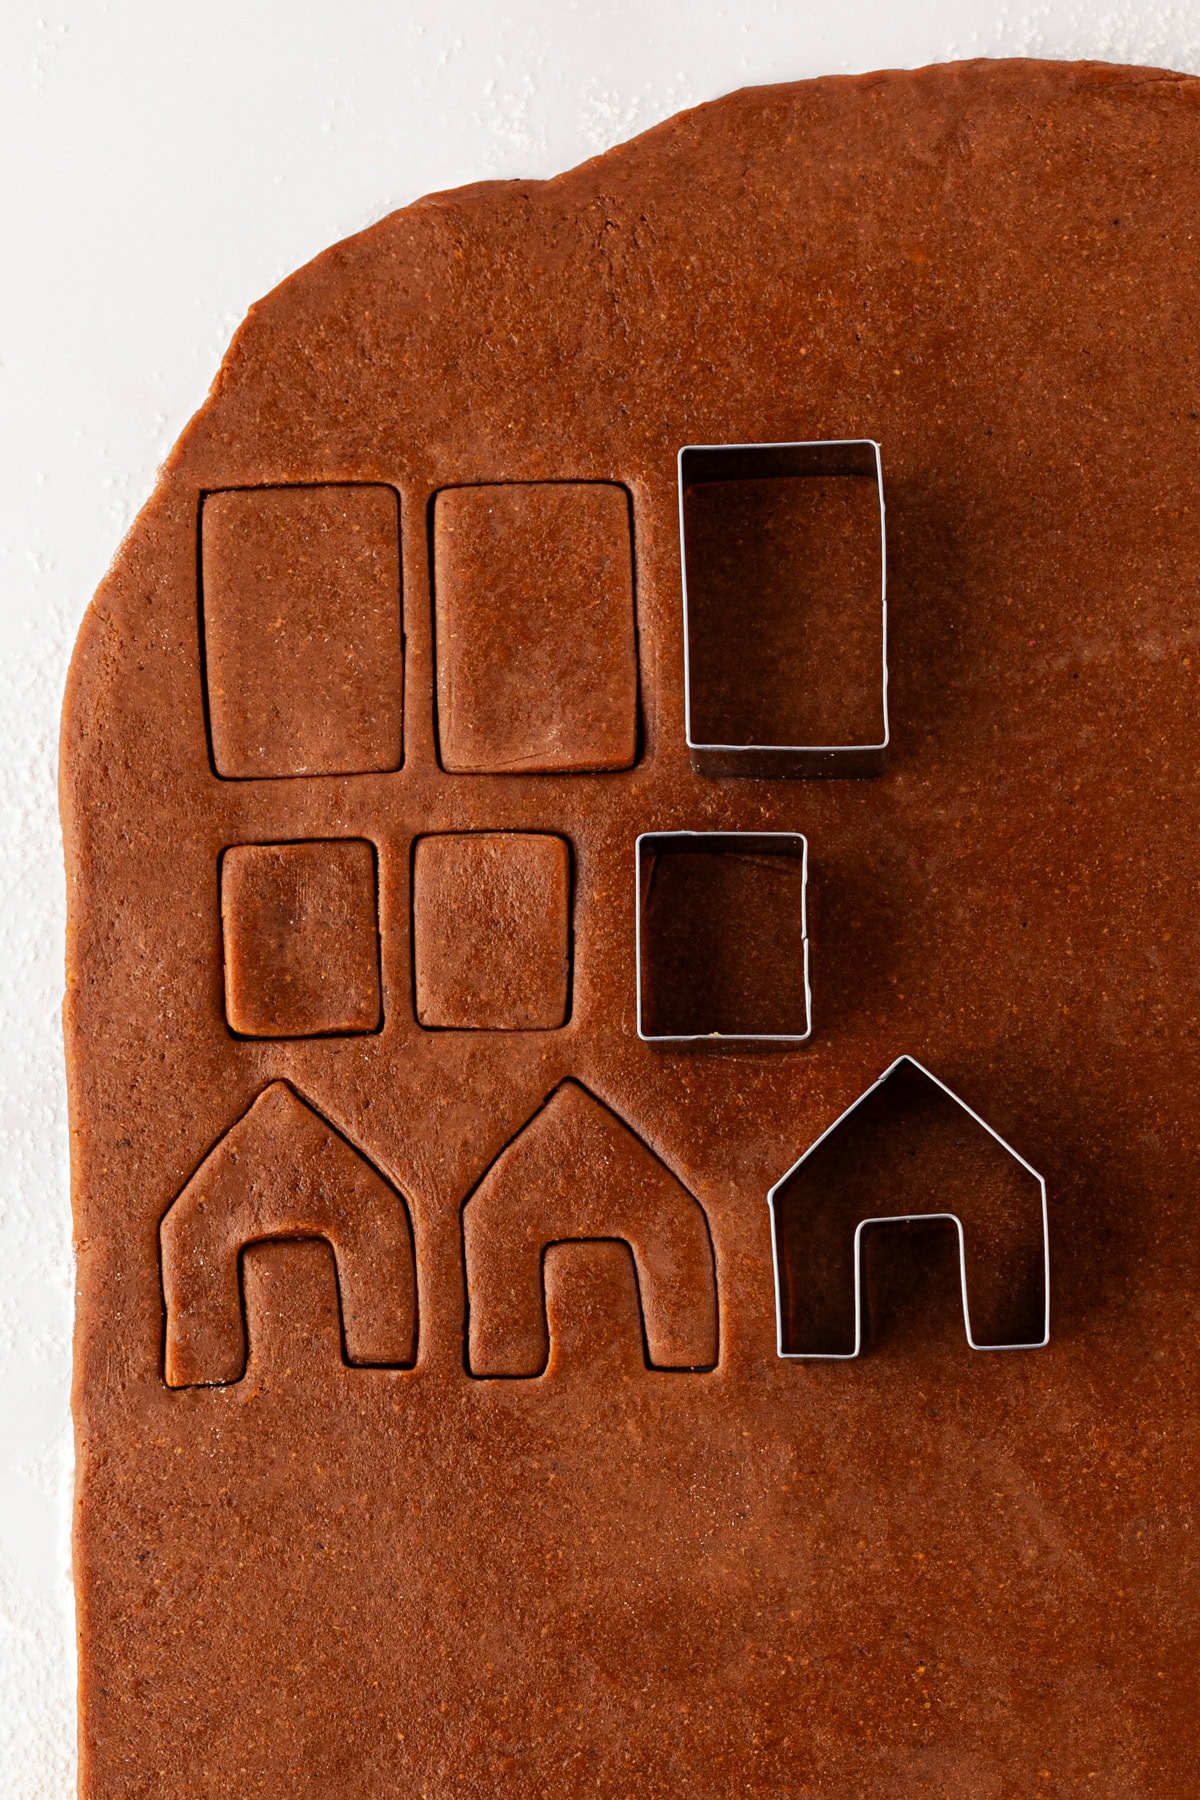
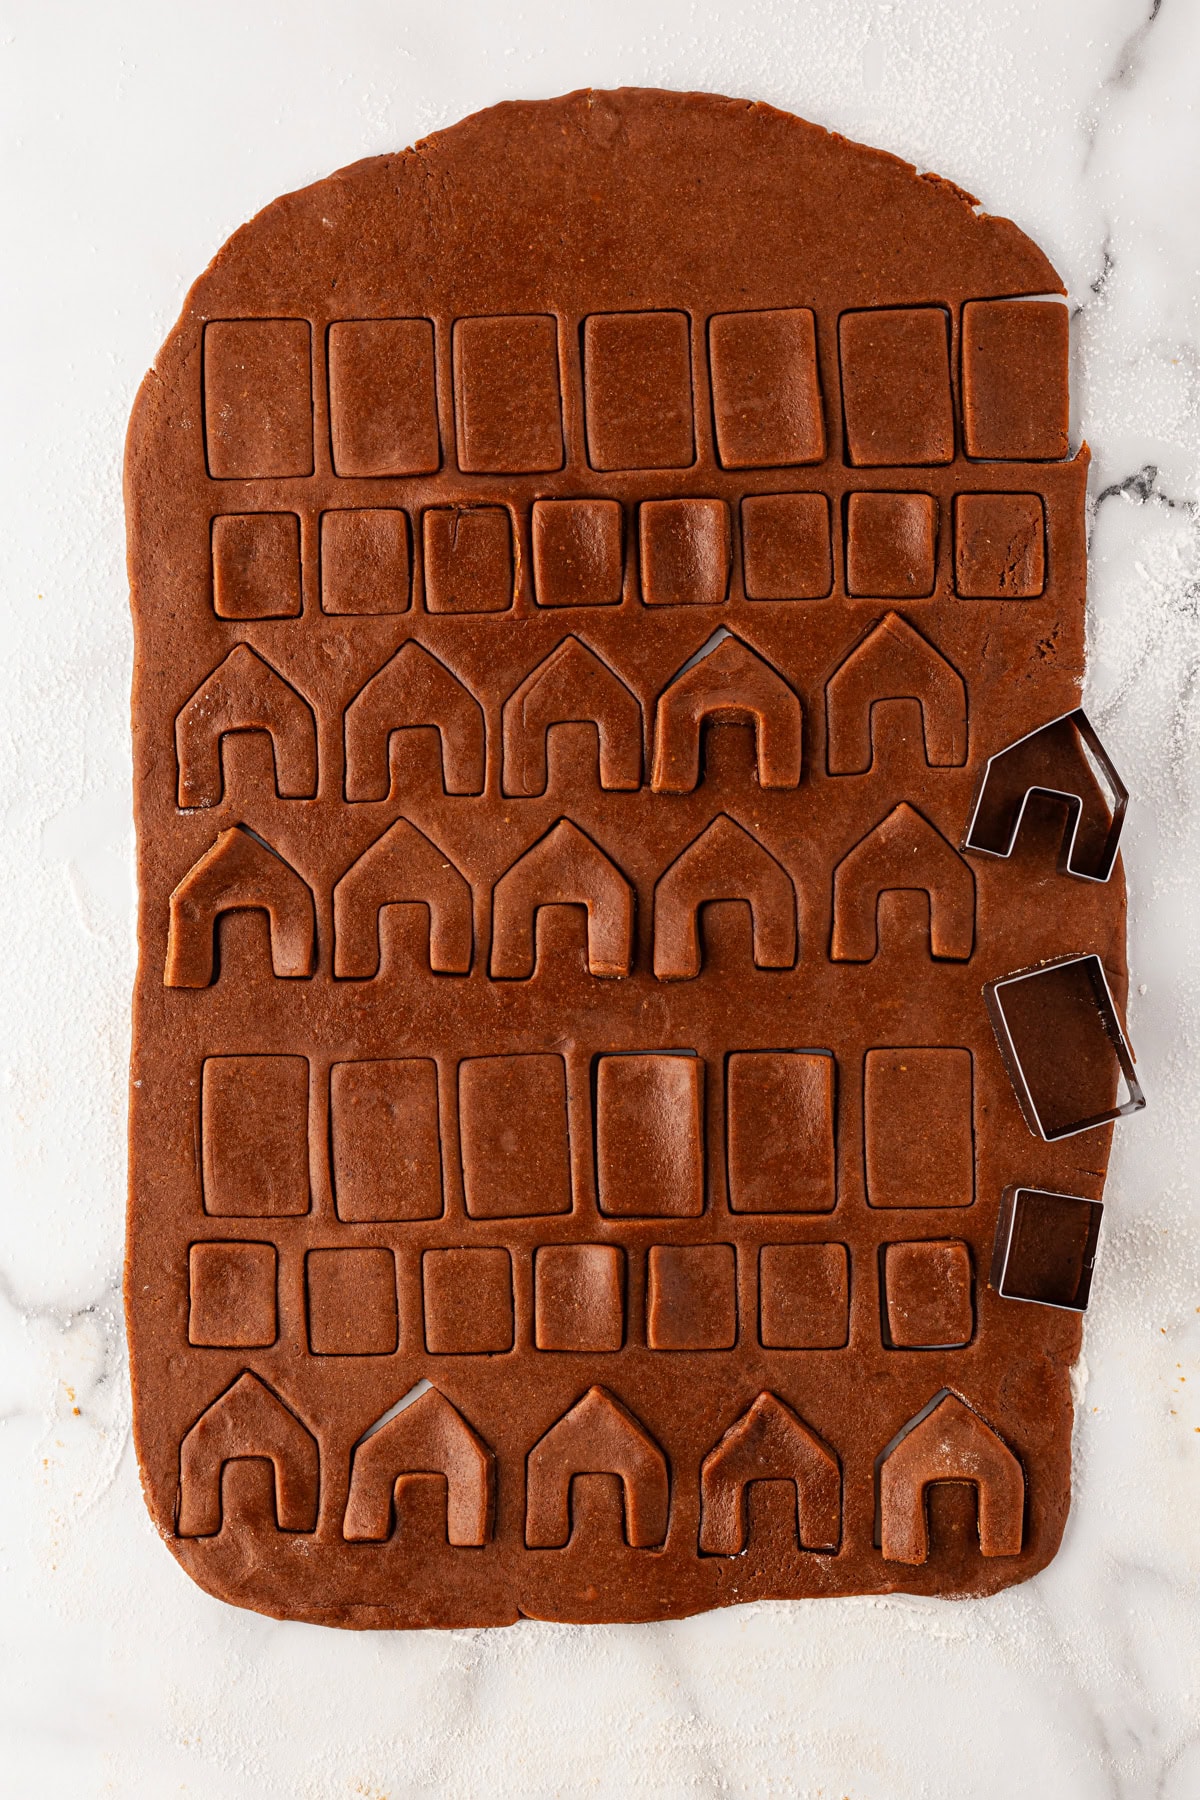
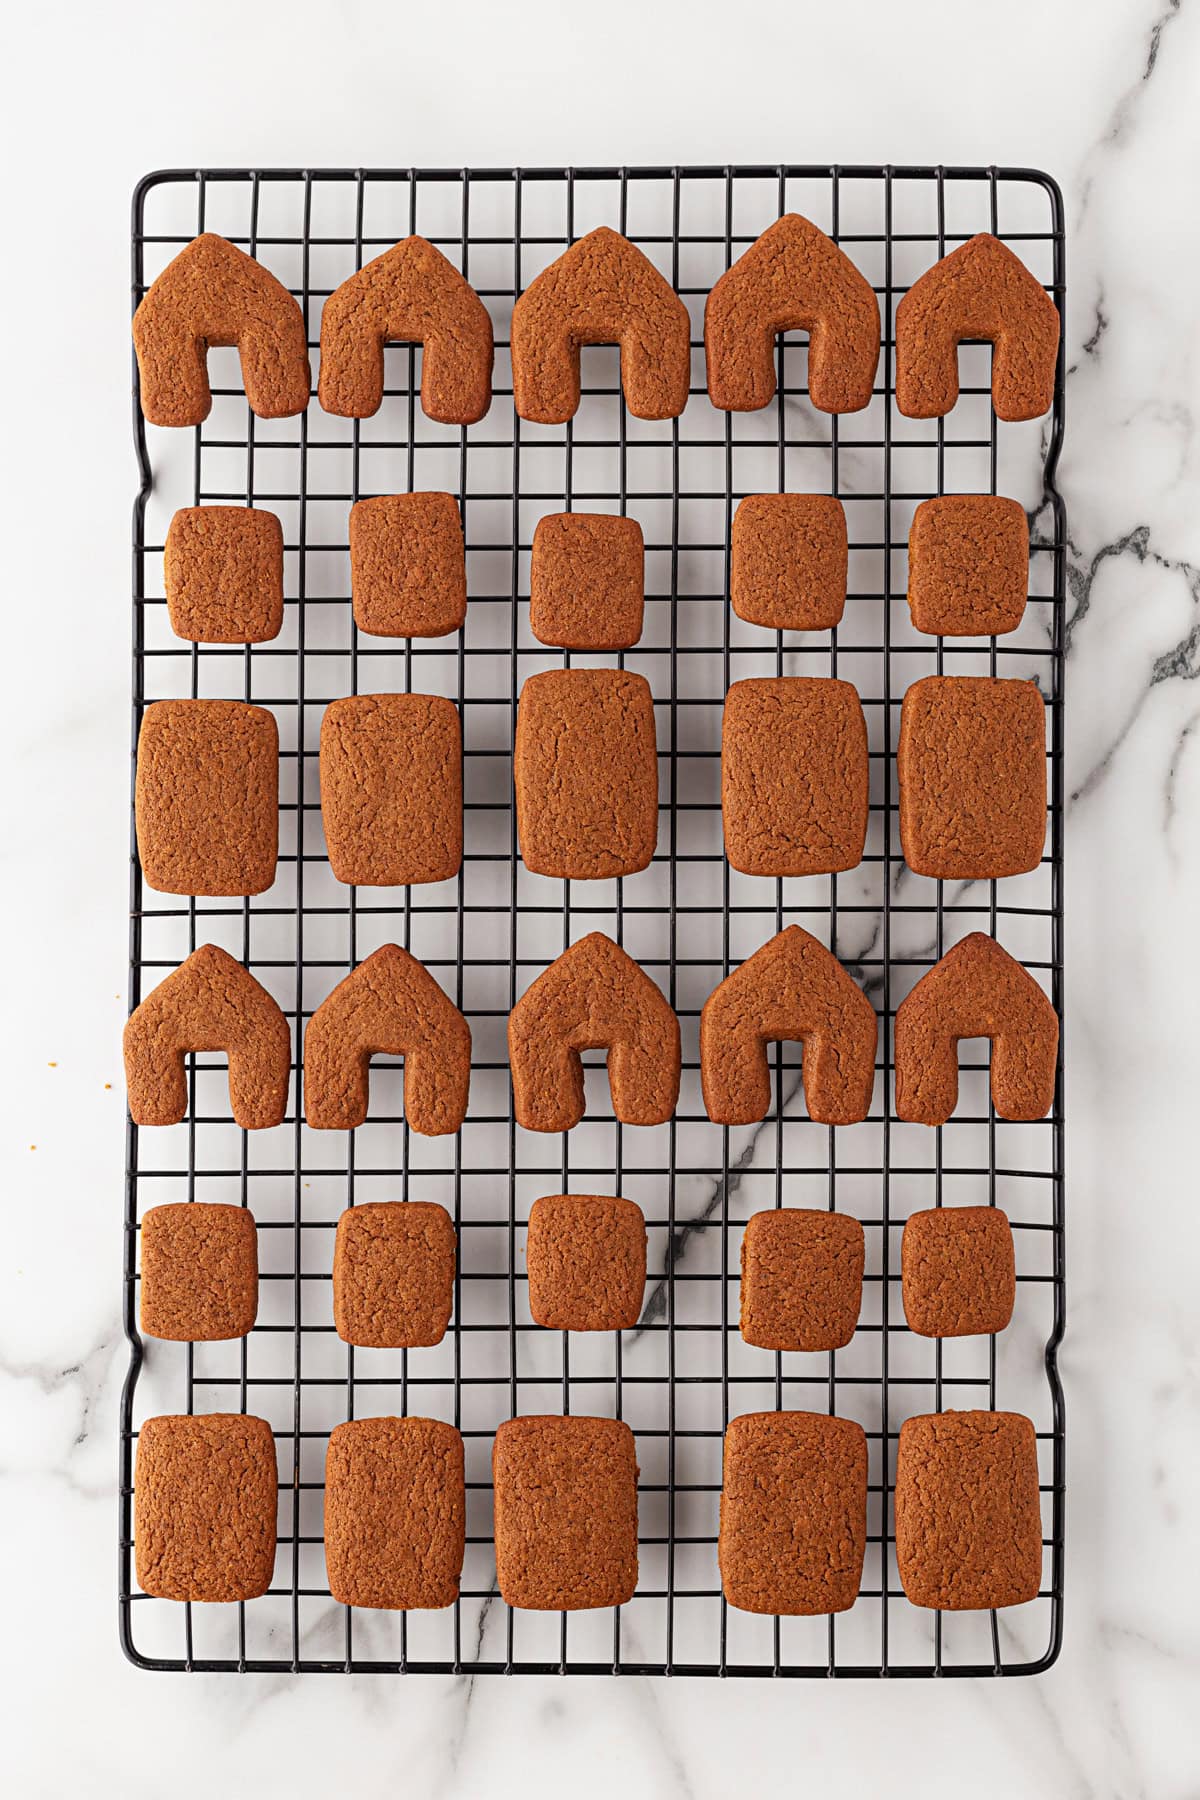
Preheat oven to 350F. Grease cookie sheets and set them aside. On a lightly floured surface and working with half the dough, roll out to 1/4″ thick. With floured cookie cutters, cut out gingerbread house pieces (2 each to make a complete house) and lay carefully onto the prepared sheets.
Reform dough into a ball and continue to roll out and cut out gingerbread house pieces.
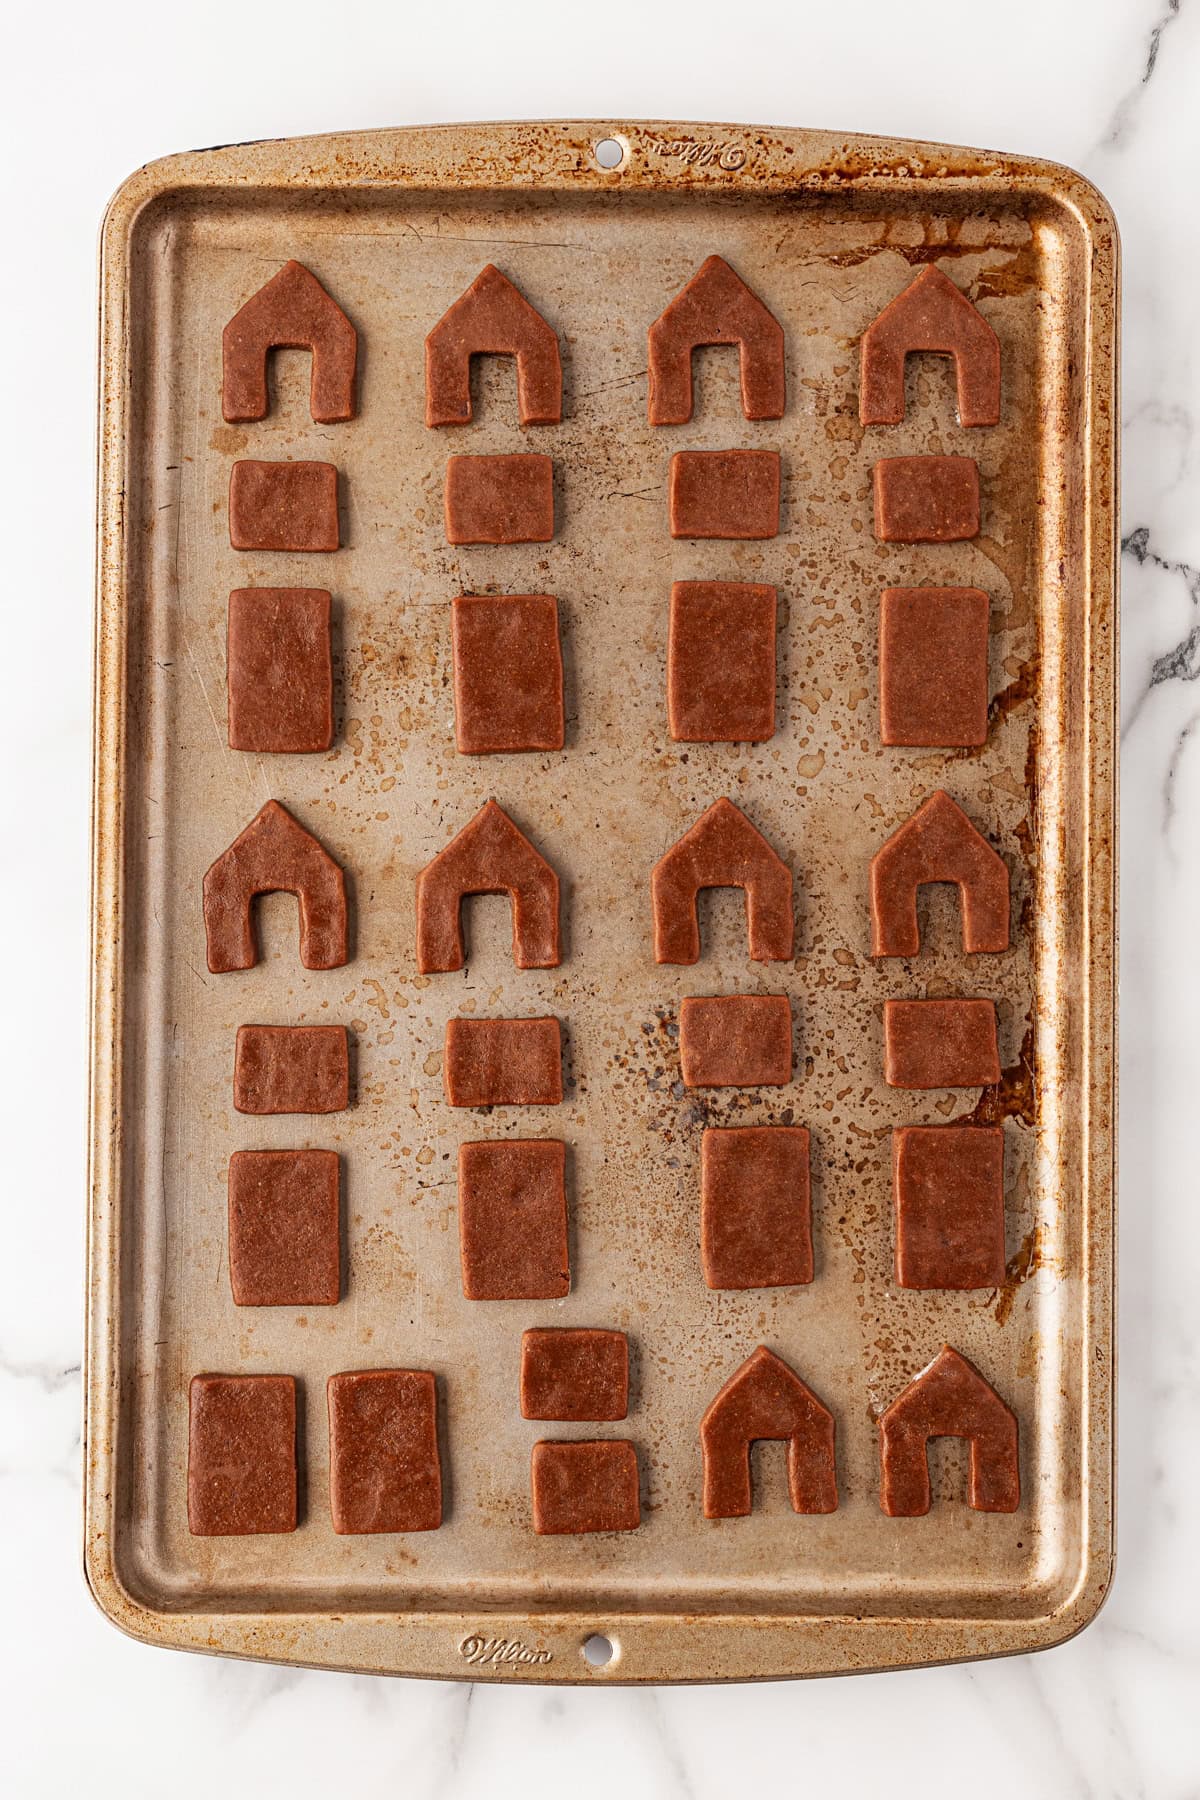
Bake 8 min. until lightly browned. Remove from pan and transfer to a cooling rack. Cool completely before assembling – approximately 20 min.
While the cookies are cooling, make the royal icing. Alternatively, you can purchase the icing, and I have given you a link above.
Royal Icing
Combine egg white + cream of tartar in a clean, grease-free bowl. Beat with a hand mixer on medium until foamy, 1-2 minutes.
Add powdered sugar, ½ cup at a time, mixing on low speed until fully incorporated.
Once all the sugar is in, beat on medium-high until the icing is thick, glossy, and holds stiff peaks, about 4–6 minutes.
Transfer to a frosting bag (you don’t need a tip). When ready to use, cut a very small piece off the tip of the bag, like the size of the tip of a pencil as you want to be able to “write” with it.
Time to Decorate Your Mini Gingerbread House
Once the cookies have completely cooled, it’s time to assemble the houses. You’ll need 2 house-shaped pieces, 2 small rectangles (for the sides), and 2 large rectangles (for the roof). So basically, cut 2 of each cookie-cutter shape to form a complete house.
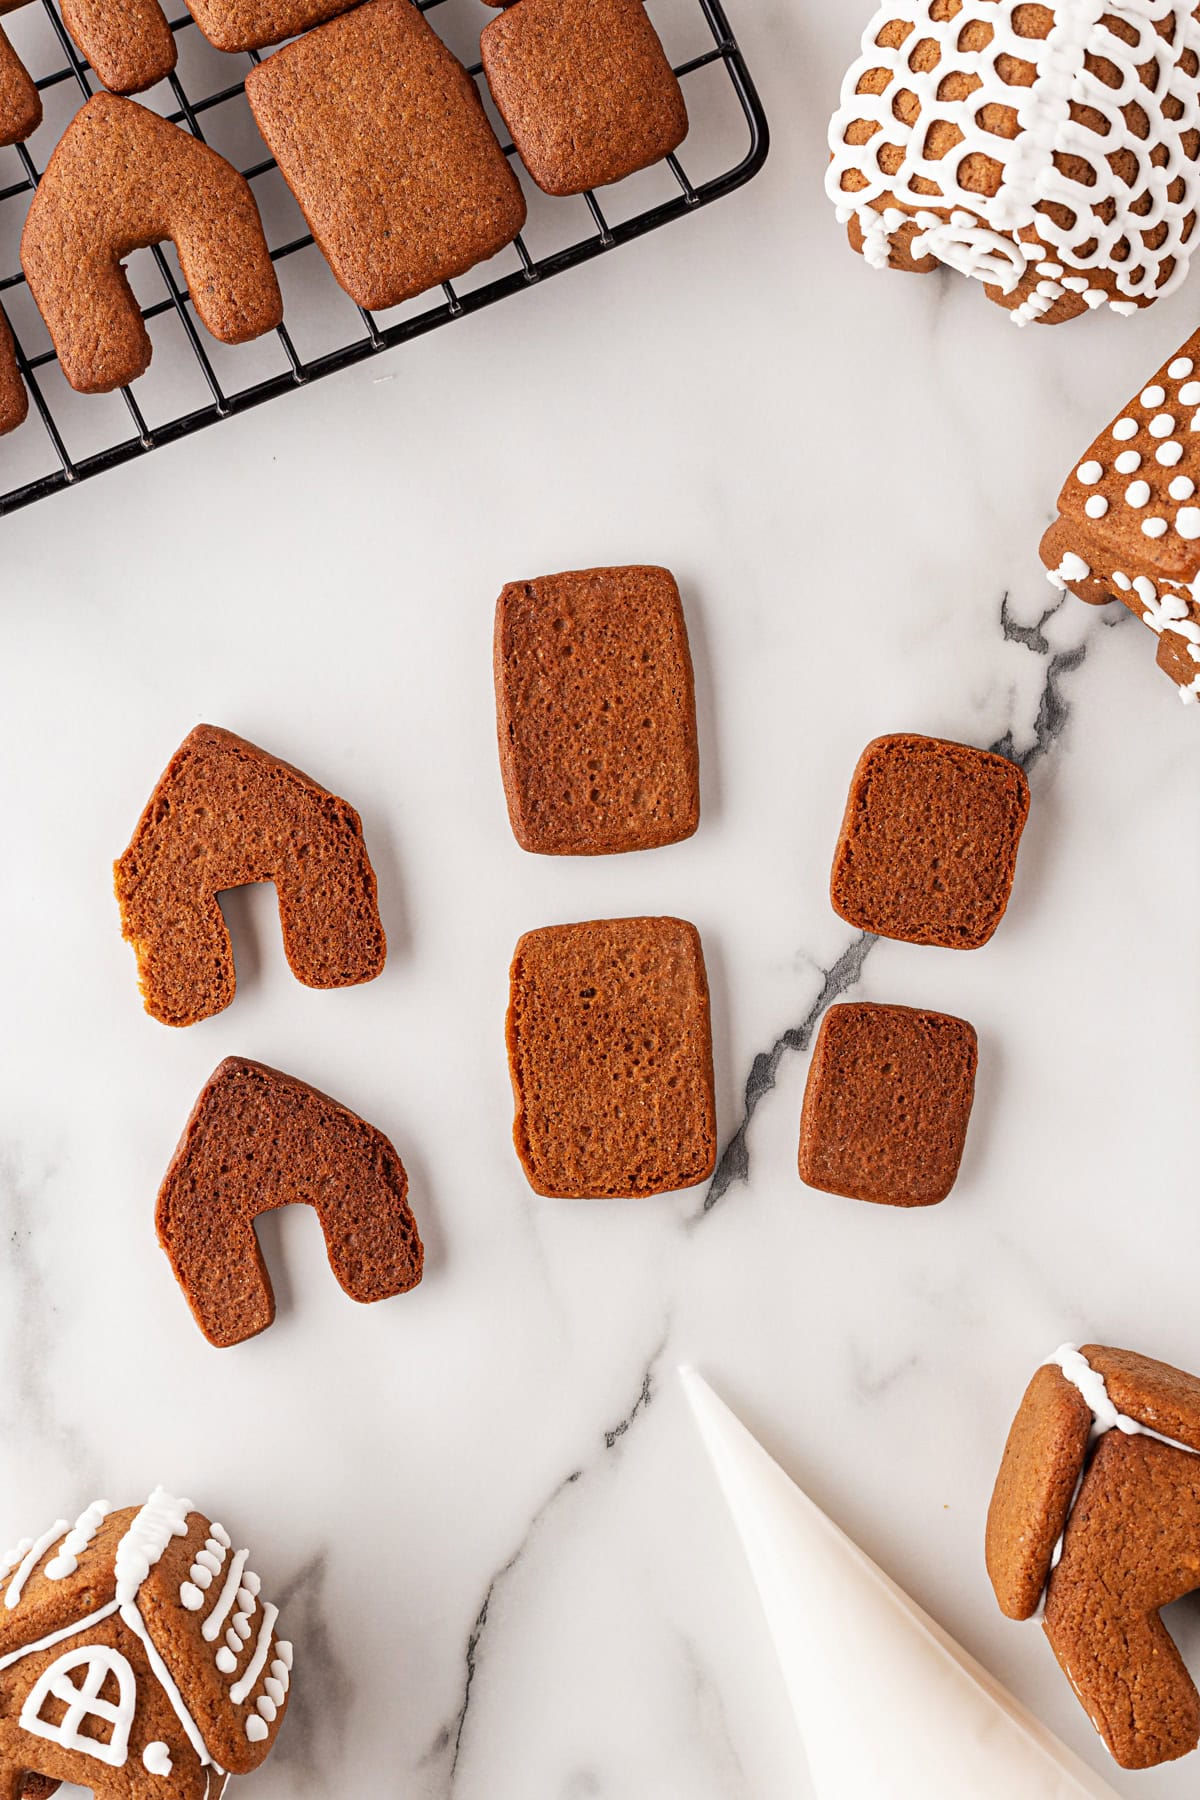
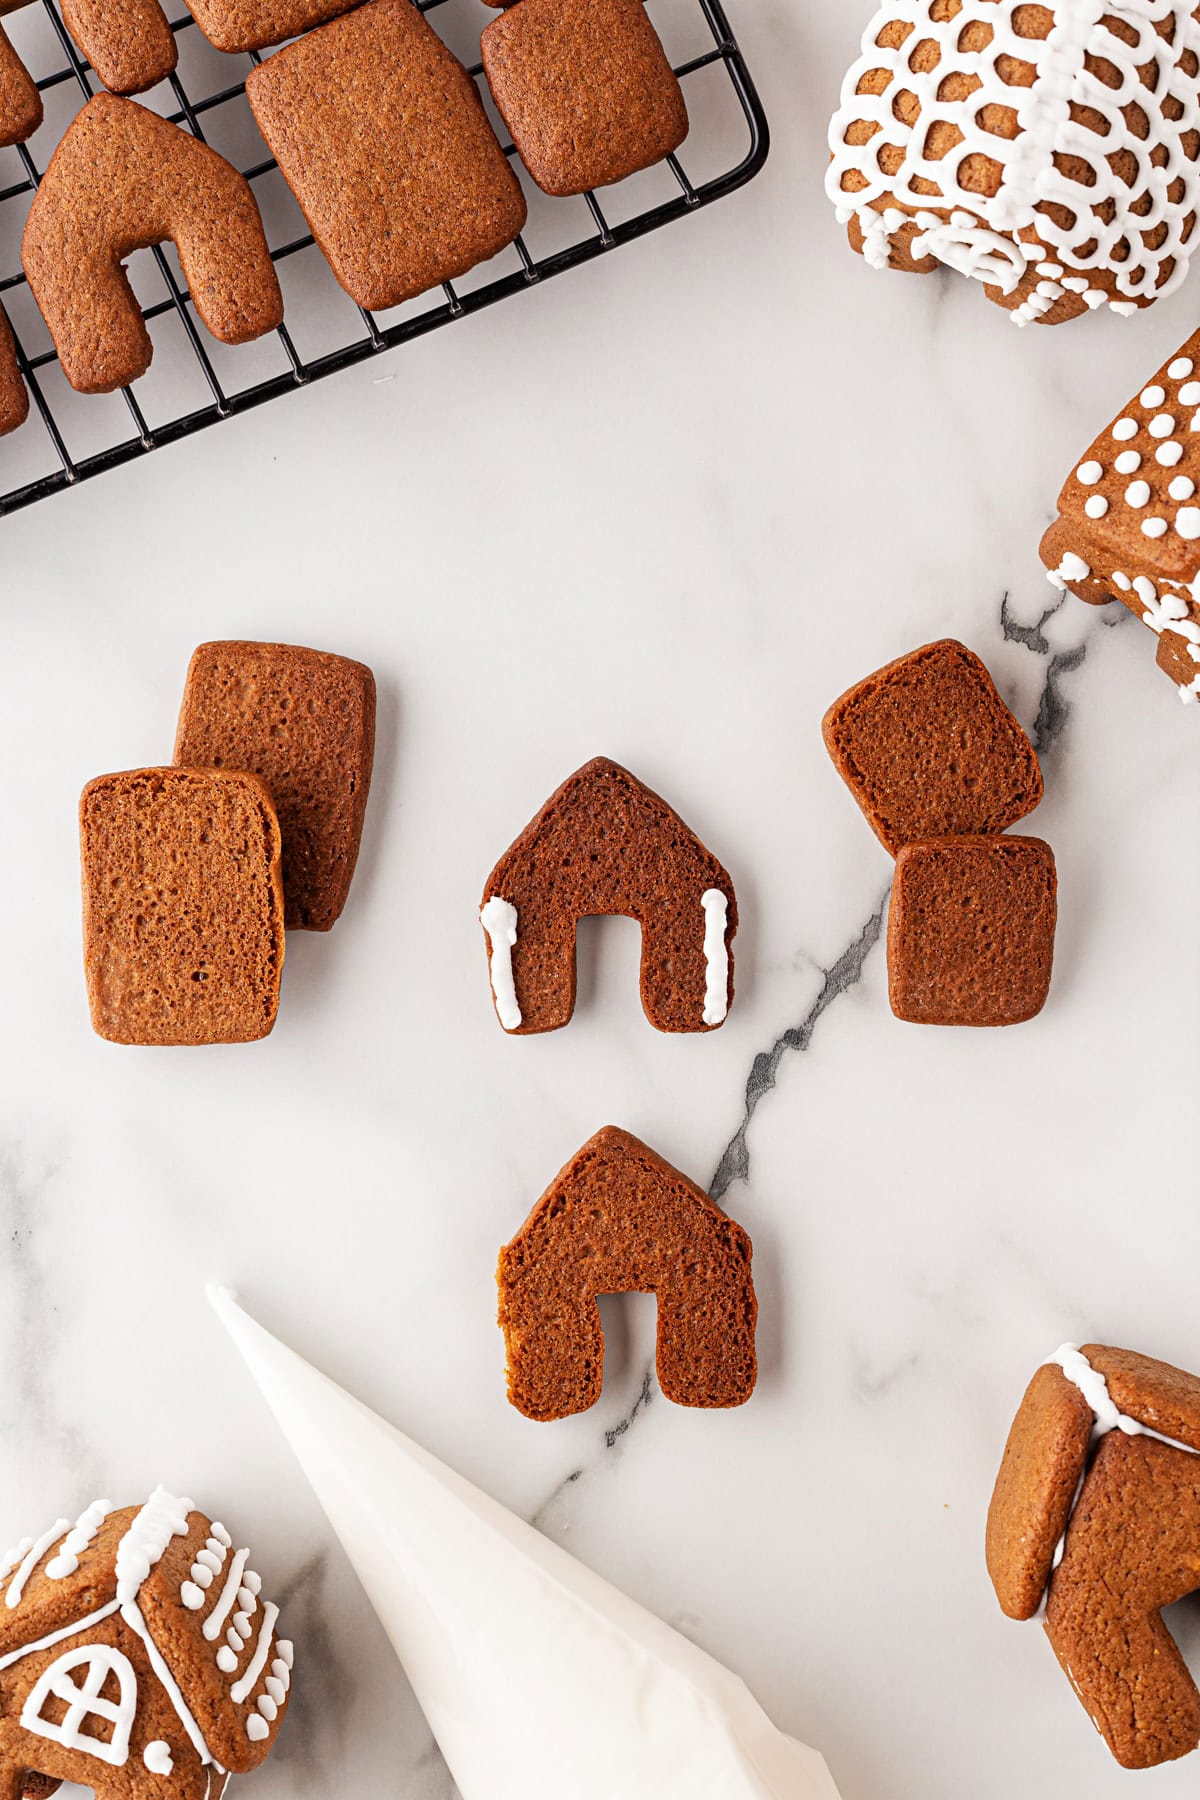
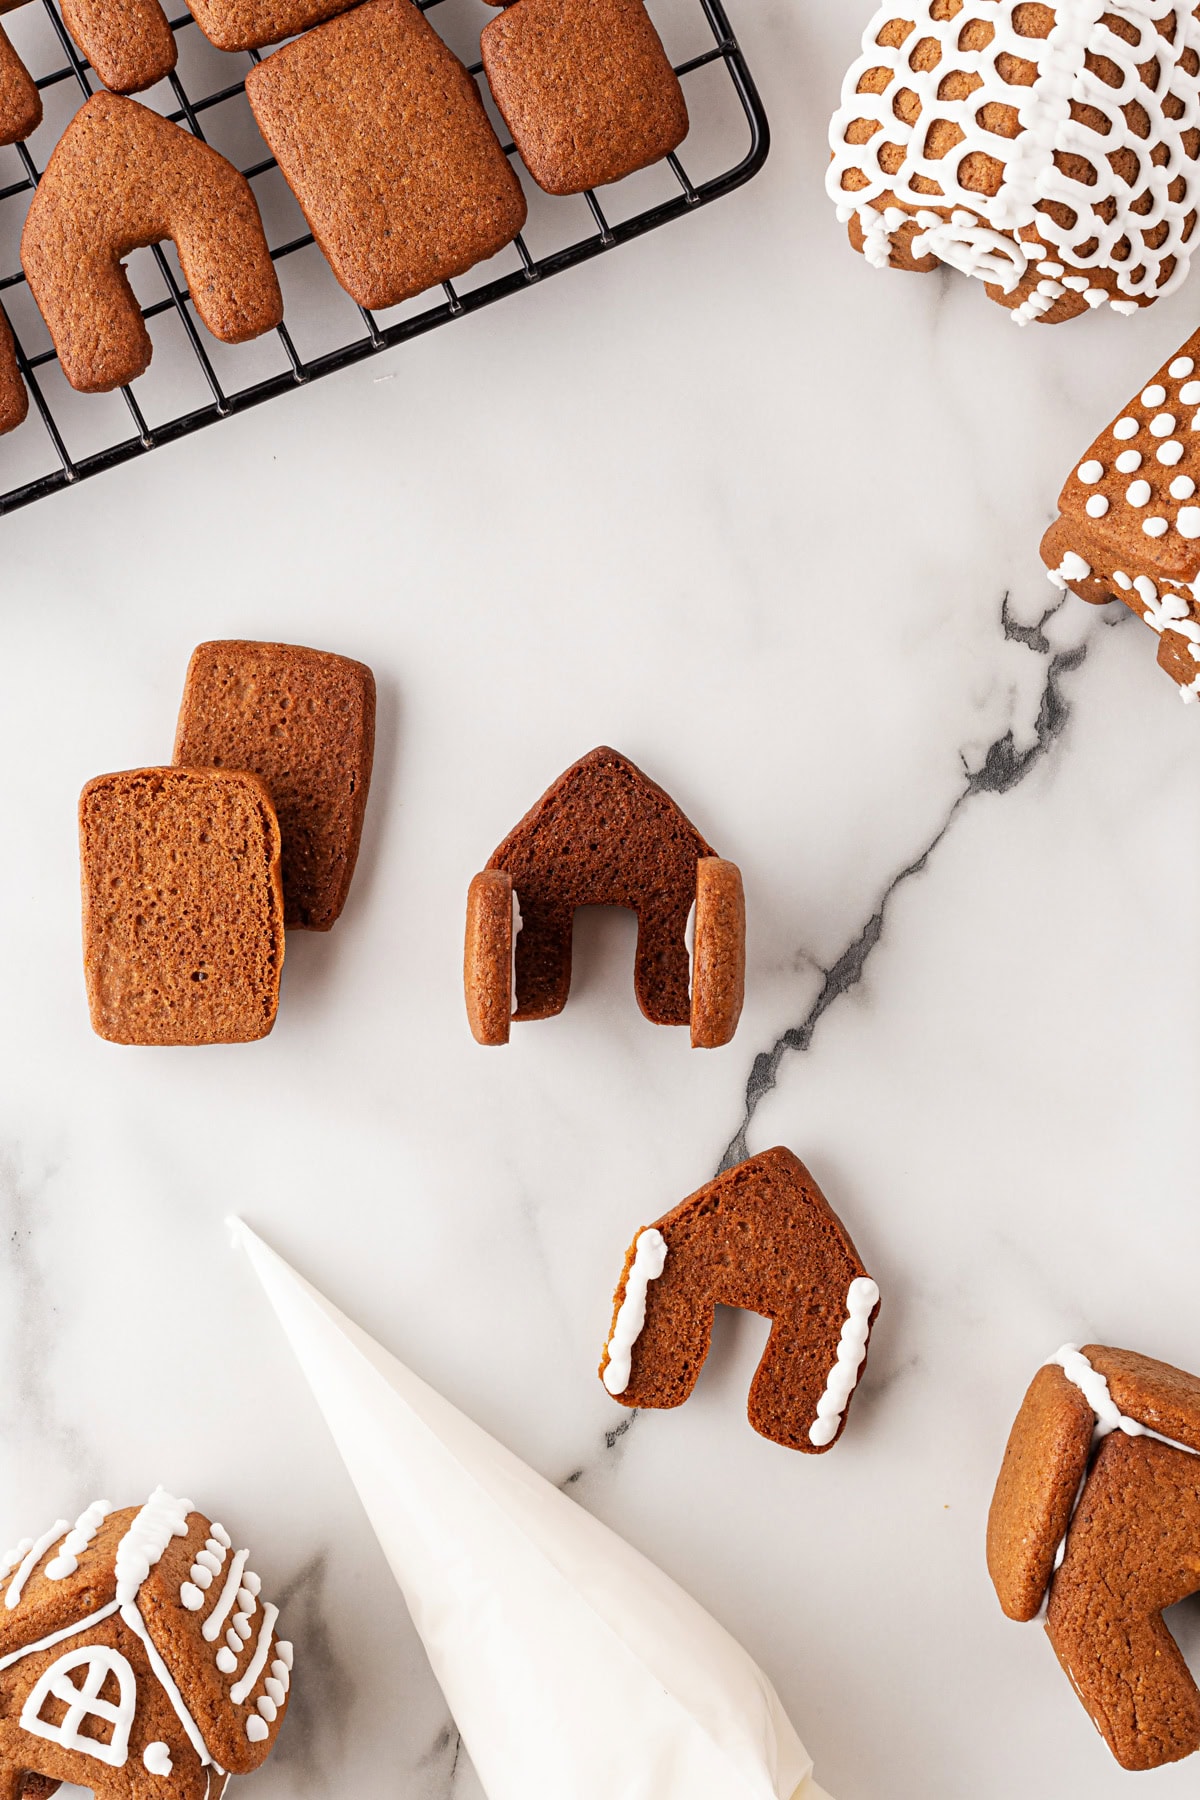
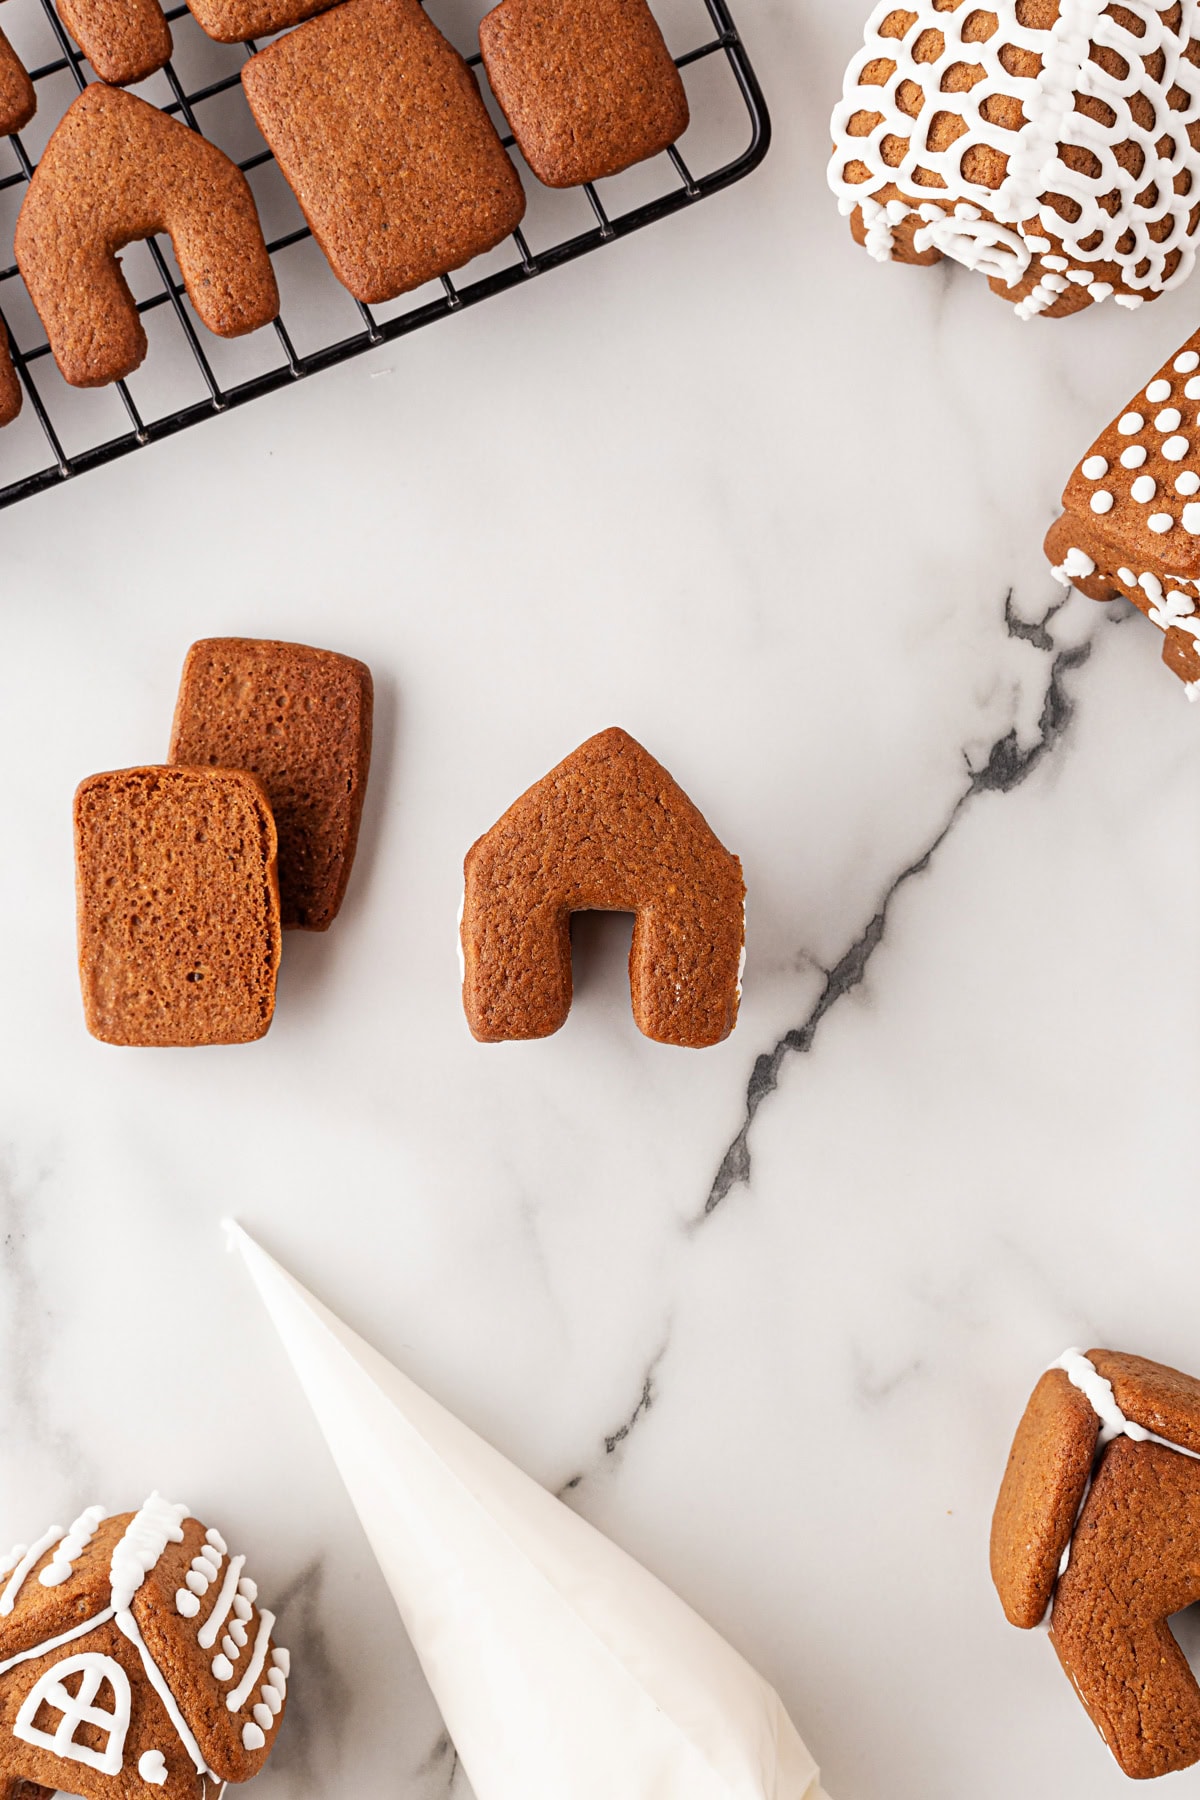
Build the base:
Place one house piece flat on your work surface. Pipe two lines of royal icing on the bottom half, opposite each other. Attach the two small rectangles (short sides) to the icing, forming the side walls. Hold gently for a few seconds until the icing begins to set.
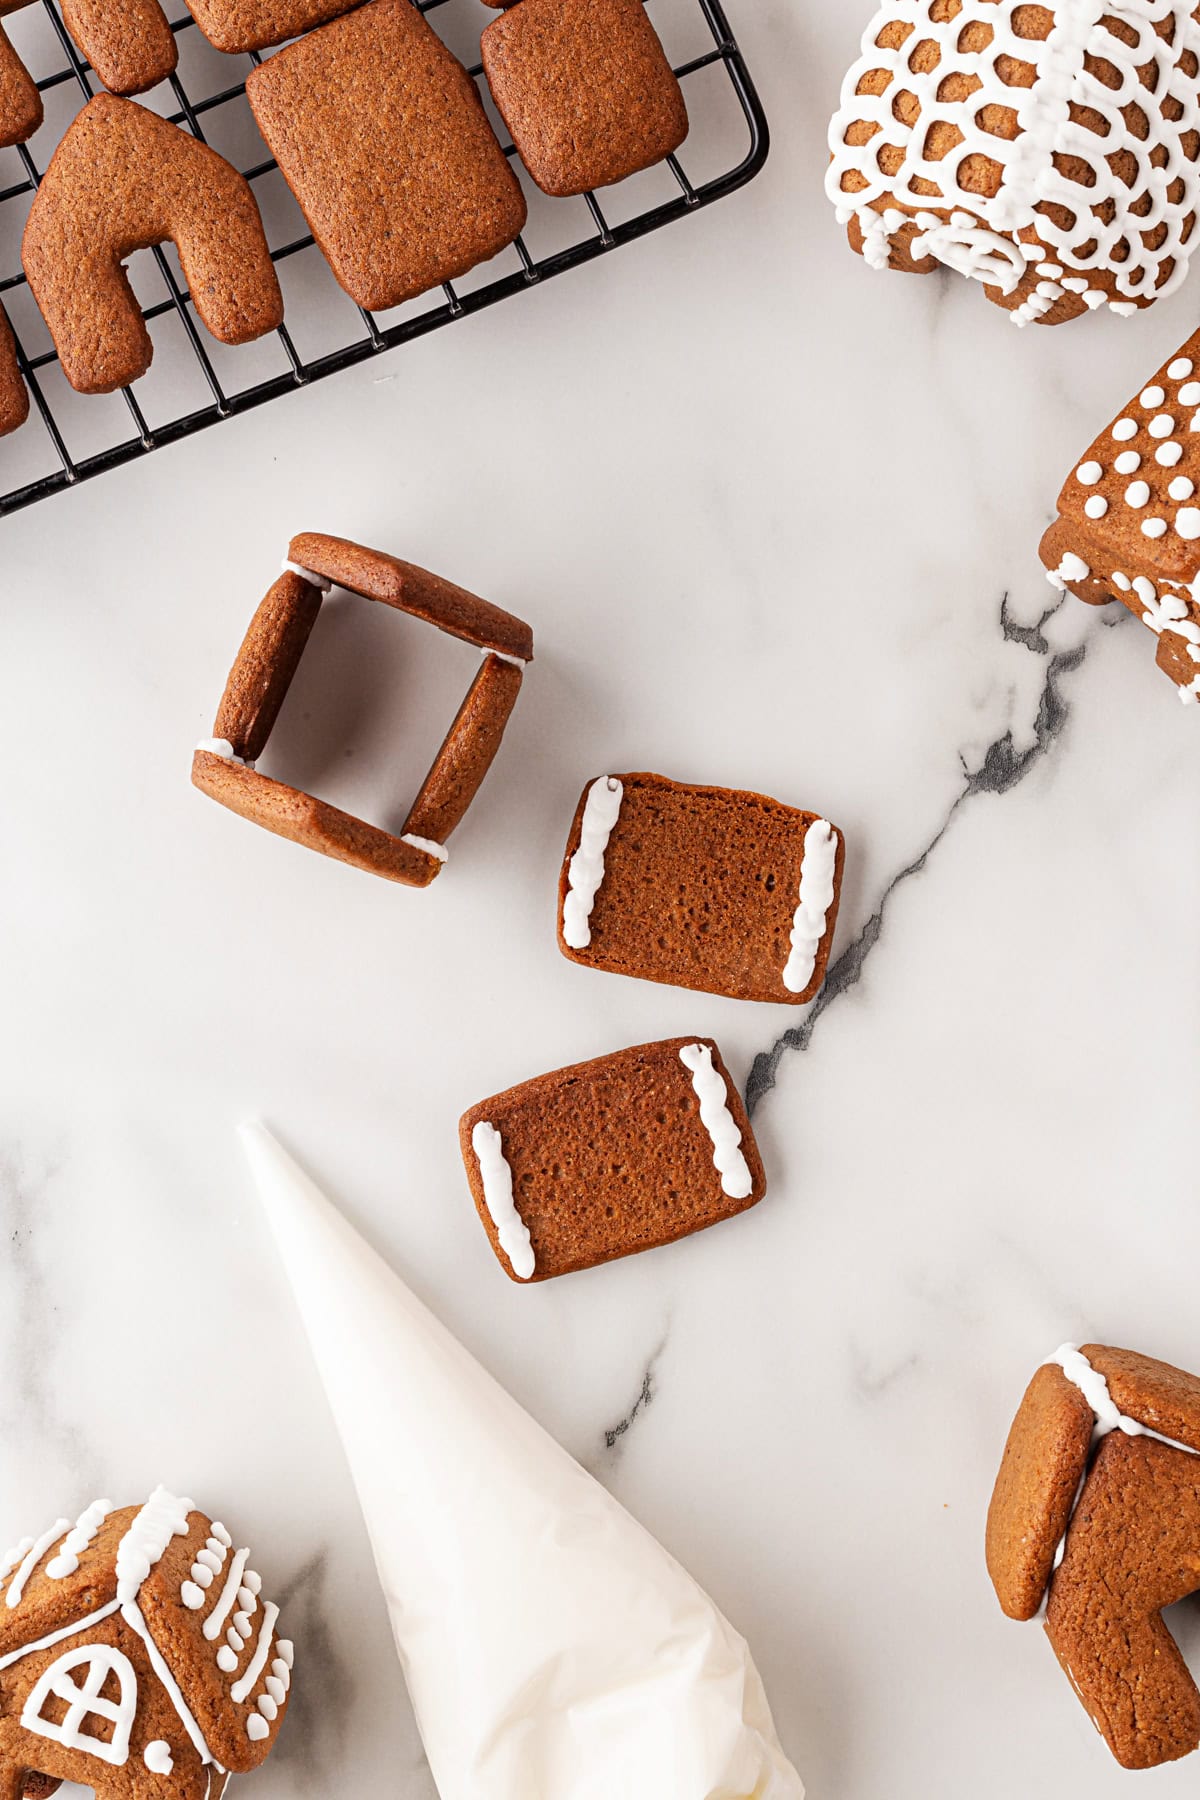
Attach the back wall:
Pipe two lines of icing on the second house piece, again opposite each other on the bottom half. Carefully press it onto the open ends of the side walls to complete the base. Hold for a few seconds, then gently flip the house upright.

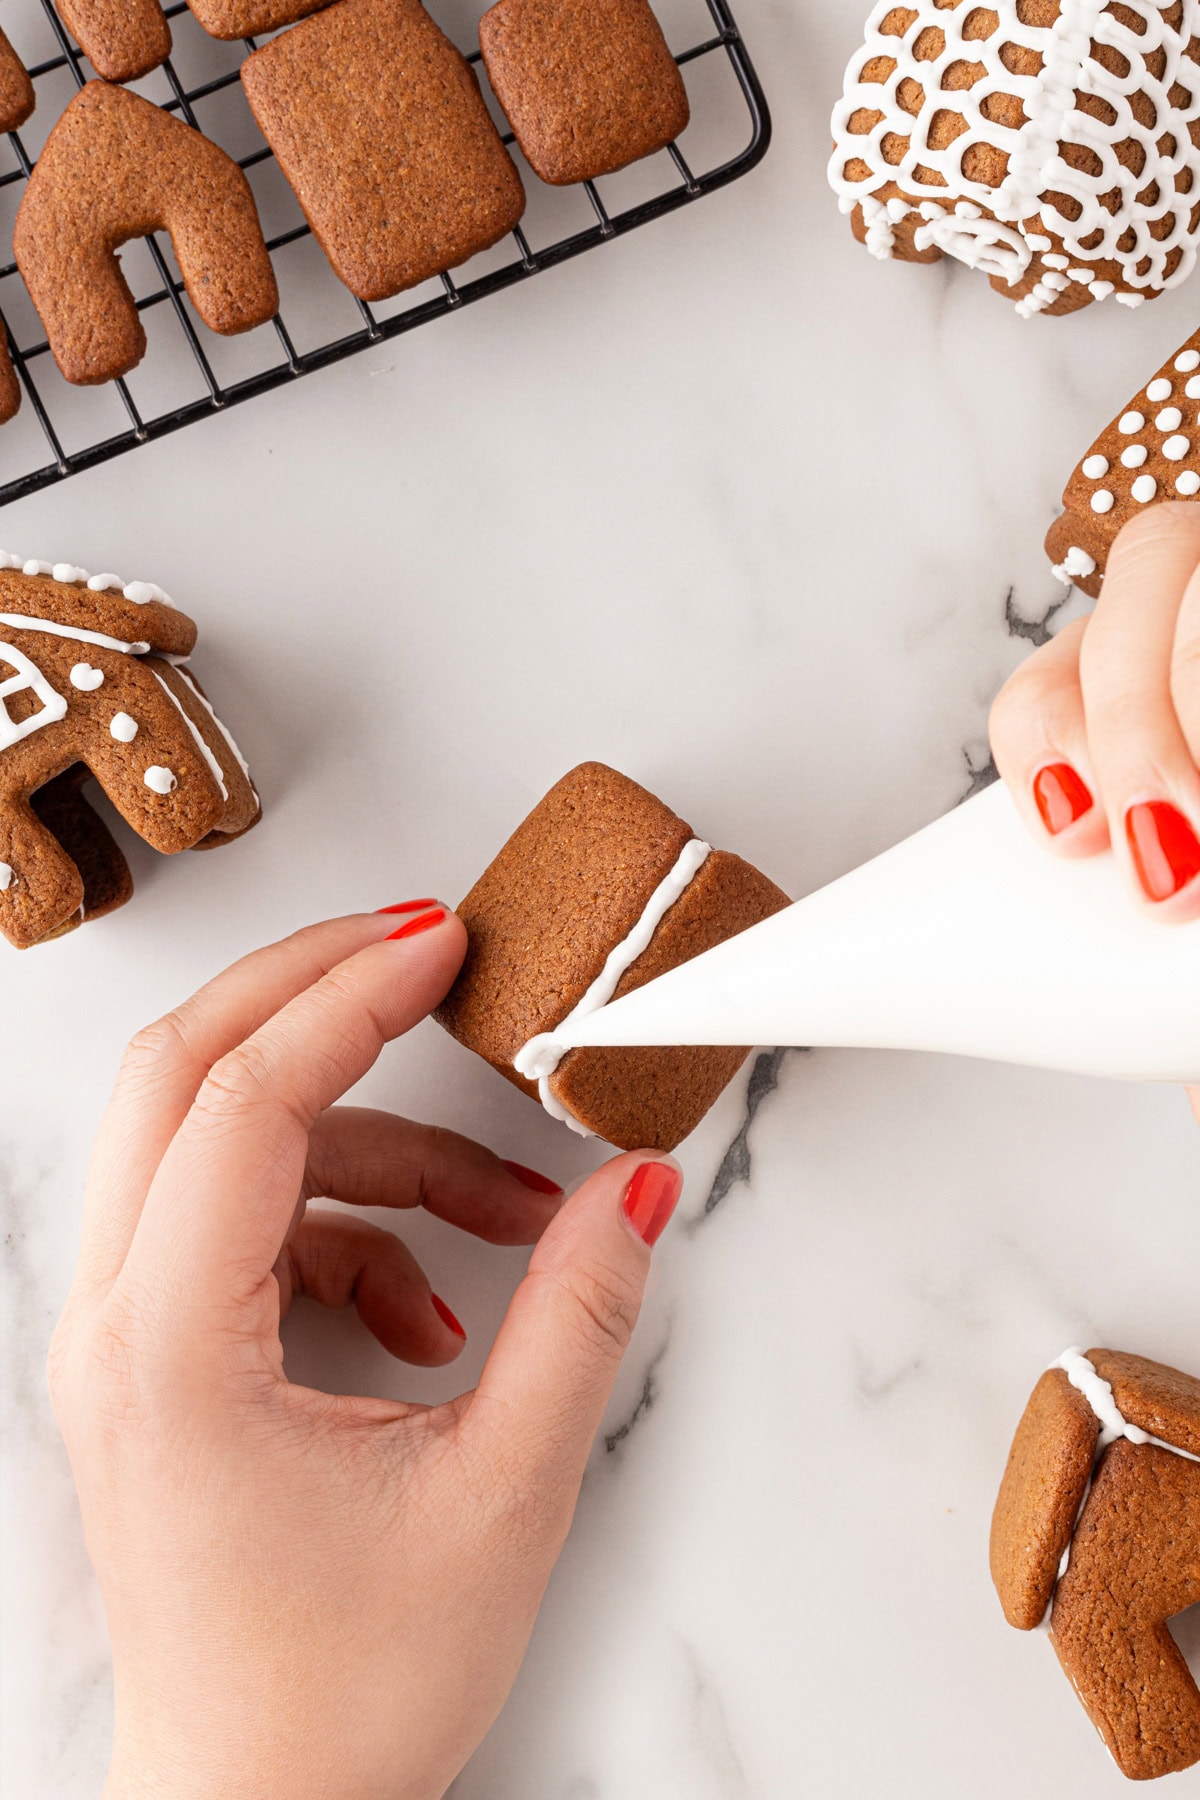
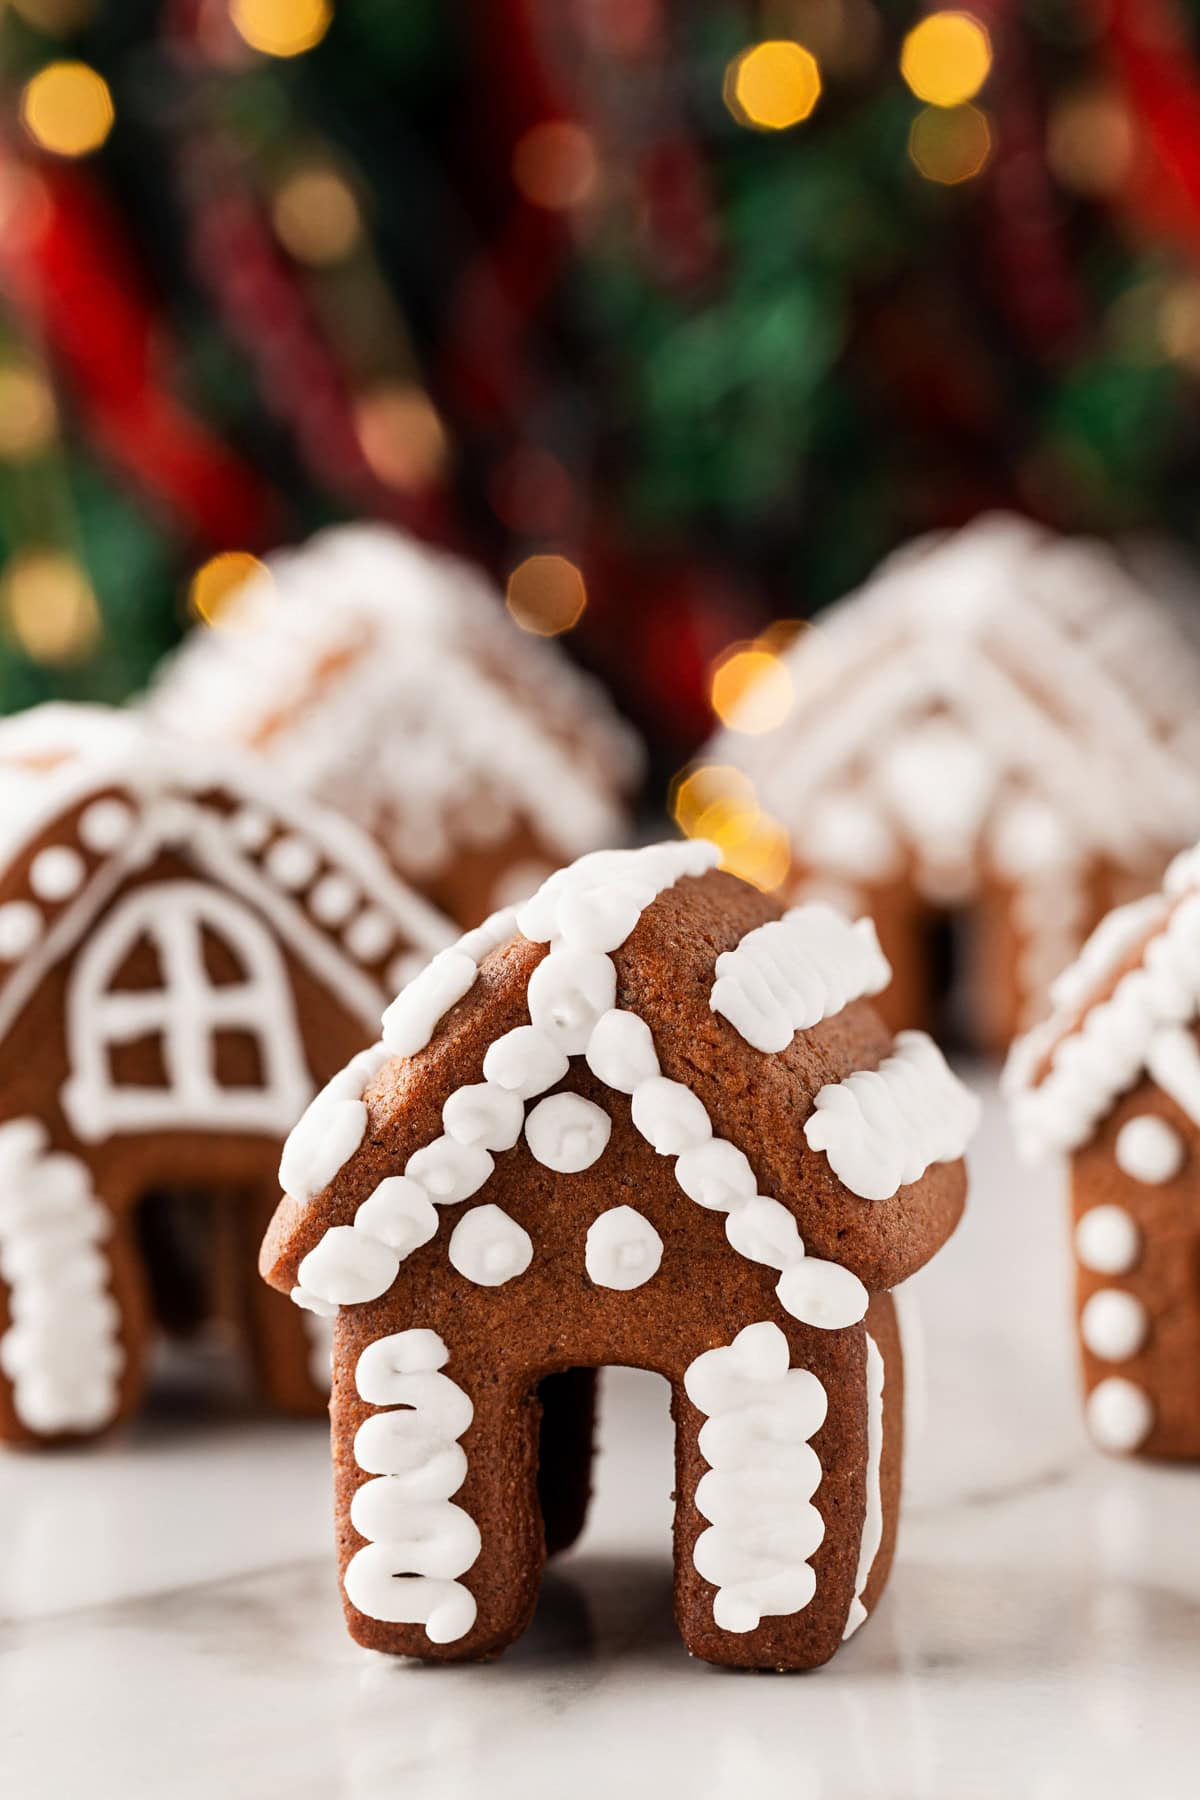
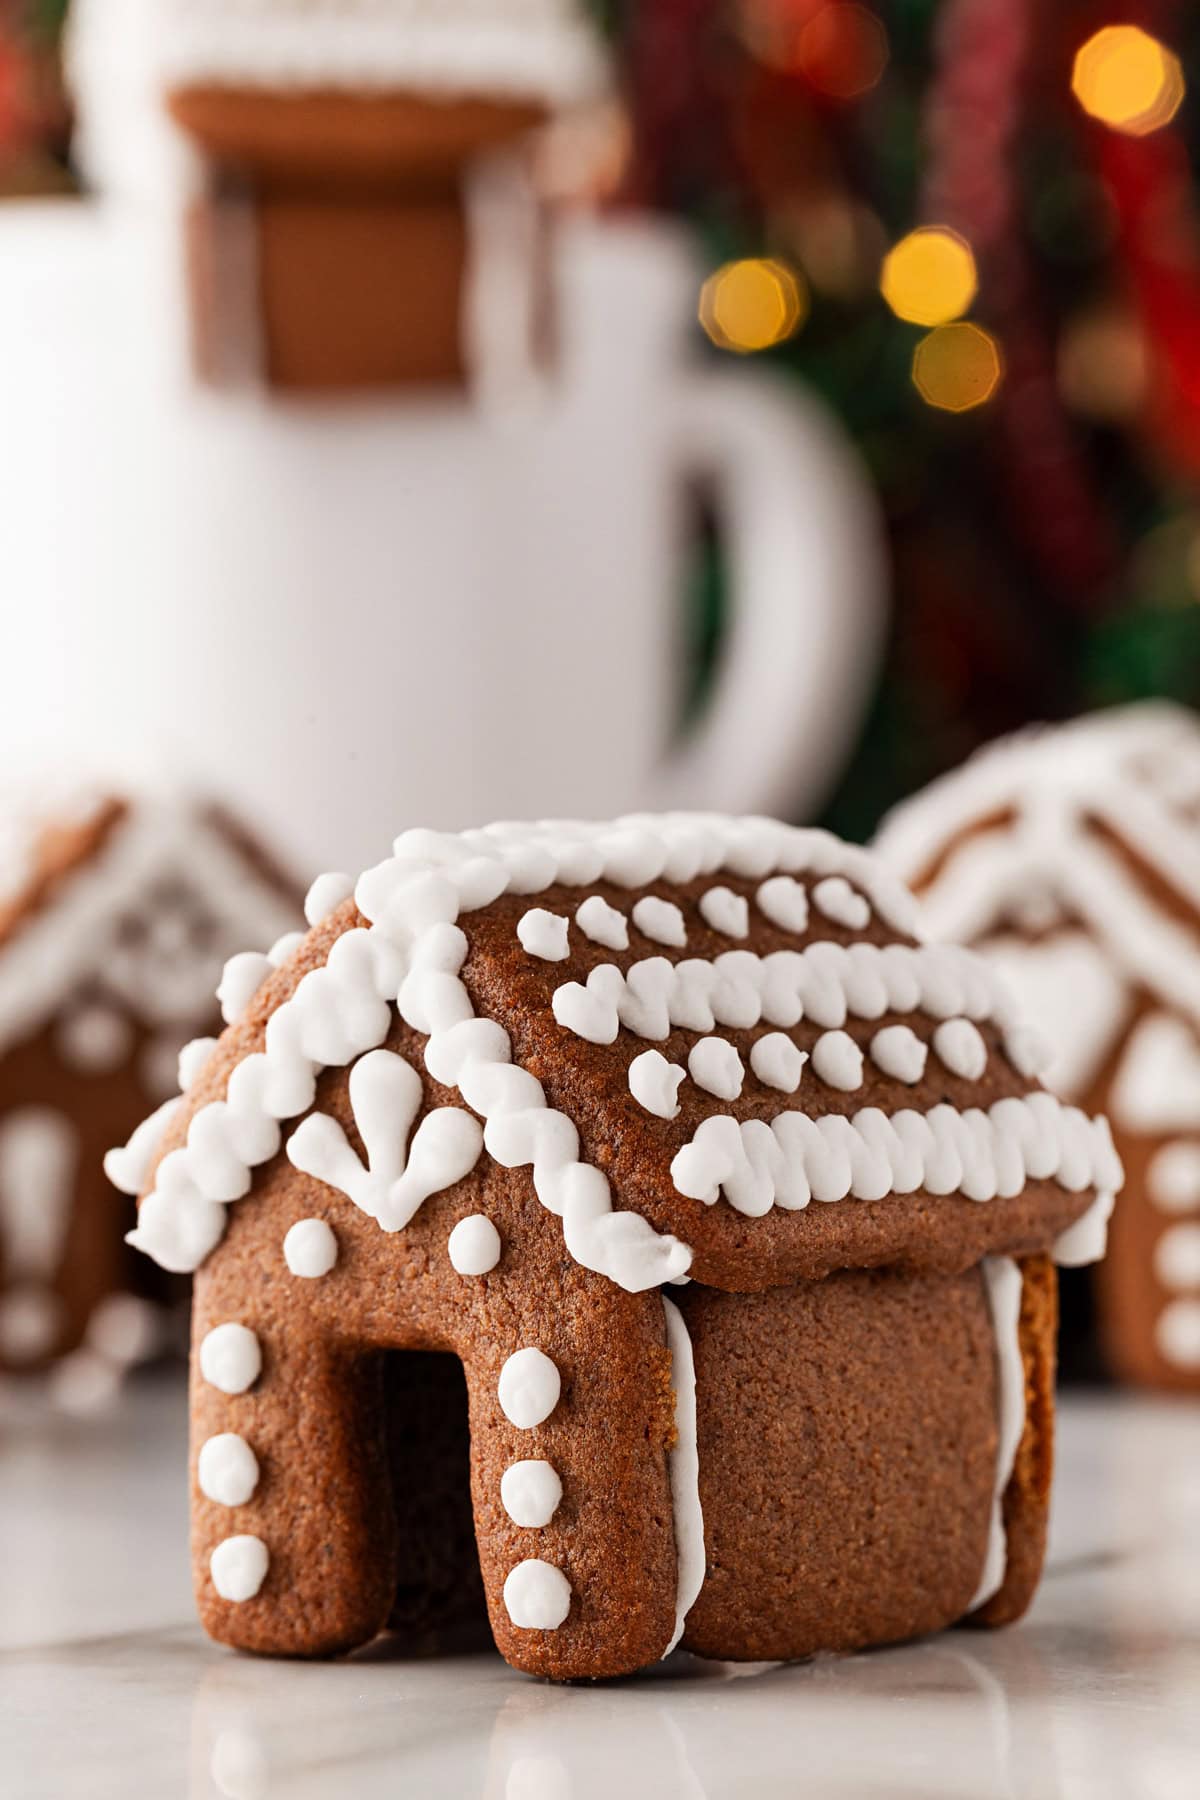
Add the roof:
Pipe a line of icing on the short ends of the large rectangles. Position the roof pieces so they meet at the peak. Pipe a final line of icing down the center seam to seal.
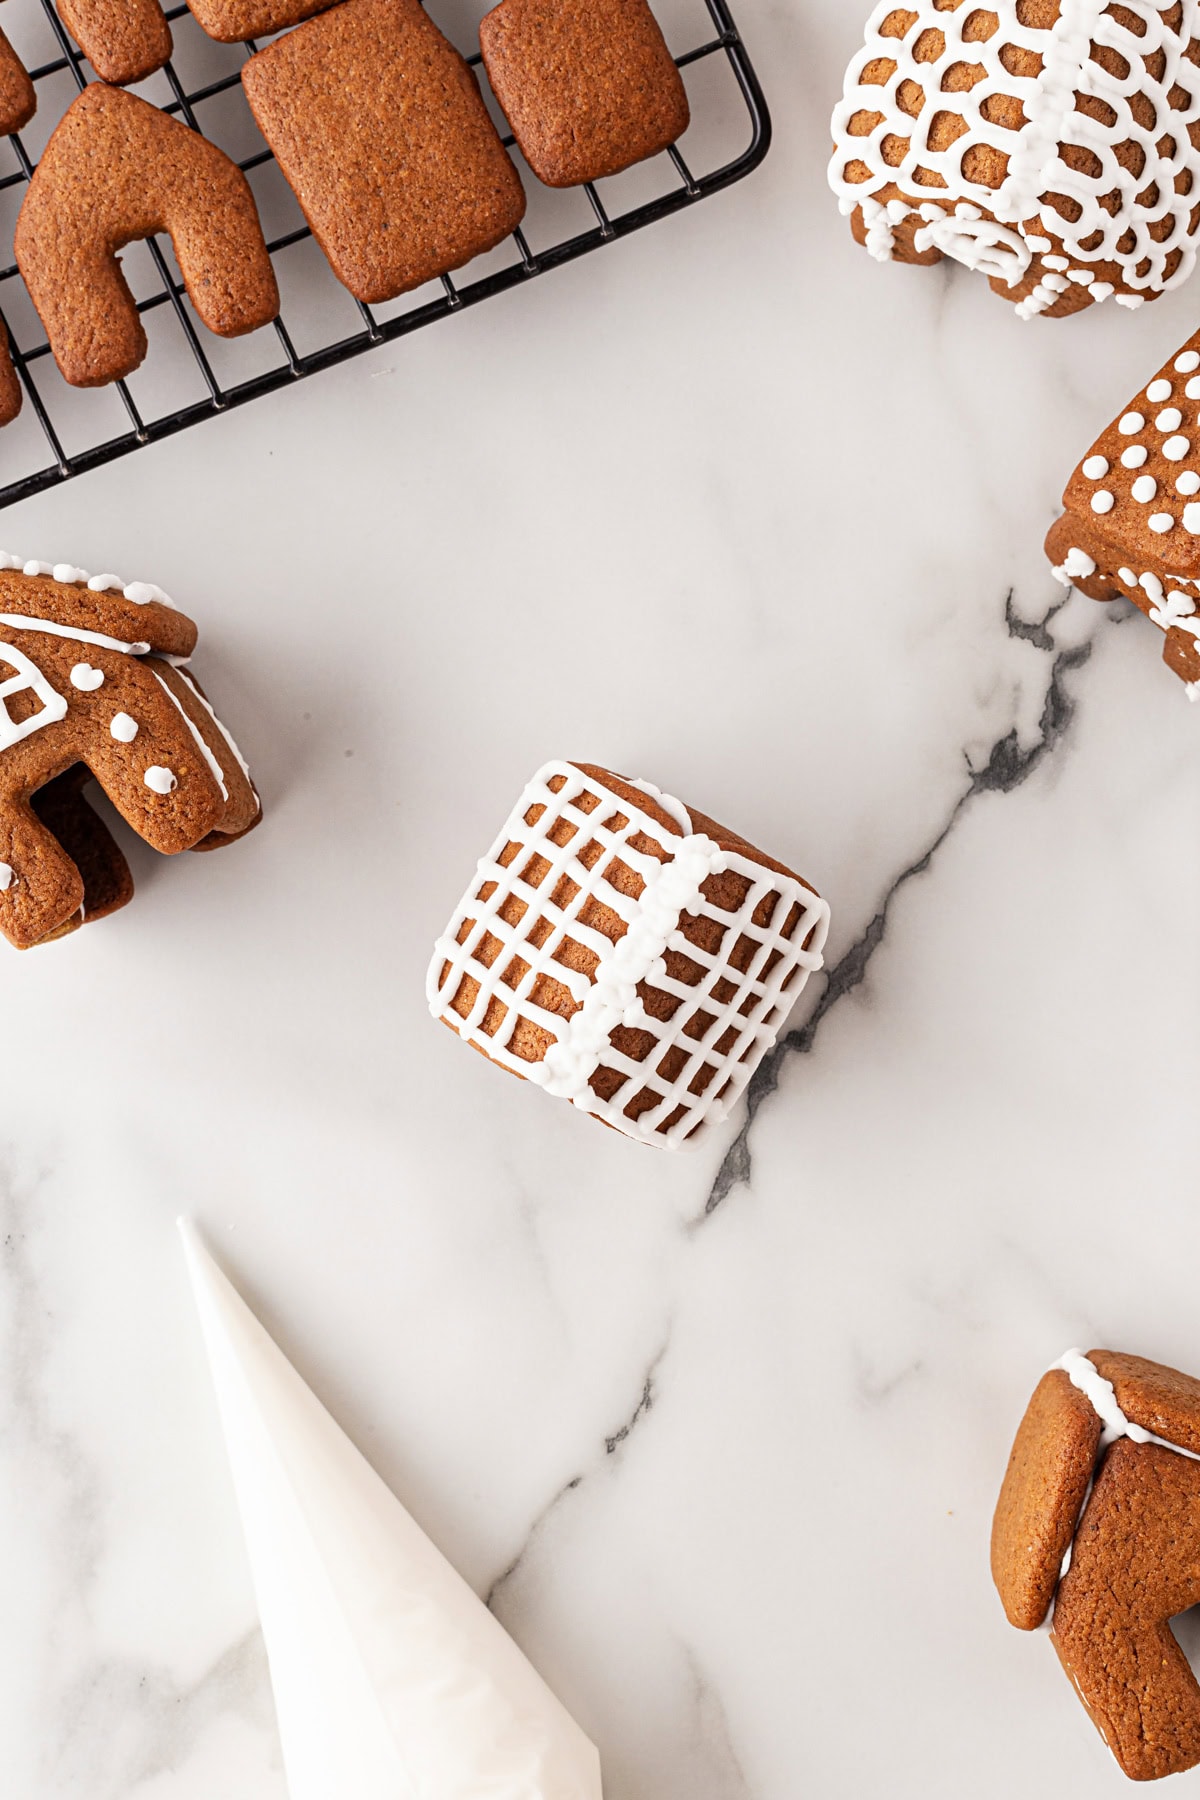
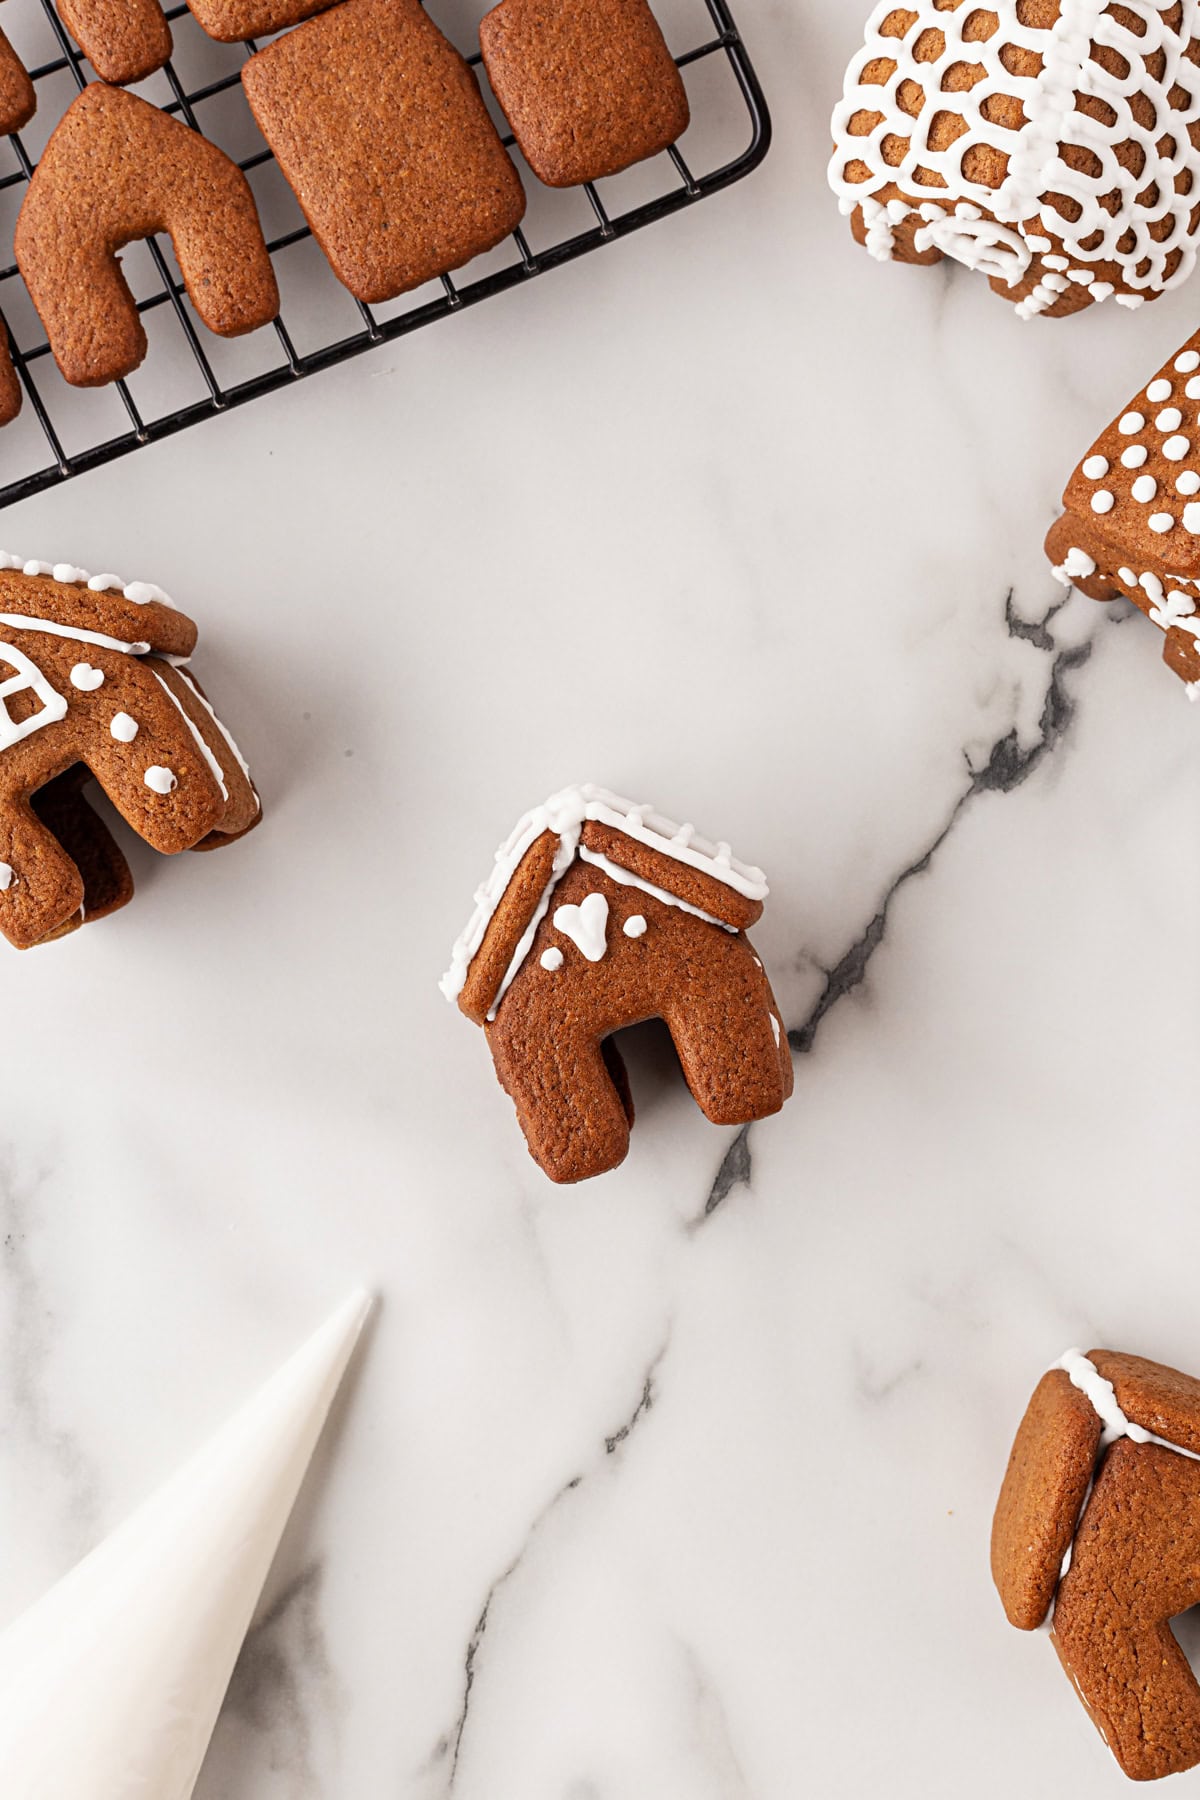
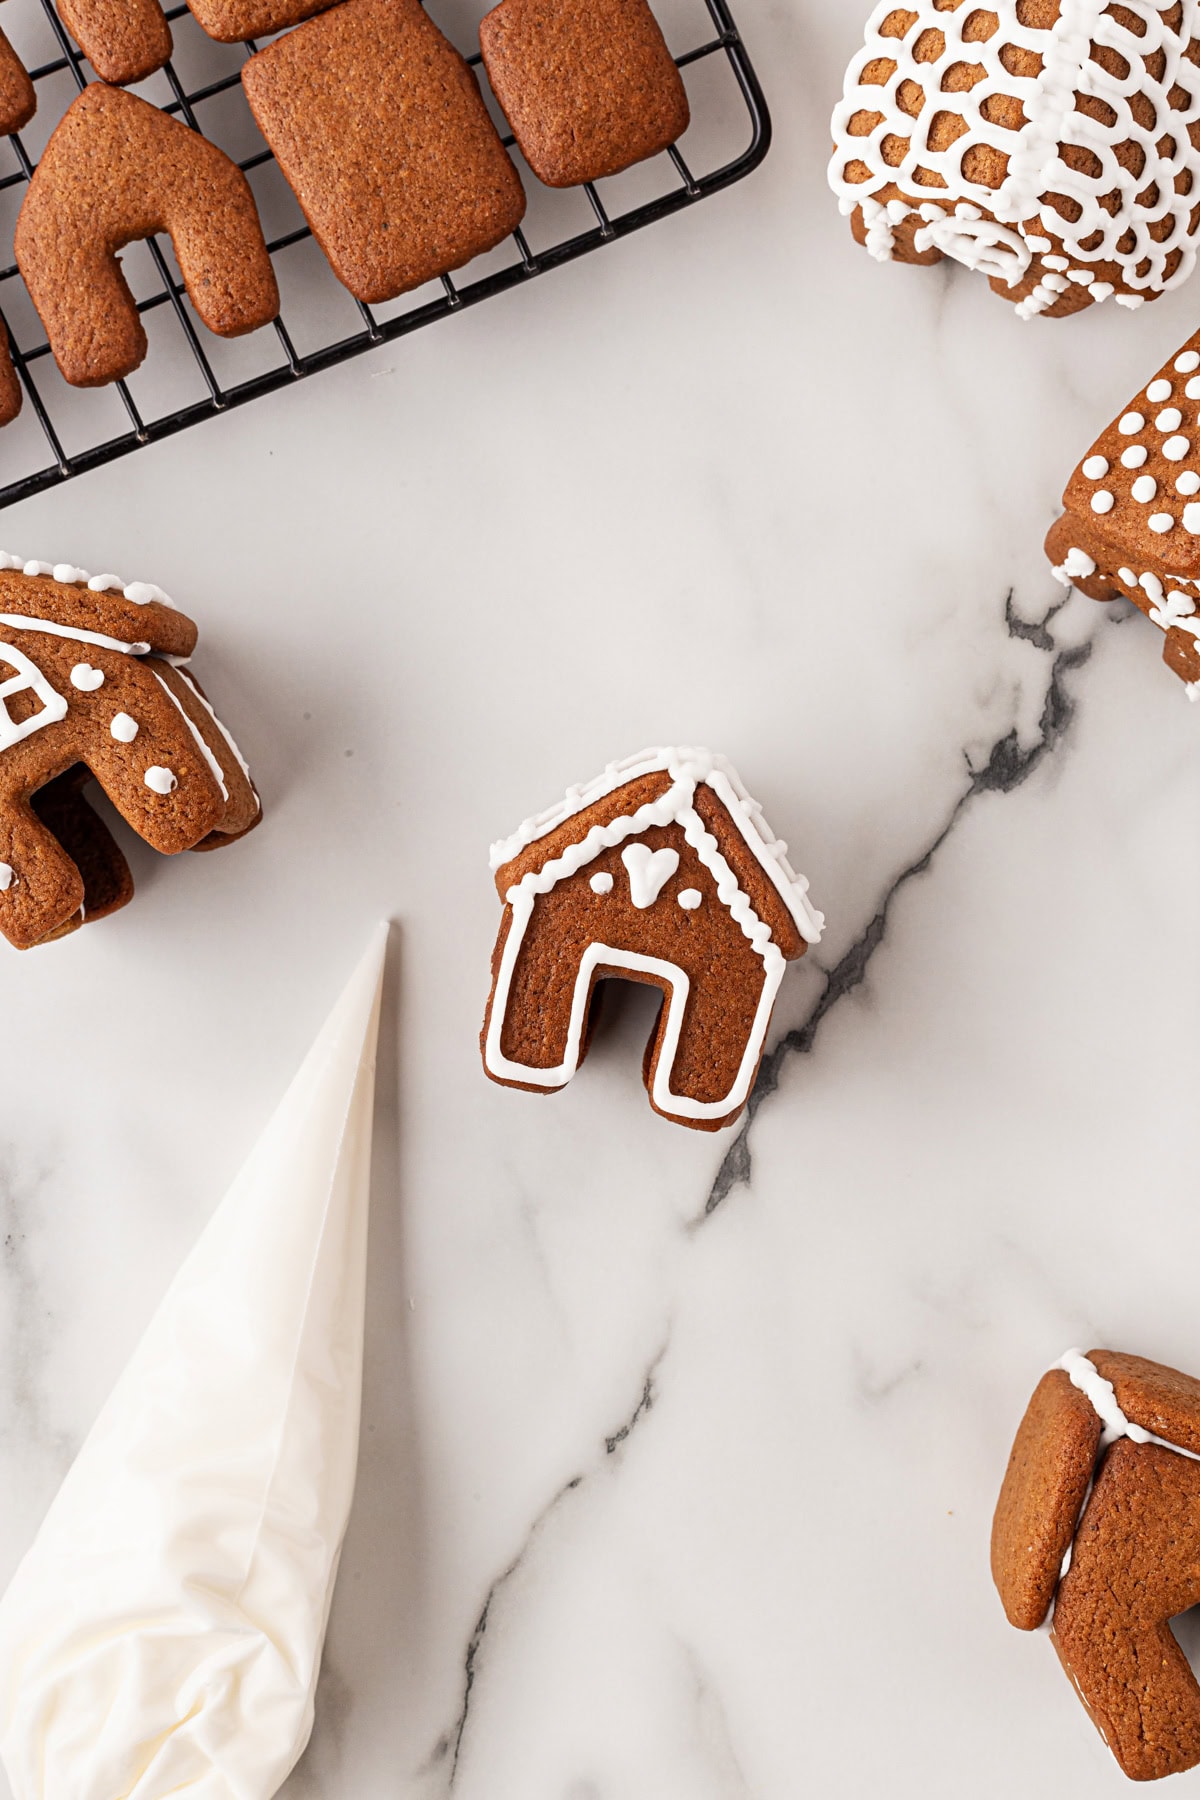

Decorate:
Once assembled, have fun decorating with the remaining royal icing: pipe lines, dots, or shapes to make each house unique. Here are some variations that we did for decorating.


What can Mini Gingerbread Houses be used for?
- They can be used for cake decorations
- Table decorations
- As a mug hugger
- Gift with hot chocolate
- Mini holiday village

Recipe Pro Tips

Gingerbread House Tips
Assembly & decorating took on average 5-7 min for each gingerbread house.
It’s best to let the houses dry overnight so the royal icing fully cures, but if you’re short on time, a few hours of drying will usually do the trick.
Can You Freeze Mini Gingerbread Houses?
Yes, as long as you keep them in an air-tight container. You can freeze them assembled and decorated, or prior to decorations, and in flat pieces. Freeze up to 3 months.

DO YOU WANT MORE CHRISTMAS TREATS?
Here are some of our favorite holiday treats to make for yourself, friends, company and more.


Mini Gingerbread Houses
Video
Ingredients
Gingerbread Dough
- 2 1/4 cups flour
- 1/2 cup sugar
- 1/2 cup butter softened
- 1/2 cup molasses
- 1 egg
- 1 1/2 tsp. ground cinnamon
- 1 tsp. baking powder
- 1 tsp. ground ginger
- 1/2 tsp. ground cloves
- 1/2 tsp. grated or ground nutmeg
- 1/2 tsp. baking soda
- 1/2 tsp. salt
Royal Icing
Yields approx: 1 cup
- 1 large egg white
- 1 ½-2 cups powdered sugar adjust for desired thickness
- ¼ tsp cream of tartar
- ½ tsp vanilla extract optional
Instructions
- In a large bowl of a stand-up mixer with a paddle attachment, add all the ingredients and mix well together (I know that is weird, but it works just fine, everyone in the pool!!).
- Transfer dough to plastic wrap and place in the refrigerator for at least one hour.
- Preheat oven to 350F. Grease cookie sheets and set them aside. On a lightly floured surface and working with half the dough, roll out to 1/4" thick. With floured cookie cutters, cut out gingerbread house pieces (2 each to make a complete house) and lay carefully onto the prepared sheets.
- Reform dough into a ball and continue to roll out and cut out gingerbread house pieces.
- Bake 8 min. until lightly browned. Remove from pan and transfer to a cooling rack. Cool completely before assembling – approximately 20 min.
- While the cookies are cooling, make the royal icing.
Assembling the Gingerbread Mug Huggers
- Once the cookies have completely cooled, it’s time to assemble the houses. You’ll need 2 house-shaped pieces, 2 small rectangles (for the sides), and 2 large rectangles (for the roof).
Build the base:
- Place one house piece flat on your work surface. Pipe two lines of royal icing on the bottom half, opposite each other. Attach the two small rectangles (short sides) to the icing, forming the side walls. Hold gently for a few seconds until the icing begins to set.
Attach the back wall:
- Pipe two lines of icing on the second house piece, again opposite each other on the bottom half. Carefully press it onto the open ends of the side walls to complete the base. Hold for a few seconds, then gently flip the house upright.
Add the roof:
- Pipe a line of icing on the short ends of the large rectangles. Position the roof pieces so they meet at the peak. Pipe a final line of icing down the center seam to seal.
Decorate:
- Once assembled, have fun decorating with the remaining royal icing: pipe lines, dots, or shapes to make each house unique.
- **It’s best to let the houses dry overnight so the royal icing fully hardens, but if you’re short on time, a few hours of drying should work in a pinch.
Royal Icing
- Combine egg white + cream of tartar in a clean, grease-free bowl.
- Beat with a hand mixer on medium until foamy, 1-2 minutes.
- Add powdered sugar, ½ cup at a time, mixing on low speed until fully incorporated.
- Once all the sugar is in, beat on medium-high until the icing is thick, glossy, and holds stiff peaks, about 4–6 minutes.
- Transfer to a frosting bag (you don’t need a tip). When ready to use, cut a very small piece off the tip of the bag, like the size of the tip of a pencil as you want to be able to “write” with it.


Let us know what you think!
We’d love to know what you and your family think! Make sure to leave a review below and follow us on your favorite social network!