Even if you’re new to canning, this step-by-step guide to Canning Applesauce at home is all you need to enjoy delicious homemade applesauce all year round! Not only does canning your own applesauce save money (and wasteful packaging!), but it also tastes incredible. Find some good quality apples, and let’s get started!
Looking for more recipes to can at home? Try our recipe for Canning Pears or Sweet and Spicy Canned Corn Relish and our Simple Easy Homemade Canned Tomatoes.

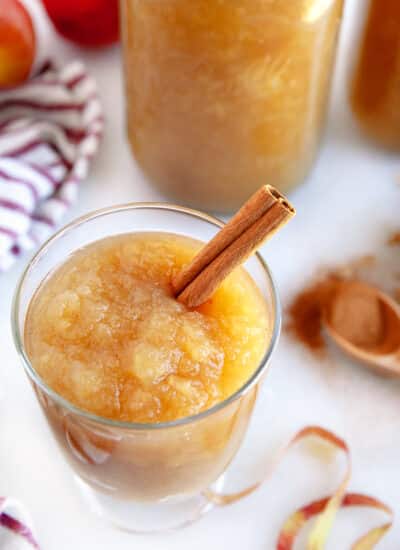
Canning Applesauce every year is a tradition that my mother and grandmother passed on to me. And every winter, when I pull out a jar to enjoy a warm bowl of applesauce and cinnamon, I’m so grateful they shared their knowledge and skills with me. Homemade applesauce truly is one of life’s great simple pleasures!
Helpful Items For This Recipe
This post contains affiliate links. As an Amazon Associate, I earn a small portion from qualifying purchases at no extra charge to you.
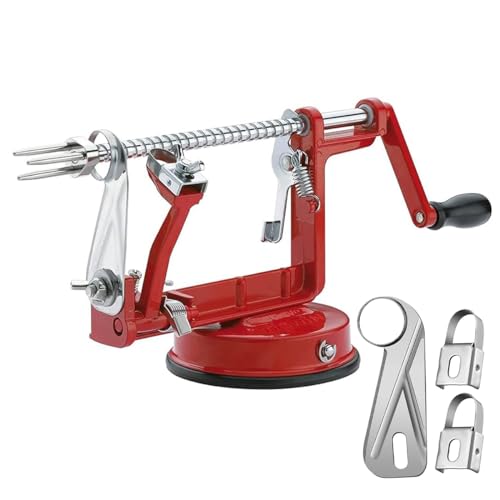
Apple Peeler Slicer Corer with Stainless Steel Blades
Stainless Steel Canning Tools – Canning Set/Pickling kit for Beginners
Water Bath Canner with Glass Lid, Induction Capable, 21.5Qt, Stainless Steel

What is In Homemade Applesauce?

The best applesauce is the simplest applesauce! To make this homemade applesauce, you only need one ingredient (plus salt) and a couple of optional ingredients:
Ingredients
Apples – This is the only ingredient you actually need to make applesauce. See the note below on choosing the right apples.
Cinnamon (optional) – I love the flavor of cinnamon in my applesauce, but you can leave it out. I use cinnamon sticks while cooking the sauce, plus a little bit of ground cinnamon to taste before I add the cooked sauce into the jars.
Sugar (optional) – If you have really good apples, you don’t need to add any sugar at all. Likewise, if your apples aren’t the best, adding a little sugar can make a world of difference to the flavor of the applesauce.

Tips for Choosing the Best Apples for Applesauce
For the most flavorful applesauce, it’s important to pick the right apples. Here are a few helpful tips when choosing apples:
Choose Fresh Apples – Freshly picked apples are the best, but that’s not always possible. So, when buying apples, buy a few to taste first. Make sure they are crunchy and juicy, not mealy and bland. Look for the freshest apples you can find.
Use More Than One Type of Apple – When you’re making applesauce, having a mixture of flavors ensures a delicious sauce. I like to use at least two, if not three, apple varieties for the best flavor.
Best Apple Varieties – Not all apples work for applesauce (I’m looking at you, Red Delicious). Good sweet and tart apple choices are Gala, Golden Delicious, Granny Smith, Honey Crisp, Pink Lady, Winesap, and Fuji.
How To Make Applesauce for Canning
If you are canning applesauce, first sterilize your jar lids and jars. I like to do this by putting the jars through the sanitizing cycle in the dishwasher. The jars need to stay hot during canning to prevent cracking, so leave them in the dishwasher on “heated dry” while you prepare the applesauce. I have also placed them in the oven at about 250F. while I work on the sauce.
To sterilize the lids, place them into a shallow pan of simmering water for 5 minutes and then remove them.

To begin making the applesauce, fill a large bowl halfway with cool water. Add a generous teaspoon of salt.
Peel, core, and slice your apples into thin chunks. Using an apple peeler (as pictured above) can speed up this process, but you can do it with just a paring knife too. As you slice each peeled apple, remove any brown spots, and then immediately add the cut slices into the bowl of salt water – this will prevent browning while you prepare the apples.

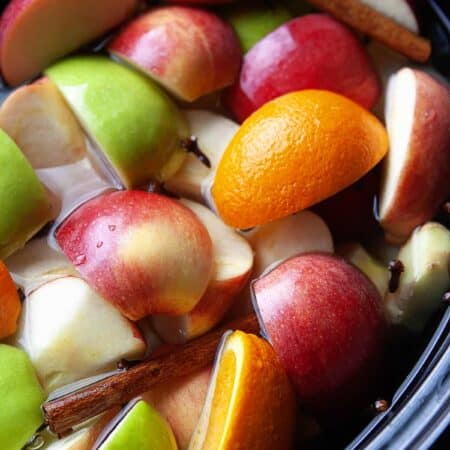
Once all of your apples are prepared, drain off all of the salt water. Add 1 inch of water to the bottom of a heavy-bottomed large pot. Add the apples (and cinnamon sticks if using) and bring to a boil over high heat. Reduce the heat to medium-high, maintaining a good boil. Stir occasionally to prevent sticking, and cook until the apples are very tender. If they are sliced thin, as pictured here, this will take about 35 minutes.

If you used cinnamon sticks, remove them now. Using a submersion blender or food processor, pulse the sauce until desired consistency. You can also run the apples through a food mill. I like mine a little chunky, but if you want a perfectly smooth applesauce (I liked it smooth when I had babies and toddlers), you can run it through a food mill.
Taste the applesauce at this point (carefully because it’s hot) and adjust the cinnamon and/or add sugar if needed (start with 2 or 3 tablespoons of brown sugar, then adjust as needed). Do not let the sauce cool before moving on to the next steps!
Prepare a hot water bath for canning. Insert the rack into the canner and fill halfway with water. Turn on high heat.
Heat a separate kettle of water or prepare to heat water in the microwave.

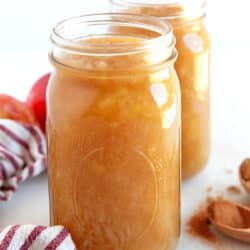
While the water bath is heating up, fill your warm, sterilized jars and ladle in hot applesauce, leaving 1/2 inch headroom at the top of the jar. If you are using wide-mouth jars, you can do this with a ladle. If you have skinnier jars, you may want to use a jar funnel.
After the jars are filled, take a clean, damp cloth and wipe off the rims of the jars so they aren’t sticky. Look for air bubbles and bang the jar carefully or use a chopstick to remove the bubble. Secure lids and use a jar lifter to lower them into your canner.

Place the jars about 1 inch apart, and then pour enough hot water around the jars to bring the level to 2 inches above the top of every jar.
How long do you can applesauce in a water bath?
Processing time in a boiling hot water bath (212 degrees Fahrenheit) is 20 minutes, or a specific time determined by your altitude (see this helpful chart). Then, using the jar lifter, carefully remove the jars and place them on a dry towel.
As the jars cool, you will hear the lids pop to let you know they have been sealed. Label with date and store in a cool, dark, dry place.

Recipe Pro Tips!
Favorite Ways to Enjoy Applesauce
Babies love applesauce, but so do adults. Here are a few ways we love to enjoy applesauce.
- With a spoon right out of the jar!
- On vanilla or salted caramel ice cream.
- With your favorite pork chop or chicken meal.
- Including it in baked goods such as muffins to give a healthy, moist touch.
- Try freezing some and eating it like a granita. Adding a little lemon juice to this wakens up the apples.
- Perfect topping for a hot bowl of oatmeal, porridge, or cream of wheat in the fall and winter.
- Place a scoop on your favorite yogurt; maple syrup or honey yogurt is amazing with apple sauce.
- Potato latkes are famous to top with apple sauce, but also pancakes and waffles work too.

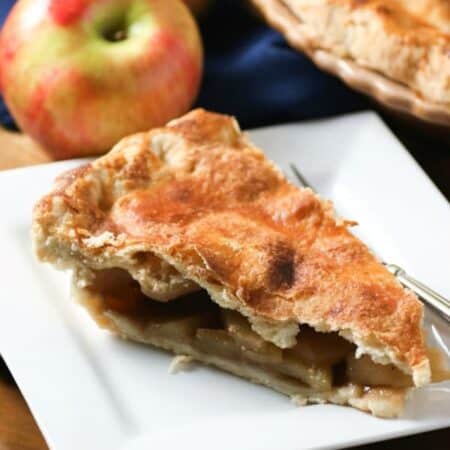
WANT MORE RECIPES TO ENJOY APPLES?
Apples are such a fun late summer-fall treat. You can get apples all year round, but when they are local and fresh, they are even better.


Canning Applesauce – Homemade
Ingredients
- 12 pounds of apples like Golden Delicious, Gala, Honey Crisp
- 1 teaspoon salt
- 2 to 4 cinnamon sticks optional
- ground cinnamon to taste optional
- brown sugar to taste optional
Instructions
- Sterilize your lids and jars. I like to do this by putting the jars through the sanitize cycle in the dishwasher. The jars need to stay hot during canning to prevent cracking, so leave them in the dishwasher on “heated dry” while you prepare the applesauce. To sterilize the lids, place them into a shallow pan of simmering water for 5 minutes and then remove.
- Fill a large bowl halfway with cool water. Add a generous teaspoon of salt.
- Peel, core, and slice your apples into thin chunks. Using an apple peeler (as pictured above) can speed up this process, but you can do it with just a paring knife too. As you slice each peeled apple, remove any brown spots, and then immediately add the cut slices into the bowl of salt water – this will prevent browning while you prepare the apples.
- Once all of your apples are prepared, drain off all of the salt water. Add 1 inch of water to the bottom of a large, heavy-bottomed pot. Add the apples (and cinnamon sticks if using) and bring to a boil over medium-high heat. Reduce the heat to medium, maintaining a good boil. Stir occasionally to prevent sticking, and cook until the apples are very tender. If they are sliced thin, this will take about 35 minutes.
- If you used cinnamon sticks, remove them now. Using a submersion blender, pulse the sauce until it is your desired consistency. I like mine a little chunky, but if you want a perfectly smooth applesauce, you can run it through a food mill. Taste the applesauce at this point (carefully because it’s hot) and adjust the cinnamon and/or add sugar if needed (start with 2 or 3 tablespoons of brown sugar, then adjust as needed). Do not let the sauce cool before moving on to the next steps!
- Prepare a hot water bath for canning. Insert the rack into the canner and fill halfway with water. Turn on high heat.
- Heat a separate kettle of water or prepare to heat 3 to 4 cups of water in the microwave.
- While the water bath is heating up, fill your warm, sterilized jars with applesauce, leaving 1/2 inch headroom at the top of the jar. If you are using wide-mouth jars, you can do this with a ladle. If you have skinnier jars, you may want to use a jar funnel. After the jars are filled, take a clean, damp cloth and wipe off the tops of the jars so they aren’t sticky. Look for air bubbles and bang the jar carefully or use a chopstick to remove the bubble. Secure lids and use a jar lifter to lower them into your canner.
- Place the jars about 1 inch apart, and then pour enough hot water around the jars to bring the level to 2 inches above the top of every jar.
- Process in the boiling hot water bath (212 degrees Fahrenheit) for 20 minutes or a specific time determined by your altitude (see this helpful chart). Then, using the jar lifter, carefully remove the jars and place them on a dry towel. As the cans cool, you will hear the lids pop to let you know they have been sealed. Label with date and store in a cool, dry place.


Let us know what you think!
We’d love to know what you and your family think! Make sure to leave a review below and follow us on your favorite social network!