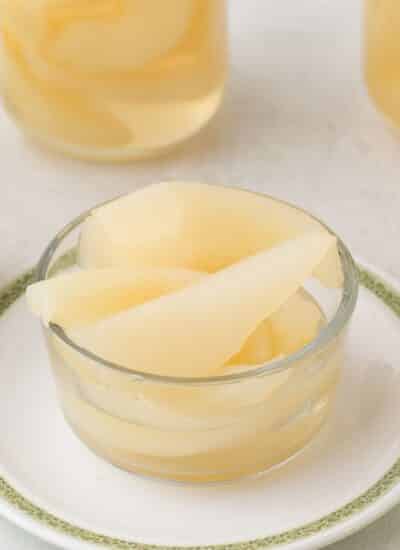
One of my favorite things growing up was Canning Pears with my mom and grandma. Our new home when I was a child was built on an old pear orchard, so we had lots at our disposal. I loved the sweet cinnamon flavor of the canned pears to enjoy year-round.
If you love pear recipes, then try our Red Wine Poached Pears, too.

Pears do not need to be pressure canned and will turn mushy with this process. Because they are a very soft fruit, it is best to use pears that aren’t fully ripened to can and to use a water bath canning method.
Helpful Items For This Recipe
This post contains affiliate links. As an Amazon Associate, I earn a small portion from qualifying purchases at no extra charge to you.
Ball Wide Mouth Pint 16-ounce Glass Mason Jar with Lids and Bands, 12-count
Canning Pot with Rack and full Set + ½ Pint ladle Measuring Cups – Supplies Kit
Dissolvable Canning Labels for Jars – 200 Kraft Dissolvable Mason Jar Labels

What are the Ingredients you need for Canning Pears?

You only need 4 ingredients plus water to can pears. But you also need water bath canning equipment. Once you have invested in that, then you always have it; I have offered Amazon links above.
Ingredients
Ripe pears – Make sure the pears are just turning ripe; over-ripe or ripe pears will be mushy when canned. You can use any variety of ripe pears you prefer.
Water – You need water to make the syrup. Good tap water is fine.
Granulated sugar – Can I reduce the amount of sugar in the syrup? You can adjust the amount of sugar to your taste, but keep in mind that sugar helps preserve the pears and maintain their texture. You can also substitute honey or other sweeteners for granulated sugar, but be sure to adjust the amount according to taste and consider the impact on preserving the pears.
Cinnamon sticks – You can customize the syrup by adding spices like cloves or nutmeg or flavorings like vanilla extract to suit your taste preferences. I use cinnamon as that was all we used when I was growing up, and I loved them.
Lemon juice (for acidity) – Lemon juice keeps the pears from browning when canned and also gives the pears a bit of acidity during water bath canning.

How to Can Pears


Mix 1 tablespoon of lemon juice with 4 cups of water in a large bowl.
Wash, peel, and core the pears. Cut them into slices or quarters, removing any bruised or damaged parts. Place them in the lemon water to prevent browning.
In a large pot, combine the remaining 4 cups of water, sugar, and cinnamon sticks. Bring the mixture to a boil, stirring until the sugar is dissolved.
Add the pear slices to the boiling syrup. Reduce the heat to a simmer and cook the pears for about 5-7 minutes, or until they are slightly tender but still firm.
Prepping The Jars


While the pears are cooking, prepare your canning jars and lids according to standard canning procedures. I like to wash the jars, lids, and bands in the dishwasher ahead of time. I then simmer the jars for a few minutes in the canner in water and then keep hot in the oven at 200F.
Add lemon juice to each hot jar to ensure proper acidity for safe canning (about 1 tablespoon per pint jar).
Once the pears are cooked, remove them from the syrup using a slotted spoon and pack them into the hot sterilized jars, leaving about 1/2 inch of headspace.
Remove the cinnamon sticks from the syrup and discard them. Bring the syrup back to a boil and let it simmer uncovered for an additional 5 minutes. (If you like your pears very cinnamon-flavored you can leave a small piece of cinnamon per jar).
Pour the hot syrup over the pears in the jars, leaving 1/2 inch of headspace. Use a clean, non-metallic utensil to remove air bubbles and adjust the headspace if necessary.
Wipe the jar rims with a clean, damp cloth or paper towel to remove any syrup or residue. Place the lids on the jars and screw on the bands until fingertip tight only.
Canning the Pears

Process the jars by placing them on a rack inside a pot large enough to cover the tops of all jars with boiling water. Process for 20 minutes, adjusting for altitude if necessary.
After processing, carefully remove the jars from the water bath and let them cool completely on a towel-lined countertop.
Once cooled, check the seals, ensure the top jar button is depressed, and label the jars with the date. Store them in a cool, dark place for up to one year. You will hear the jars pop as they are cooling and sealing.
Here is a helpful free chart for altitude canning; just click on the banner below.


Recipe Pro Tips!
Can I reuse jars and lids for canning?
While jars and rims can be reused if they are in good condition with no chips or cracks, lids should always be used once to ensure a proper seal.
Can I add additional fruits or ingredients to the jars along with the pears?
Yes, you can add other fruits, like apples or berries, or even spices, like ginger or cardamom, to create unique flavor combinations.
How do I know if the canned pears are properly sealed?
You should hear a popping sound as the jars cool, indicating that they have sealed properly. Additionally, the lid should be concave and not give when pressed.
Can I leave the peels on the pears when canning?
I don’t recommend this as the skin can be tough and off-putting and can also discolor the liquid.
Can I use the syrup for other recipes?
Yes, you can use the syrup for other canning recipes or as a sweetener in other dishes.

DO YOU LOVE CANNING AND WANT MORE?
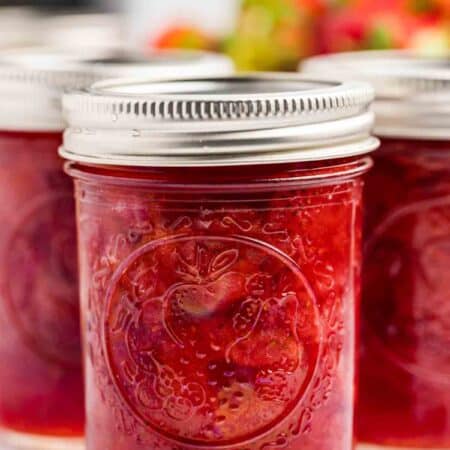
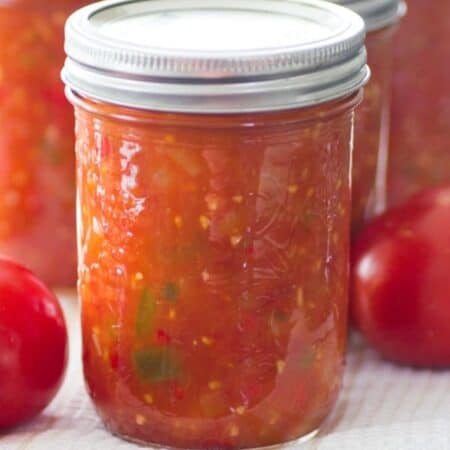
We do a lot of canning, from jams to fruit, tomatoes, salsa, and more. Check out our large selection of recipes under canning.


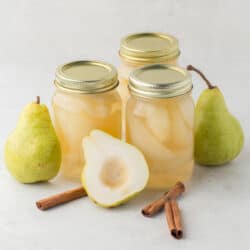
Canning Pears
Ingredients
- 3 pounds ripe pears
- 8 cups water
- 2 cups granulated sugar
- 2 cinnamon sticks
- 5 tablespoons Lemon juice for acidity
Instructions
How to Can Pears
- Mix 1 tablespoon of lemon juice with 4 cups of water in a large bowl.
- Wash, peel, and core the pears. Cut them into slices or quarters, removing any bruised or damaged parts. Place them in the lemon water to prevent browning.
- In a large pot, combine the remaining 4 cups of water, sugar, and cinnamon sticks. Bring the mixture to a boil, stirring until the sugar is dissolved.
- Add the pear slices to the boiling syrup. Reduce the heat to a simmer and cook the pears for about 5-7 minutes, or until they are slightly tender but still firm.
Prepping The Jars
- While the pears are cooking, prepare your canning jars and lids according to standard canning procedures. I like to wash the jars, lids, and bands in the dishwasher ahead of time. I then simmer the jars for a few minutes in the canner in water and then keep hot in the oven at 200F.
- Add lemon juice to each hot jar to ensure proper acidity for safe canning (about 1 tablespoon per pint jar).
- Once the pears are cooked, remove them from the syrup using a slotted spoon and pack them into the hot sterilized jars, leaving about 1/2 inch of headspace.
- Remove the cinnamon sticks from the syrup and discard them. Bring the syrup back to a boil and let it simmer uncovered for an additional 5 minutes. (If you like your pears very cinnamon-flavored you can leave a small piece of cinnamon per jar).
- Pour the hot syrup over the pears in the jars, leaving 1/2 inch of headspace. Use a clean, non-metallic utensil to remove air bubbles and adjust the headspace if necessary.
- Wipe the jar rims with a clean, damp cloth or paper towel to remove any syrup or residue. Place the lids on the jars and screw on the bands until fingertip tight only.
Canning the Pears
- Process the jars by placing them on a rack inside a pot large enough to cover the tops of all jars with boiling water. Process for 20 minutes, adjusting for altitude if necessary.
- After processing, carefully remove the jars from the water bath and let them cool completely on a towel-lined countertop.
- Once cooled, check the seals, ensure the top jar button is depressed, and label the jars with the date. Store them in a cool, dark place for up to one year. You will hear the jars pop as they are cooling and sealing.


Comments & Reviews
fall guys online says
I love pears. I often make pear juice. I will try your recipe tonight